Exploring Embedded Linux on Beaglebone Black
A walkthrough of Free Electron’s course material on embedded linux with BeagleBone Black
Note
This is a long post ported from my old asciidoc based website. There could be broken links or images as a result of the porting process.
This journal assumes you are comfortable with a linux environment as most of the published work here uses an Ubuntu distribution as the work station.
This journal was started in order to document my exploration of embedded linux using a popular low-cost platform i.e. the BeagleBone Black. The end objective is to become well versed with embedded linux development on an ARM based embedded device.
About The Linux Kernel
I’m doing a (free) operating system (just a hobby, won’t be big and professional like gnu) for 386(486) AT clones. This has been brewing since April and is starting to get ready. I’d like any feedback on things people like/dislike in minix, as my OS resembles it somewhat (same physical layout of the file-system (due to practical reasons) among other things).
— Linus Torvald: 25th August 1991
The Linux kernel started off as a hobby project and by a Finnish national Linus Torvalds. It is today the OS powering the largest number of computers on the planet. It is used in phones, tablets, laptops, netbooks, routers, desktops, servers, supercomputers, embedded devices, consumer electronics, etc.
The development of the Linux kernel is carried out by an army of dynamic open source developers, the majority of which comprise of hobbyists. Significant contribution to the kernel is now coming from companies using the kernel. The development is still spearheaded by Linus who is employed by the Linux Foundation.
About BeagleBoard
BeagleBoard.org Foundation is a non-profit corporation which promotes open source software and open hardware. It was started by enthusiasts from TI with the aim of providing a powerful platform to design embedded solutions. The BeagleBone Black is their fourth board till date which offers a lot of possibilities in a small credit card size form factor.
About Free Electrons
Free Electrons is an engineering company consisting of embedded linux experts who support companies using Embedded Linux. They additionally conduct training workshops for companies on different topics such as Linux kernel and device driver development, Android system development, Yocto Project and OpenEmbedded development, etc. This journal uses the Free Electrons training material which they publish online to explore Embedded Linux with the BeagleBone Black board from TI.
This section covers the setup software and hardware used in this journal. The sources of the training material and references are mentioned as well as details about how to procure the hardware.
Hardware
BeagleBone Black
The BeagleBone Black is the newest member in the BeagleBoard family. The board is designed to be a low sized small form factor board. The size of the board is comparable to the size of a credit card and it offers expansion headers to add headers called as capes similar to the Raspberry Pi.
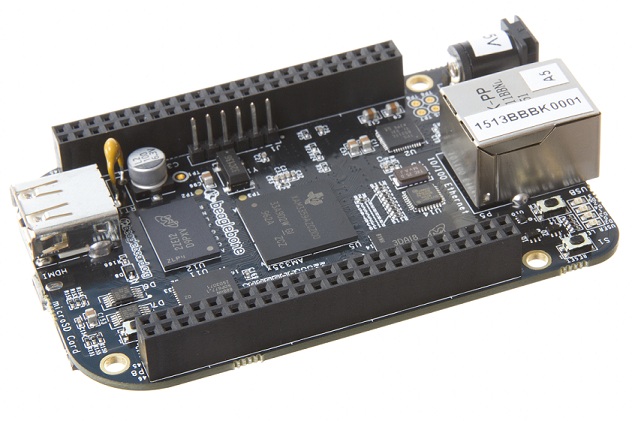
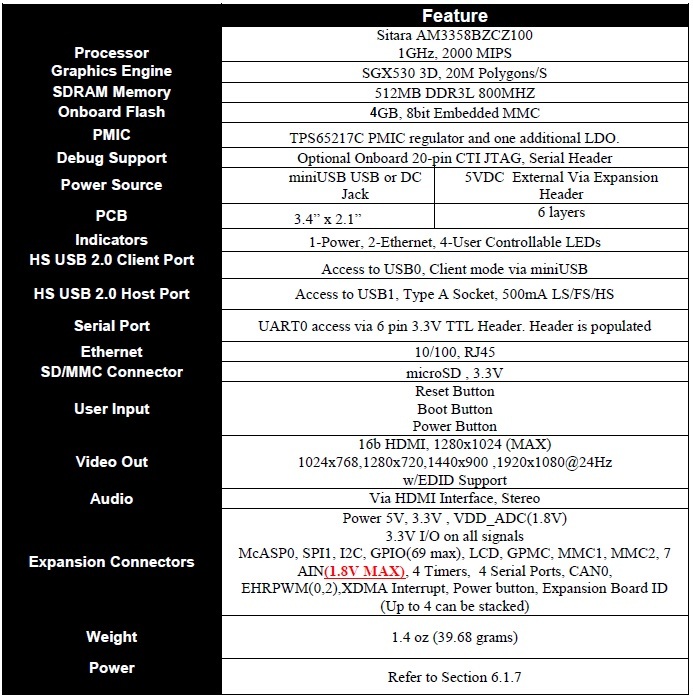
The table below highlights the key onboard components of the board along with the connectors available on the board. The diagram of the table below is taken from the BeagleBone Black System Reference Manual.
Software
Ubuntu
To work with an embedded system you need a work station on which you can perform the various tasks that are required in the development life cycle. These tasks include:
-
Editing your build scripts and source code
-
Cross-compiling your source code for the embedded target
-
Transferring or accessing the cross-compiled application and libraries to or from the embedded target
-
Collecting debug information from the target
-
Communicating with the target remotely using its interfaces like serial, USB, network, etc..
In this document we use the popular Debian based Linux operating system, Ubuntu as our work station for all the tasks listed above. Ubuntu can be easily downloaded and installed on any PC or laptop.
Important
This document uses Ubuntu 14.04 running on a HP laptop. Use of a similar environment through a virtual machine runnning on VMWare or Oracle VirtualBox is not recommended.
GIT
The source code management tool used by the Linux kernel community is GIT. To use GIT we need to install the packages required on our work station using the Advanced Packaging Tool(APT) using a command line terminal.
conrad@conrad-HP-Pavilion-dm3-Notebook-PC:~$ sudo apt-get install git gitk git-email
Once the packages are successfully installed we will need to configure GIT with some basic information about our name and email address
conrad@conrad-HP-Pavilion-dm3-Notebook-PC:~$ git config --global user.name Conrad Gomes
conrad@conrad-HP-Pavilion-dm3-Notebook-PC:~$ git config --global user.email conrad.s.j.gomes@gmail.com
Further infomation about GIT can be obtained at:
http://git-scm.com/.
Free Electrons Linux Kernel Data
Since we are going through the training material provided by Free
Electrons we’ll need to download their slides and lab data from their
website link:
http://free-electrons.com/training/kernel/
As Free Electrons continues to improve on their training material, this journal will be based on the version available at the time of its writing:
This section covers details about the Linux Kernel source code. We will go through the source code, its structure and characteristics.
Offical and Unofficial Kernel Sources
The official source of the Linux Kernel is available at:
https://www.kernel.org/
The sources present in this website do not represent the entire spectrum of features and development that is taking place. Since the kernel is logically divided into sub-systems, each sub-system is maintained by a designated individual who has been involved with the sub-system and is trusted by Linus. So when the merge window opens these individuals who are termed as "maintainers" send pull requests to Linus to take in the patches from their repositories for merging with the mainline kernel tree. In some cases if the subsystem is large it may be divided into smaller subsystems which are managed by individuals designated as "sub-maintainers".
The official development repository for some sub-systems are given below:
-
MTD
Website: http://www.linux-mtd.infradead.org/index.html
GIT: git://git.infradead.org/linux-mtd.git -
MIPS
Website: http://www.linux-mips.org/wiki/Main_Page
GIT: git://git.linux-mips.org/pub/scm/ralf/linux.git -
USB
Website: http://www.linux-usb.org/
GIT: git://git.kernel.org/pub/scm/linux/kernel/git/gregkh/patches.git
Cloning the Linux Tree With GIT
Now that GIT is present in the workstation we can get the main development tree of the Linux kernel as follows:
conrad@conrad-HP-Pavilion-dm3-Notebook-PC:~$ git clone git://git.kernel.org/pub/scm/linux/kernel/git/torvalds/linux.git
And if you’re in a corporarte environment or if your firewall blocks out the network port for git you can use http instead as follows:
conrad@conrad-HP-Pavilion-dm3-Notebook-PC:~$ git clone http://git.kernel.org/pub/scm/linux/kernel/git/torvalds/linux.git
The whole process should take a while so you can go for a small coffee break and come back. Comparitively using git is recommended as it is faster than http
If you happen to have a copy of the Linux GIT repository all you have to do is pull in the latest changes
conrad@conrad-HP-Pavilion-dm3-Notebook-PC:~$ cd ~/git/linux
conrad@conrad-HP-Pavilion-dm3-Notebook-PC:~/git/linux$ git checkout master
conrad@conrad-HP-Pavilion-dm3-Notebook-PC:~/git/linux$ git pull
Once you have the Linux GIT repository you can pull the latest changes by by running git pull.
Using Stable Releases
Typically when we are developing a project we reuse multiple projects to build our application on top of. Similarly since we will be learing about Embedded Linux we cannot use the tip of the tree as it is the latest but not the stablest version of the kernel.
With GIT we don’t have to clone the whole repository all over again. Instead we can add a reference to a remote tree to our existing clone and fetch all the commits which are unique in that repository. As the stable release is derived from the mainline tree we can add a remote to our repository as follows:
conrad@conrad-HP-Pavilion-dm3-Notebook-PC:~/git/linux$ git remote -v
origin  git://git.kernel.org/pub/scm/linux/kernel/git/torvalds/linux.git (fetch)
origin  git://git.kernel.org/pub/scm/linux/kernel/git/torvalds/linux.git (push)
conrad@conrad-HP-Pavilion-dm3-Notebook-PC:~/git/linux$ git remote add stable git://git.kernel.org/pub/scm/linux/kernel/git/stable/linux-stable.git
conrad@conrad-HP-Pavilion-dm3-Notebook-PC:~/git/linux$ git remote -v
origin  git://git.kernel.org/pub/scm/linux/kernel/git/torvalds/linux.git (fetch)
origin  git://git.kernel.org/pub/scm/linux/kernel/git/torvalds/linux.git (push)
stable  git://git.kernel.org/pub/scm/linux/kernel/git/stable/linux-stable.git (fetch)
stable  git://git.kernel.org/pub/scm/linux/kernel/git/stable/linux-stable.git (push)
-
git remote -v lists the remotes. By default the git repository from which the repository was cloned will be the main remote
-
git remote add adds a new remote with the name stable
-
git remote -v lists the new added remote
The last part is fetching the unique commits in the stable remote. This command should take a while.
conrad@conrad-HP-Pavilion-dm3-Notebook-PC:~/git/linux$ git fetch stable
Why Are The Sources So Big?
One of the reasons why cloning the kernel sources takes so long is that the Linux Kernel source code is BIG. This is because the Kernel source code contains many subsystems, frameworks, drivers, network protocols and supports many different processor architectures.
Size Comparison of Different Kernel Source Directories
If we check the disk usage per directory in the Linux Kernel source code we get the distribution below. We’ll go through the type of source code in each of those directories in a later section.
conrad@conrad-HP-Pavilion-dm3-Notebook-PC:~/git/linux$ du -s ./*/ | sort -nr
3084600 ./drivers/
723496  ./net/
589520  ./fs/
275636  ./arch/
260960  ./sound/
84020   ./kernel/
52264   ./security/
38628   ./include/
36340   ./crypto/
28968   ./Documentation/
27616   ./lib/
25984   ./mm/
17768   ./block/
8920    ./firmware/
8440    ./tools/
4356    ./scripts/
3760    ./ipc/
3720    ./init/
2596    ./virt/
248 ./samples/
92  ./usr/
Programming Language
The Linux Kernel is written primarily in C with a little assembly code too. The source code is written in a version of C supported by Gnu Compiler Collection or GCC. Therefore the Linux Kernel source can not be compiled with all C compilers.
The assembly code comprises of small sections of code and is basically the GCC’s "AT&T-style" syntax of target architecture which will run the kernel.
Even though the Linux Kernel has certain frameworks designed with Object Oriented Principles in mind it is not written in C. For further understanding on why C is still not used please see the following link: http://www.tux.org/lkml/#s15-3
And on a lighter note …
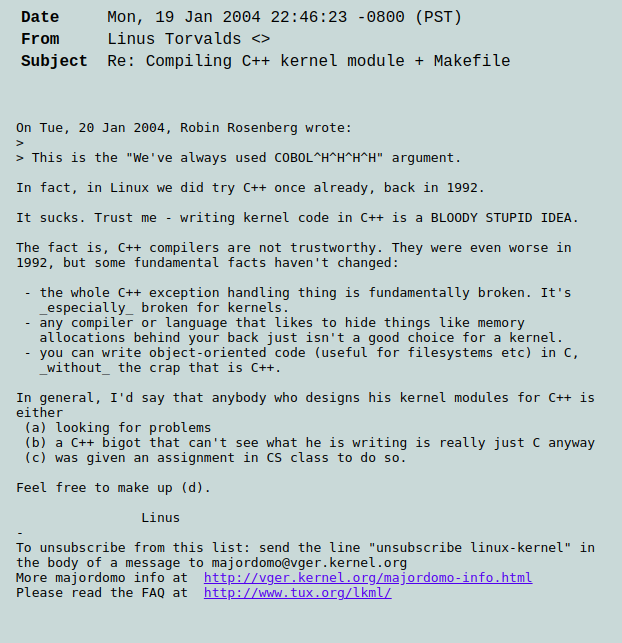
No C Library
The Linux Kernel is a single program which has its own routines to perform common functions. It does not use any user space library like stdlib, rather it has equivalent functions that enable it to achieve the same results.
In place of the standard C functions like printf(), memset(), malloc() there are functions like printk(), memset(),kmalloc() in the source code.
Portability
One of the Linux Kernel key features is portability and hardware support. It supports a wide variety of architectures and to achieve this the source code should be portable across architectures. The architecture specific code is all located in the arch/ directory. The remaining code in all the other directories has to be portable across all architectures.
To achieve portability there are hardware abstraction API for specific features:
-
Endianess
-
cpu_to_be32()
-
cpu_to_le32()
-
be32_to_cpu()
-
le32_to_cpu()
-
-
I/O Memory Access
-
Memory barriers
-
DMA API to flush and invalidate caches
Since the Linux Kernel is designed to run on any processor the use of floating point expressions is not allowed. As an example consider the most popular embedded architecture i.e. ARM, it does not have a floating point unit.
Linux Internal API
One of the main reasons for having drivers in-tree i.e. present along with the sources of the Linux Kernel is that the internal Linux API may be changed at any point in time and if a change is proposed and implemented the developer responsible for the API change will also have to take the ownership of changing all the modules and drivers which use the changed API. In the case of an out-of-tree driver the work will be owned by the driver owner and any time a change occurs the driver will not compile with the latest kernel source code.
Having said that the Linux Kernel external API i.e. kernel to userspace API like system calls, /proc, /sys does not change and is considered to protect the user space applications who depend on it.
Is It Free?
The Linux Kernel is licensed under GNU General Public License version 2. This license defines the Linux Kernel as Free Software as defined by the Free Software Foundation.
-
If you redistribute the software you have to do so under the same license irrespective of whether it is modified or unmodified.
-
If you make modifications to the Linux Kernel you have to release it under the same license.
-
You only have to do so when your device with the kernel start getting distributed
-
You only have to license it to your customers and not necessarily the whole world.
-
It is illegal to distribute a binary kernel with statically compiled proprietary drivers.
-
Proprietary drivers are frowned upon by the Linux Kernel community as it goes against the philosophy of the GPL license.
Advantages Of GPL Drivers
-
It is possible to reuse software from other GPL drivers to write a new GPL driver
-
A GPL driver has more contributors, testers, reviewers and maintainers thereby making it more robust.
-
Once the driver is accepted it is easily shipped and distributed by others who are using the Linux Kernel.
-
A pre-compiled driver will always have to catch up with the latest kernel devlopments leaving users of the driver at a loss as they can’t upgrade their kernel with ease in order to use the latest source with new features
-
Making a driver GPL compliant avoids any potential legal hastles
Advantages Of In-Tree Kernel Drivers
-
Acceptance of a driver into the mainline kernel is a step that must be done by developers who have developed a GPL compatible driver.
-
This allows the developer to release the ownership of maintaining the kernel driver to the community. This reduces the cost of maintainence.
-
The source of the kernel driver is easily accessible by anyone, as the kernel code is widely published.
User Space Device Drivers
It is possible to develop a user space device driver. There are several scenarios in which a user space device driver is developed:
-
The device driver does not depend on any of the frameworks exposed by the Linux Kernel.
-
The device driver is used by only one application and is not required by any other application.
-
The kernel provides a simple interface with which the user space device driver can control and read the hardware for which it is developed.
Examples Of User Space Device Drivers
Certain busses have interfaces exposed by the kernel which can be used to develop a user space device driver if the hardware is connected to that bus:
-
USB with libusb, http://www.libusb.org/
-
SPI wiht spidev, Documentation/spi/spidev
-
I2C with i2cdev, Documentation/i2c/dev-interface
-
Memory-mapped devices with UIO, including interrupt handling, http://free-electrons.com/kerneldoc/latest/DocBook/uio-howto/
On certain SOCs the vendor also provides a user space device driver along with a kernel driver which has access to other processors in the SOC which are running a firmware for highly specialized applications.
The Good And The Bad Of User Space Device Drivers
The Good
-
The driver can be written in any programming language or script.
-
The driver can be kept proprietary.
-
The driver runs in user space as an application or daemon.
-
The driver cannot bring down the kernel.
The Bad
-
Handling interrupts from the hardware is non-trivial resulting in some sort of polling mechanism.
-
The interrupt latency is larger when compared to a kernel device driver.
What’s In The Sources?
We’ll briefly go through each of the sources in the Linux Source Code and try to get an understanding of the overall structure of the source tree. Each directory is a placeholder for certain code, scripts and files which serve to make up the Linux Kernel project.
- arch/<ARCH>
-
Architecture specific code. All code that has anything to do with the processor the kernel is running on is present in this directory
-
arch/<ARCH>/mach-<machine>, machine/board specific code
-
arch/<ARCH>/include/asm, architecture-specific headers
-
arch/<ARCH>boot/dts, Device Tree source files for certain architecture
-
- block/
-
Code relate to block device drivers for hard disk drives and others
- COPYING
-
License of the Linux Kernel.
- CREDITS
-
Who Did what?
- crypto/
-
Cryptographic libraries
- Documentation/
-
Documentation for all things about the Linux Kernel
- drivers/
-
Device drivers except for sound which has its own directory below
- firmware/
-
Legacy: firmware images extracted from old drivers
- fs/
-
Source code for various filesystems (ext2/ubifs/etc..)
- include/
-
Kernel headers
- include/linux/
-
Linux Kernel core headers
- include/uapi/
-
User space API headers
- init/
-
Code related to the kernel initaliazation. Includes the main.c
- ipc/
-
Code responsible for allowing inter process communication
- Kbuild
-
Part of the build system
- Kconfig
-
Top level description file for configuration parameters
- kernel/
-
The core of the Linux Kernel
- lib/
-
Useful library routines (crc32…)
- MAINTAINERS
-
Maintainers of different subsystems of the kernel
- Makefile
-
Top level makefile
- mm/
-
Memory management code
- net/
-
Network support code
- README
-
Overview and building instructions. Read once atleast.
- REPORTING-BUGS
-
Procedure to report bugs with the Linux Kernel
- samples/
-
Sample code of usage of frameworks and kernel code
- scripts/
-
Useful scripts for internal or external use
- security/
-
Support for security features like SELinux
- sound/
-
Sound support code and drivers
- tools/
-
Code for various user space tools
- usr/
-
Code to generate an initramfs cpio archive file
- virt/
-
Virtualization support (KVM)
Browsing The Sources
One of the most common tasks required by any developer is the ability to browse a project and search for:
-
A specific symbol such as a function name or variable name
-
The calling function of a function
-
The function definition using a function call point
-
An include file in the project from its declaration in source code
-
A pattern of text
Cscope
One such tool is Cscope which allows us to browse the Linux source code with ease from editors like vim, emacs and also independently using only cscope.
LXR
This is a generic indexing tool and code browser which is available as a web service. It supports both C and C++ and it makes it easy to search for declarations, definitions and symbols. A good examples of LXR with the Linux Kernel in action is through the Free Electrons LXR Site and further information abouit LXR can be obtained from its sourceforge page.
LAB 1 : Getting Accustomed To Browsing The Sources
Note
Create a branch based on a remote tree to explore a particular stable kernel version (from the stable kernel tree).
Explore the sources in search for files, function headers or other kinds of information. . .
Browse the kernel sources with tools like cscope and LXR.
Creating A Branch To A Particular Stable Kernel Version
In order to get the list of branches on our stable remote tree we have to enter the Linux Kernel source tree and use the git branch command as follows:
conrad@conrad-HP-Pavilion-dm3-Notebook-PC:~$ cd ~/git/linux
conrad@conrad-HP-Pavilion-dm3-Notebook-PC:~/git/linux$ git branch -a
* master
  remotes/origin/HEAD -> origin/master
  remotes/origin/master
  remotes/stable/linux-2.6.11.y
  remotes/stable/linux-2.6.12.y
.
.
  remotes/stable/linux-3.9.y
  remotes/stable/master
-
Our source code is currently pointing to the master branch
-
Remote stable branch remotes/stable/linux-2.6.11.y
We will be working with the 3.13 stable branch and so we will use the remote branch remotes/stable/linux-3.13.y from the list of branches displayed.
Before we do anything let us check the version of our master branch using the top level Makefile in the source code. Using vim or your favourite editor or head examine the first few lines of the Makefile
conrad@conrad-HP-Pavilion-dm3-Notebook-PC:~/git/linux$ head Makefile
VERSION = 3
PATCHLEVEL = 18
SUBLEVEL = 0
EXTRAVERSION = -rc4
NAME = Diseased Newt
.
.
We can see the version of our master branch is at 3.18.0 -rc4 and the name of the release is "Diseased Newt". Now let us create a local branch starting from the stable remote branch of 3.13.y. The following command uses git checkout to checkout the stable remote branch stable/linux-3.13.y as a local branch with the name 3.13.y.
conrad@conrad-HP-Pavilion-dm3-Notebook-PC:~/git/linux$ git checkout -b 3.13.y stable/linux-3.13.y
Checking out files: 100% (27044/27044), done.
Branch 3.13.y set up to track remote branch linux-3.13.y from stable.
Switched to a new branch '3.13.y'
conrad@conrad-HP-Pavilion-dm3-Notebook-PC:~/git/linux$
conrad@conrad-HP-Pavilion-dm3-Notebook-PC:~/git/linux$ git branch -a
* 3.13.y
  master
  remotes/origin/HEAD -> origin/master
  remotes/origin/master
.
.
-
Command to checkout the stable remote branch as a local branch
-
The switch to the new branch takes place successfully
-
We list all the branches again
-
The git repository now points to the 3.13.y local branch
Once again let us examine the first few lines of the top level Makefile. We can now see the version is at 3.13.11 and the name of the release is "One Giant Leap for Frogkind". So we have successfully managed to create a branch pointing to a stable release of the Linux Kernel source code.
conrad@conrad-HP-Pavilion-dm3-Notebook-PC:~/git/linux$ head Makefile
VERSION = 3
PATCHLEVEL = 13
SUBLEVEL = 11
EXTRAVERSION =
NAME = One Giant Leap for Frogkind
.
.
Searching Tools
There are several tools that can be used to browse the kernel code and search. We will demonstrate the commands used with examples taken from the labs.
Using Find
The find utility can be used to search for a specific file name. The only catch being the name or pattern of the file needs to be known. For instance say you want to locate the logo of Linux in the source code.
conrad@conrad-HP-Pavilion-dm3-Notebook-PC:~/git/linux$ find . -name "*.gif" -o -name "*.jpg" -o -name "*.png" -type f
./Documentation/logo.gif
We use popular file formats to locate pictures in the source code and coincidentally there is one file in the Documentation directory with the name logo.gif.
Using Git-Grep
The git-grep command can be used to search within a git project. For instance if we want to search for the name of the maintainer of MVNETA network driver we would use it as follows:
conrad@conrad-HP-Pavilion-dm3-Notebook-PC:~/git/linux$ git grep MVNETA
MAINTAINERS:MARVELL MVNETA ETHERNET DRIVER
arch/arm/configs/mvebu_defconfig:CONFIG_MVNETA=y
drivers/net/ethernet/marvell/Kconfig:     This driver is used by the MV643XX_ETH and MVNETA drivers.
drivers/net/ethernet/marvell/Kconfig:config MVNETA
.
.
.
-
We search for MVNETA with git grep
-
We get the maintainers as MARVELL for MVNETA ETHERNET DRIVER
To get line numbers for the references of the regex being searched we have to set the environment for git. This can be done locally (--local) specific to the git project or globally(--global) for all git projects on the workstation.
conrad@conrad-HP-Pavilion-dm3-Notebook-PC:~/git/linux$ git config --local grep.lineNumber true
- Enabling line numbers in the search in my local linux git clone
It is possible to search in a specific branch of the project with git-grep. For instance let us try to find the platform_device_register function in all header files in the linux project in the branch remotes/stable/linux-3.7.y
conrad@conrad-HP-Pavilion-dm3-Notebook-PC:~/git/linux$ git grep -e platform_device_register remotes/stable/linux-3.7.y -- '*.h'
remotes/stable/linux-3.7.y:arch/arm/mach-ux500/devices-common.h:99:     return platform_device_register_full(&pdevinfo);
remotes/stable/linux-3.7.y:arch/arm/mach-ux500/devices-common.h:123:    return platform_device_register_full(&pdevinfo);
remotes/stable/linux-3.7.y:arch/arm/mach-ux500/devices-common.h:140:    platform_device_register_full(&pdevinfo);
remotes/stable/linux-3.7.y:arch/arm/mach-ux500/devices-db8500.h:26:     return platform_device_register_resndata(parent, "nmk-ske-keypad", -1,
remotes/stable/linux-3.7.y:arch/arm/plat-mxc/include/mach/devices-common.h:31:  return platform_device_register_full(&pdevinfo);
remotes/stable/linux-3.7.y:include/linux/platform_device.h:43:extern int platform_device_register(struct platform_device *);
remotes/stable/linux-3.7.y:include/linux/platform_device.h:69:extern struct platform_device *platform_device_register_full(
remotes/stable/linux-3.7.y:include/linux/platform_device.h:73: * platform_device_register_resndata - add a platform-level device with
remotes/stable/linux-3.7.y:include/linux/platform_device.h:86:static inline struct platform_device *platform_device_register_resndata(
remotes/stable/linux-3.7.y:include/linux/platform_device.h:102: return platform_device_register_full(&pdevinfo);
remotes/stable/linux-3.7.y:include/linux/platform_device.h:106: * platform_device_register_simple - add a platform-level device and its resources
remotes/stable/linux-3.7.y:include/linux/platform_device.h:127:static inline struct platform_device *platform_device_register_simple(
remotes/stable/linux-3.7.y:include/linux/platform_device.h:131: return platform_device_register_resndata(NULL, name, id,
remotes/stable/linux-3.7.y:include/linux/platform_device.h:136: * platform_device_register_data - add a platform-level device with platform-specific data
remotes/stable/linux-3.7.y:include/linux/platform_device.h:151:static inline struct platform_device *platform_device_register_data(
remotes/stable/linux-3.7.y:include/linux/platform_device.h:155: return platform_device_register_resndata(parent, name, id,
-
Expression searches for platform_device_register declaration in remotes/stable/linux-3.7.y
-
The function is declared on line 43 in include/linux/platform_device.h in the branch linux-3.7.y
If we compare it to one of the older stable branches of remotes/stable/linux-2.6.11.y we get fewer header files with reference to the function name.
conrad@conrad-HP-Pavilion-dm3-Notebook-PC:~/git/linux$ git grep -e platform_device_register remotes/stable/linux-2.6.11.y -- '*.h'
remotes/stable/linux-2.6.11.y:include/asm-ppc/ppc_sys.h:54:/* Update all memory resources by paddr, call before platform_device_register */
remotes/stable/linux-2.6.11.y:include/asm-ppc/ppc_sys.h:58:/* Get platform_data pointer out of platform device, call before platform_device_register */
remotes/stable/linux-2.6.11.y:include/linux/device.h:380:extern int platform_device_register(struct platform_device *);
remotes/stable/linux-2.6.11.y:include/linux/device.h:392:extern struct platform_device *platform_device_register_simple(char *, unsigned int, struct resource *, unsigned int);
-
Expression searches for platform_device_register declaration in remotes/stable/linux-2.6.11.y
-
The function is declared on line 380 in include/linux/platform_device.h in the branch linux-2.6.11.y
Using Linux Cross Reference
We can make use of an automated tool like Linux Cross Reference or LXR as well:
-
Identifier search: http://lxr.free-electrons.com/ident
-
Free text search: http://lxr.free-electrons.com/search
Configuring The Kernel
The kernel source code contains code to support many filesystems, device drivers, network protocols, architectures, etc. The source code can be configured to chose which features are required based on the type of applications that will be run in user space.
Additionally the kernel configuration will also support test code that may be run to validate device drivers in the system. For example the MTD system has several kernel modules which can be loaded to validate the implementation of the mtd device driver code for the flash storage in the system.
To support this type of configuration there are a series of Makefiles present in the kernel source code. However to start the configuraton and build we would only be required to work with the top level Makefile.
There are various targets defined in the top level Makefile which can control the configuration, build and installation of the Linux kernel.
To get a sense of the number of targets available we can run make help to see all the targets.
conrad@conrad-HP-Pavilion-dm3-Notebook-PC:~/Git/linux$ make help | head
Cleaning targets:
  clean       - Remove most generated files but keep the config and
                    enough build support to build external modules
  mrproper    - Remove all generated files + config + various backup files
  distclean   - mrproper + remove editor backup and patch files

Configuration targets:
  config      - Update current config utilising a line-oriented program
  nconfig         - Update current config utilising a ncurses menu based program
  menuconfig      - Update current config utilising a menu based program
.
.
.
Kernel Configuration
The process of configuring the Linux Kernel includes modifying the configuration file located at the root of the source code. This file is named .config. The dot at the beginning of the file name indicates that it is a hidden file.
The syntax of this file is in the form of simple key value pairs as shown in the example below:
conrad@conrad-HP-Pavilion-dm3-Notebook-PC:~/Git/linux$ head .config
#
# Automatically generated file; DO NOT EDIT.
# Linux/x86 3.12.0-rc7 Kernel Configuration
#
# CONFIG_64BIT is not set
CONFIG_X86_32=y
CONFIG_X86=y
CONFIG_INSTRUCTION_DECODER=y
CONFIG_OUTPUT_FORMAT="elf32-i386"
CONFIG_ARCH_DEFCONFIG="arch/x86/configs/i386_defconfig"
.
.
.
-
Command to display the first lines of the .config file
-
# is used to comment out key values in the configuration file
An important point to note is that because options have dependencies it is not advisable to edit the .config file by hand. Preferably use the available configuration interfaces.
- Graphical Interfaces
-
make xconfig OR make gconfig
- Text/Shell Interfaces
-
make menuconfig OR make nconfig
It doesn’t make any difference which is used and we can shift between either of the interfaces as they all edit the same .config file.
Kernel Configuration In The System
The configuration of a GNU/Linux distribution is usually present along with the kernel image in the /boot/ directory.
conrad@conrad-HP-Pavilion-dm3-Notebook-PC:~/Git/linux$ uname -r
3.13.0-45-generic
conrad@conrad-HP-Pavilion-dm3-Notebook-PC:~/Git/linux$ ls -l /boot/config-3.13.0-45-generic
-rw-r--r-- 1 root root 169818 Jan 14 01:53 /boot/config-3.13.0-45-generic
conrad@conrad-HP-Pavilion-dm3-Notebook-PC:~/Git/linux$
-
uname -r is the command to get the kernel running on the system
-
The kernel running is 3.13.0-45-generic
-
Listing the configuration file of this kernel in /boot/
-
The configuration file is config-3.13.0-45-generic
Configuring Features As Modules
Upon configuring the kernel source and completion of the build we get a single image which represents the kernel and all the features it is configured for. However it is possible to configure some of the features such as device drivers, filesystems, driver tests, etc. as separate entities called kernel modules.
By configuring certain features as modules we are able to keep the size of the kernel to a minimum. Kernel modules can be loaded from user space to support certain applications on execution or on insertion of certain devices into the system buses like USB, PCI, etc..
Therefore in the configuration of certain features it is possible to select if the feature needs to be compiled as a kernel module. All kernel modules will have to be stored in a file system and will have to be loaded into the running kernel by some user space application or script.
An important point to note in choosing if a feature should be compiled as a module is the latency with which the feature needs to be activated from boot of the system. As the kernel module is stored in a filesystem, it will not be loadable until the filesystem is mounted in the kernel.
Kernel Option Types
When selecting different features and configuring the kernel we come across different types based on the information required to complete the configuration.
- bool
-
true or false to indicate presence or absence of the feature respectively.
- tristate
-
true or false similar to bool option types and also a third state i.e. module to indicate it is a kernel module.
- int
-
If an integer value is required in the configuration of the feature.
- hex
-
If a hexadecimal value is required in the configuration of the feature.
- string
-
If a string value is requried in the configuration of the feature.
Kernel Option Dependencies
There will be dependencies between different kernel objects. To describe the dependency there are two types:
- depends on dependencies
-
The option that is dependent on another remains invisible until the later is enabled.
- select dependencies
-
The option on selection automatically selects the object on which it depends on in the configuration.
Graphical Configuration Interface xconfig
The xconfig configuration utitlity which uses Qt is invoked when running make xconfig in the root directory. If we try to invoke it we get the following error:
conrad@conrad-HP-Pavilion-dm3-Notebook-PC:~$ cd ~/Git/linux
conrad@conrad-HP-Pavilion-dm3-Notebook-PC:~/Git/linux$ make xconfig
  CHECK   qt
* Unable to find the QT4 tool qmake. Trying to use QT3
*
* Unable to find any QT installation. Please make sure that
* the QT4 or QT3 development package is correctly installed and
* either qmake can be found or install pkg-config or set
* the QTDIR environment variable to the correct location.
*
make[1]: *** No rule to make target `scripts/kconfig/.tmp_qtcheck', needed by `scripts/kconfig/qconf.o'.  Stop.
make: *** [xconfig] Error 2
conrad@conrad-HP-Pavilion-dm3-Notebook-PC:~/Git/linux$
-
The target rule checks for qt
-
A nice description of what is probably wrong with our Ubuntu distribution
Ok we need to install Qt in our system. The dependencies are libqt4-dev and g++. For older kernel sources the dependencies are libqt3-mt-dev.
conrad@conrad-HP-Pavilion-dm3-Notebook-PC:~/Git/linux$ sudo apt-get install libqt4-dev g++
Reading package lists... Done
Building dependency tree
Reading state information... Done
.
.
.
Setting up libqtwebkit-dev (2.3.2-0ubuntu7) ...
Processing triggers for libc-bin (2.19-0ubuntu6.5) ...
- Installing the prerequisites
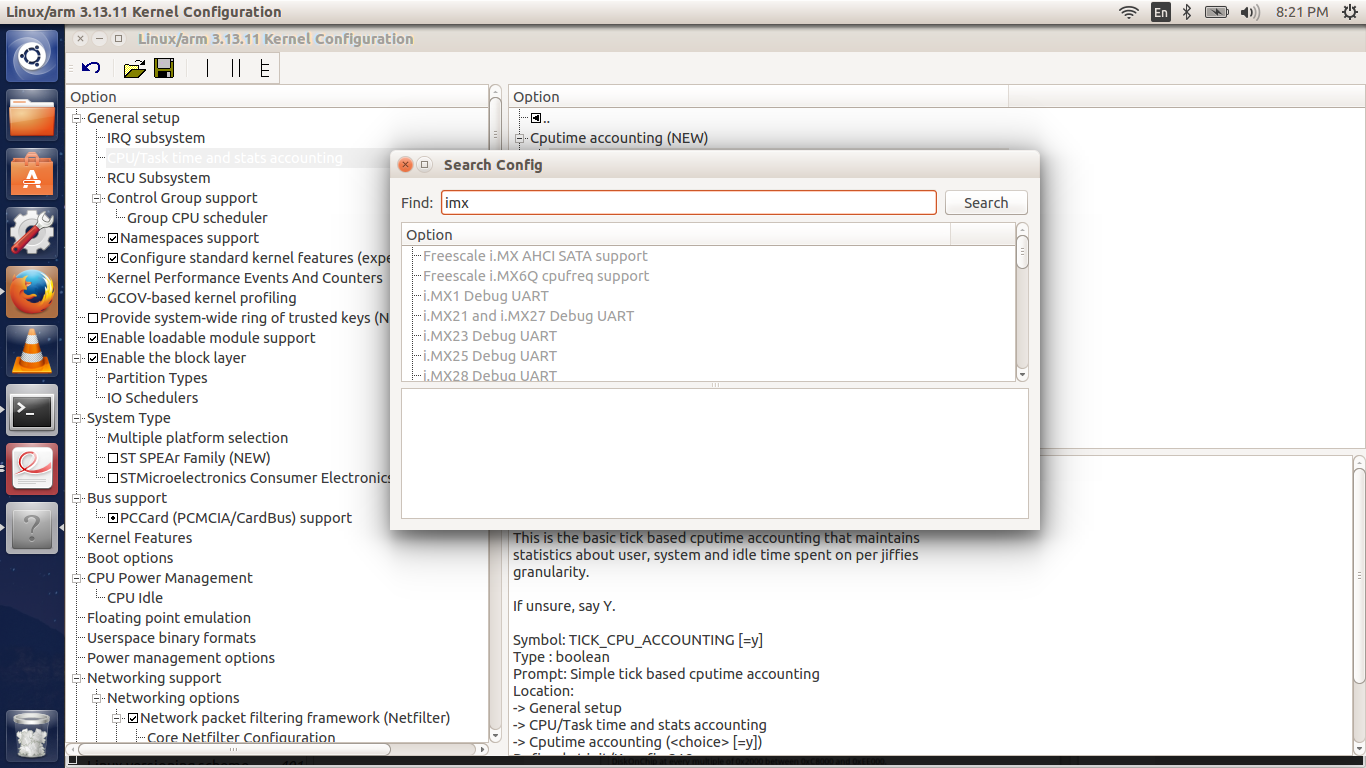
Again we try running make xconfig and see the graphical interface as shown in the screen capture below:
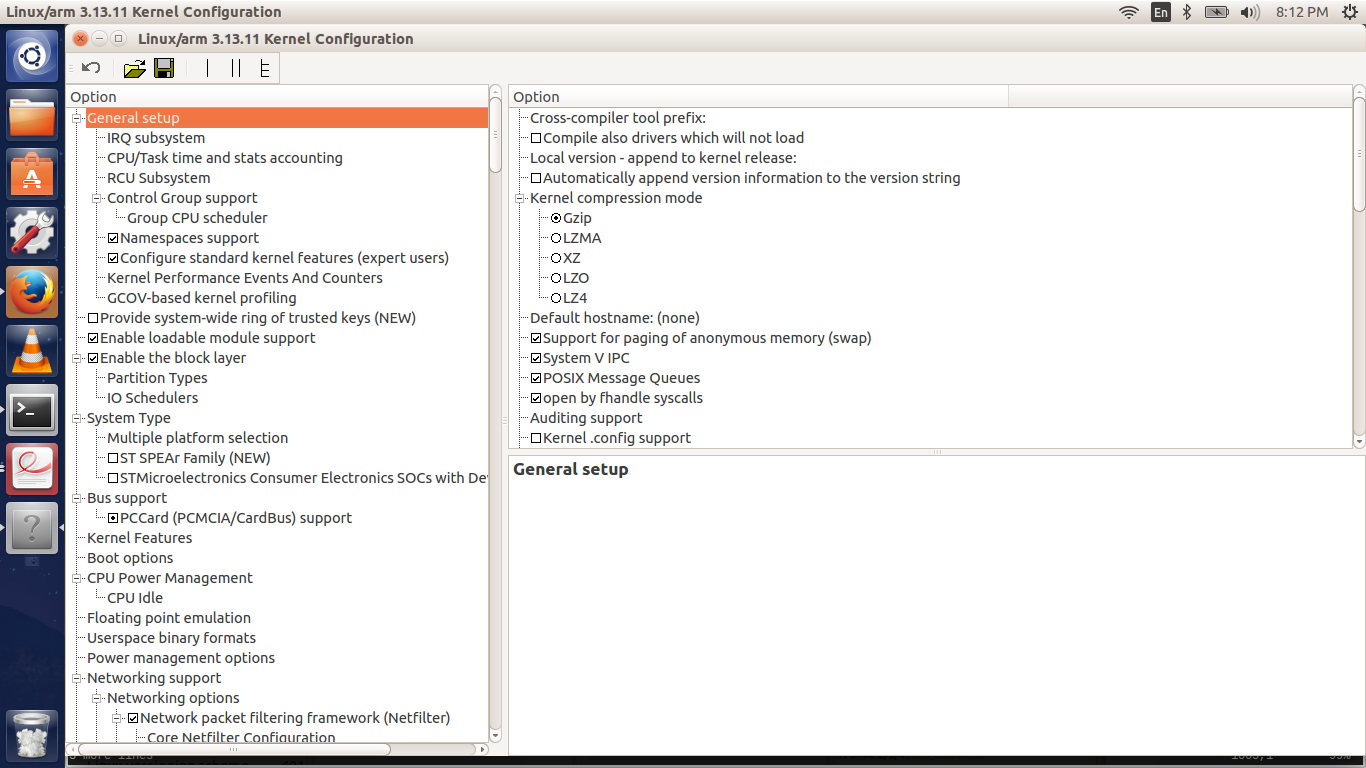
It is possible to search for a particular feature using the search interface. This can be invoked with a CTRL + F keyboard combination.
Graphical Configuration Interface gconfig
Another graphical interface is the gconfig target.This GTK based configuration gives the following error when we invoke it:
conrad@conrad-HP-Pavilion-dm3-Notebook-PC:~/Git/linux$ make gconfig
*
* Unable to find the GTK+ installation. Please make sure that
* the GTK+ 2.0 development package is correctly installed...
* You need gtk+-2.0, glib-2.0 and libglade-2.0.
*
make[1]: *** No rule to make target `scripts/kconfig/.tmp_gtkcheck', needed by `scripts/kconfig/gconf.o'.  Stop.
make: *** [gconfig] Error 2
-
We invoke the target gconfig of the root directory makefile
-
A helpful message indicates a missing GTK+ installation in our Ubun
In this case we have to install the debian package libglade2-dev
conrad@conrad-HP-Pavilion-dm3-Notebook-PC:~/Git/linux$ sudo apt-get install libglade2-dev
[sudo] password for conrad:
no talloc stackframe at ../source3/param/loadparm.c:4864, leaking memory
Reading package lists... Done
Building dependency tree
Reading state information... Done
.
.
.
Text Configuration Interface menuconfig
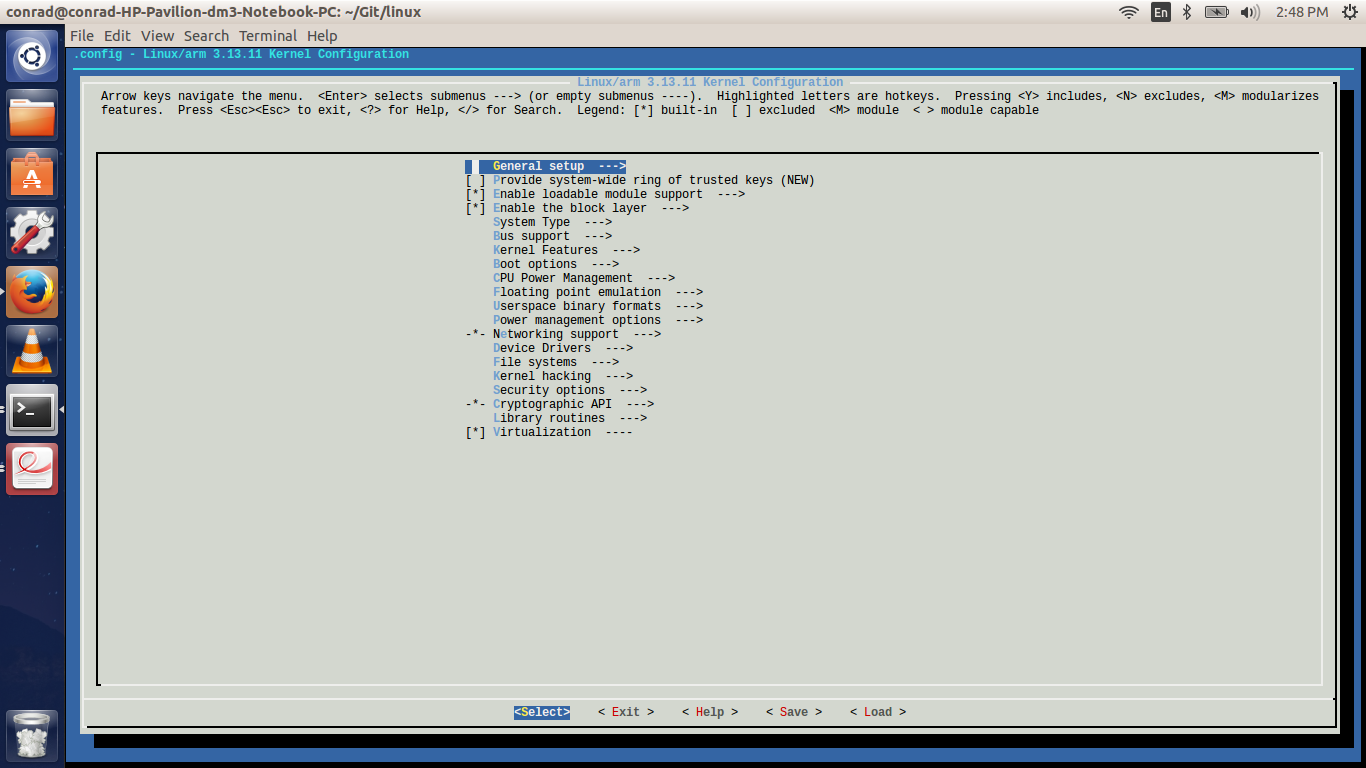
This configuration interface requires no graphical interface and only requires the libncurses-dev debian package to be installed. This interface is popular with other projects such as Linux Target Image Builder (LTIB), Busybox, OpenWrt, etc.. It works well enough for us to ignore the graphical interfaces. It is brought up using a make menuconfig command in the root directory.
conrad@conrad-HP-Pavilion-dm3-Notebook-PC:~/Git/linux$ make menuconfig
We get the following screen shot one the interface is invoked from the shell.
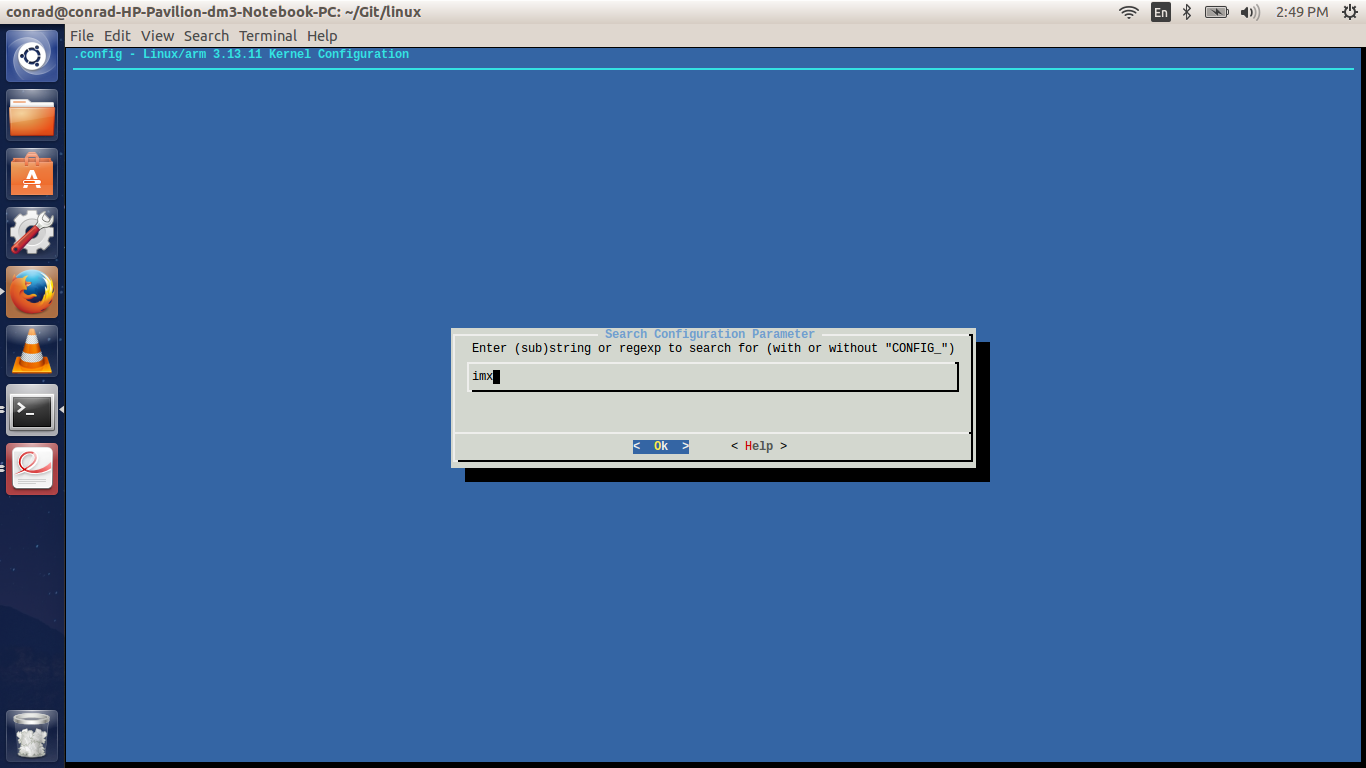
Searching with the menuconfig interface is done by hitting the '/' key similar to vim. Once the search page is displayed we can enter a key word for the search.
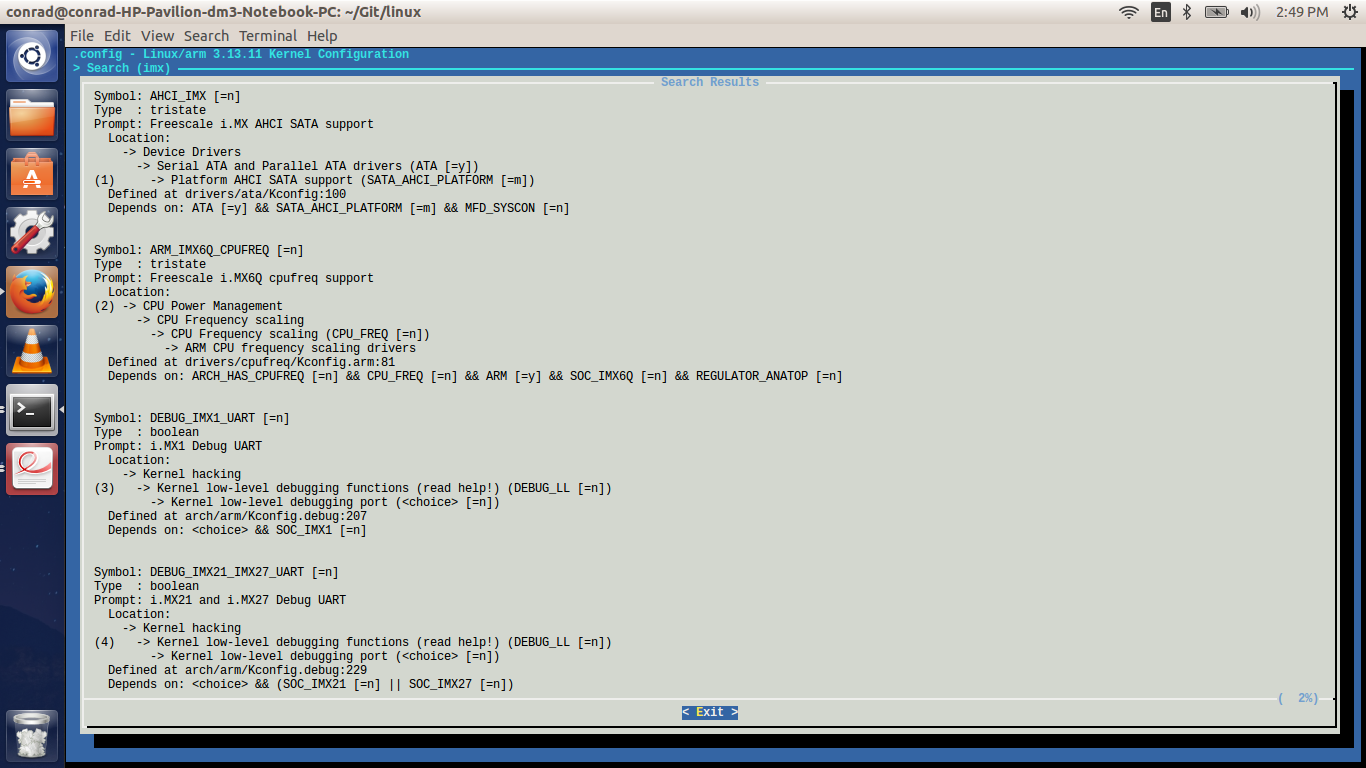
The results of the search are displayed as follows:
Text Configuration Interface nconfig
Another similar test based configuration interface is nconfig with the same dependency on libncurses_dev debian package. Again to invoke the interface we will have to use make nconfig.
conrad@conrad-HP-Pavilion-dm3-Notebook-PC:~/Git/linux$ make nconfig
We get the following screen shot once the interface is invoked from the shell.
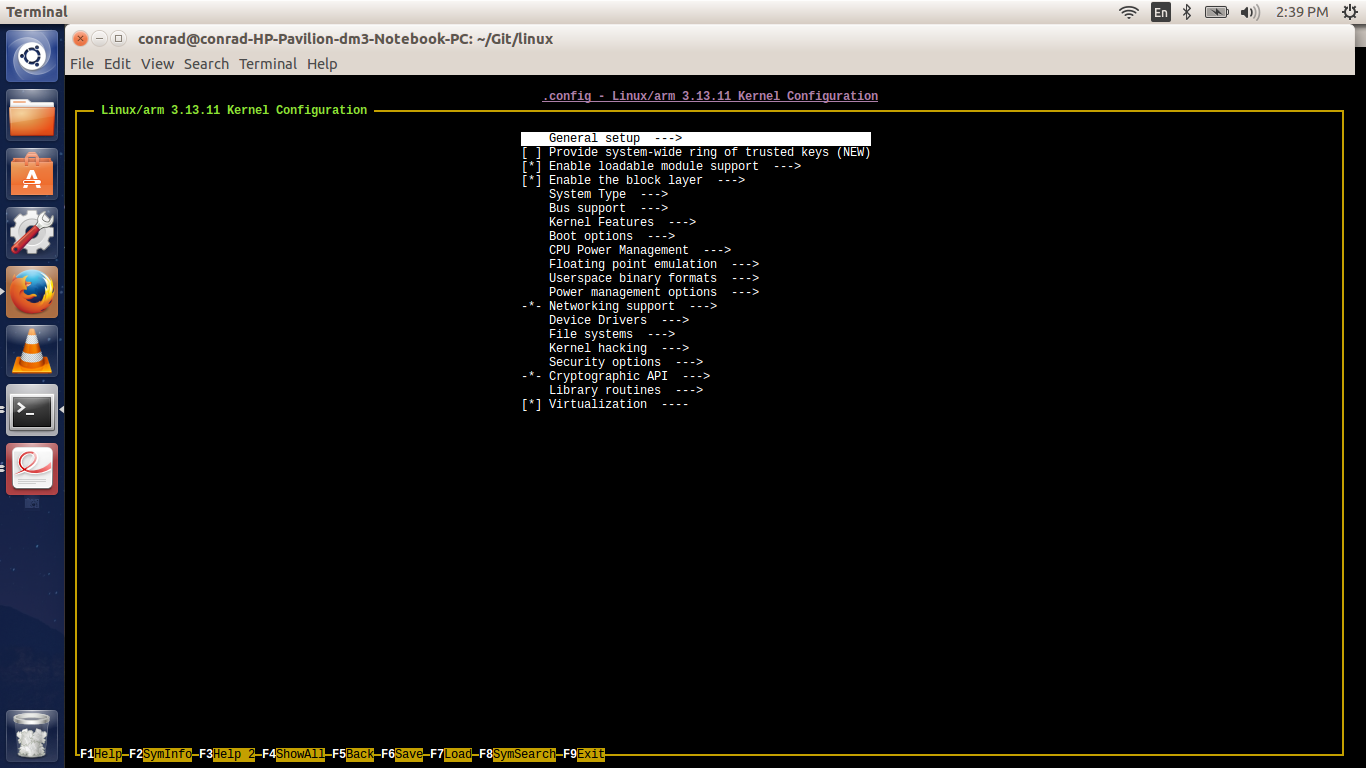
make oldconfig
If we are upgrading to a newer release and use the .config file from an older release of the Linux kernel then we need to run make oldconfig. This will inform us of the configuration settings that are irrelevant in the newer release and if there are newer features or parameters then it will prompt us asking for appropriate values for these settings.
Another scenario in which make oldconfig may come in use is if we modify the .config file by hand.
Reverting To A Previous Configuration
If we mess up our configuration and build a kernel that is unusable then we can revert to the older configuration that the kernel was built. This is done by copyting the .config.old file which gets created if we use any of the configuration interfaces available. All the interfaces save a copy of the existing configuration file .config as a back up in .config.old
Compiling The Kernel
After configuring the kernel with one of the configuration interfaces we can proceed to build the kernel by issuing a make command in the root directory. If blessed with multiple CPU cores then the build can be speed up using a make -j 4 command which instructs make to run 4 jobs in parallel.
After the build the following will be generated:
- vmlinux
-
Raw and uncompressed image which can be used for debugging purposes. This image cannot be booted.
- arch/<ARCH>/boot/*Image
-
The final kernel image which can be booted e.g. bzImage for x86 and zImage for ARM. There may also be compressed images generated.
- arch/<ARCH>/boot/dts/*.dtb
-
Compiled Device Tree files for certain architectures. This will be loaded by the bootloader before the kernel image.
- kernel modules(*.ko)
-
This will be generated in the directory corresponding to the driver/feature for which module type of configuration option was selected.
Kernel Installation
A kernel compiled for the host machine on which it is built can be installed in the system by issuing a make install after the build is successful. To install the kernel image we would required root permissions.
The installation includes the following:
- /boot/vmlinuz-<version>
-
The compressed kernel image. This is copied from the arch/<ARCH>/boot directory.
- /boot/System.map-<version>
-
This file stores the kernel symbols along with their addresses and will be handy in the event of a Kernel panic
- /boot/config-<version>
-
This is the configuration file .config saved along with the compiled kernel
The installation may also reconfigured the bootloader to take the new kernel settings so that on the next boot the new kernel will be visible.
Kernel Module Installation
Along with the kernel the compiled modules will also have to be installed in the system. To achieve this there is a target modules_install which can be executed after executing the install target of the root makefile.
The kernel modules and related files are installed in the /lib/modules/<version>/ directory. If we explore this directory we will see the following:
- kernel/
-
This directory contains a directory structure similar to the kernel source code. The kernel modules will be saved in the same directory structure as the source from which they were built.
- modules.alias
-
Aliases for the modules for loading utilities. An example of the contents of this file is given below:
conrad@conrad-HP-Pavilion-dm3-Notebook-PC:~$ head /lib/modules/3.13.0-45-generic/modules.alias
# Aliases extracted from modules themselves.
alias char-major-10-134 apm
alias aes-asm aes_i586
alias aes aes_i586
alias twofish-asm twofish_i586
alias twofish twofish_i586
alias salsa20-asm salsa20_i586
alias salsa20 salsa20_i586
alias serpent serpent_sse2_i586
alias aes aesni_intel
- modules.dep
-
Highlights the dependencies between modules. This will be used by modprobe to choose which kernel modules have to be loaded before loading a particular module. In the example below mce_inject.ko has no dependency and can be loaded without any issue. But twofish-i586.ko depends on twofish_common.ko which must be loaded first.
conrad@conrad-HP-Pavilion-dm3-Notebook-PC:~$ head /lib/modules/3.13.0-45-generic/modules.dep
kernel/arch/x86/kernel/cpu/mcheck/mce-inject.ko:
kernel/arch/x86/kernel/msr.ko:
kernel/arch/x86/kernel/cpuid.ko:
kernel/arch/x86/kernel/apm.ko:
kernel/arch/x86/crypto/glue_helper.ko:
kernel/arch/x86/crypto/aes-i586.ko:
kernel/arch/x86/crypto/twofish-i586.ko: kernel/crypto/twofish_common.ko
kernel/arch/x86/crypto/salsa20-i586.ko:
kernel/arch/x86/crypto/serpent-sse2-i586.ko: kernel/crypto/xts.ko kernel/crypto/serpent_generic.ko kernel/crypto/lrw.ko kernel/crypto/gf128mul.ko kernel/arch/x86/crypto/glue_helper.ko kernel/crypto/ablk_helper.ko kernel/crypto/cryptd.ko
kernel/arch/x86/crypto/aesni-intel.ko: kernel/arch/x86/crypto/aes-i586.ko kernel/crypto/xts.ko kernel/crypto/lrw.ko kernel/crypto/gf128mul.ko kernel/crypto/ablk_helper.ko kernel/crypto/cryptd.ko
- modules.symbols
-
Describes the kernel module to which a symbol belongs. It can be useful during debugging of a Kernel panic. For example we can see that cfg80211_report_obss_beacon belongs to the cfg80211 kernel module.
conrad@conrad-HP-Pavilion-dm3-Notebook-PC:~$ head /lib/modules/3.13.0-45-generic/modules.symbols
# Aliases for symbols, used by symbol_request().
alias symbol:cfg80211_report_obss_beacon cfg80211
alias symbol:drm_dp_link_train_channel_eq_delay drm_kms_helper
alias symbol:VBoxHost_RTThreadPreemptDisable vboxdrv
alias symbol:__twofish_setkey twofish_common
alias symbol:get_wd_exp_mode_sd bpctl_mod
alias symbol:hsi_register_controller hsi
alias symbol:mlx4_db_free mlx4_core
alias symbol:sdhci_remove_host sdhci
alias symbol:videobuf_dma_init_kernel videobuf_dma_sg
Cleaning Up
There are several targets that are used to clean up files that have been generated by the configuration and compilation of the Linux kernel source code.
- make clean
-
This will remove all the generated object code files to allow us to rebuilt the kernel.
- make mrproper
-
Remove all the generated files including the configuration file .config. It may be used if we are rebuilding the kernel source code for a different architecture.
- make distclean
-
This target is used to remove editor backup files. It is mainly used when generating patches.
Cross-Compiling The Kernel
When we work with embedded targets such as the Beagle Bone Black board we have to compile the kernel for the architecture of that board i.e. ARM. A kernel compiled on our x86 workstation will not execute on the Beagle Bone Black because it is compiled for an x86 architecture.
The process of compiling the kernel on our work station for another architecture is referred to as cross-compilation. The kernel can be compiled on the Beagle Bone Black if it has a toolchain installed on it. However as the processing power of embedded targets is much lower than that of PCs and servers it becomes more efficient to employ a cross-compilation toolchain for embedded development.
A cross-compiler can be recognized by its prefix which indicates the system for which it will compile the source code. For example mips-linux-gcc indicates that the cross-compiler will generate a binary that can be executed on a MIPS based architecture whereas a arm-linux-gnueabi-gcc indicates that the cross-compiler will generate a binary that can be executed on an ARM based architecture.
To specify the architecture for which the kernel source code is to be compiled we have to pass a variable ARCH to the top level makefile. This should map to any of the subdirectories in the arch/ directory of the kernel source code e.g. arm.
To specify the cross compilation toolchain we have to pass the CROSS_COMPILE variable which represents the prefix of the toolchain e.g. mips-linux- or arm-linux-gnueabi-.
Predefined Configuration Files
Many times when working with embedded boards we don’t set the configuration of a particular board from scratch. It is easier if there is a predefined configuration with which we can start from and there is in most cases. We get a list of predefined configurations from make help which allows us to set the .config to a particular configuration for a specific board.
For instance if we run make viper_defconfig it will overwrite the .config file with the file from arch/arm/configs/viper_defconfig. To get a list of default configurations we can either use make help or the find utility as shown below:
conrad@conrad-HP-Pavilion-dm3-Notebook-PC:~/Git/linux$ find . -name *_defconfig |head
./arch/arc/configs/tb10x_defconfig
./arch/arc/configs/fpga_defconfig
./arch/arc/configs/fpga_noramfs_defconfig
./arch/arc/configs/nsimosci_defconfig
./arch/mn10300/configs/asb2364_defconfig
.
.
.
./arch/ia64/configs/sim_defconfig
./arch/ia64/configs/tiger_defconfig
./arch/xtensa/configs/iss_defconfig
./arch/xtensa/configs/s6105_defconfig
./arch/xtensa/configs/common_defconfig
Once we’ve loaded a default configuration which is basically a minimal configuration it’s time to tailor the configuration to our specifications. This will include running one of the configuration interfaces like make menuconfig. We see the settings of the default configuration in the interface.
Saving Our Default Configuration
We also have the ability to save our configuration once it is tailored, as a default configuration. This can be done by running the command make savedefconfig. Running this target causes make to save the .config file with a name defconfig. We can move the new defconfig file to the architecture configs directory with an appropriate name.
- mv defconfig arch/<ARCH>/configs/my_favourite_config
Overall the choice of starting from a default minimal configuration lies with the developer. We can also start from scratch but be mindful about selection of the CPU selection and the correct device drivers.
Device Tree
Most embedded platforms have non-discoverable hardware which exists as part of the SOC. This hardware has to be described to the kernel in the form of code or a special hardware description language called Device Tree.
The Device Tree language is used only recently in certain architectures such as ARM, PowerPC, ARC, etc.. The Device Tree source file is compiled into a binary called Device Tree Blob by a compiler and passed to the kernel through the bootloader. Each board will have its own unique hardware and therefore will have a unique device tree source file.
The Device Tree files will be located in the /arch/<ARCH>/boot/dts/ folder. The bootloader has to have the capability to load the Device Tree Blob and the kernel image before starting execution of the kernel.
Steps To Build and Install A Kernel
-
Configure the kernel source code using make menuconfig
-
Build the kernel using make with <ARCH> and <CROSS_COMPILE> set if building for and embedded platform.
-
Copy the built image from arch/<ARCH>/boot/.
a. The image name will depend on the architecture e.g. bzImage, zImage, etc..
-
Install the kernel image. For an embedded platform do NOT run make install. It is better to simply copy the built kernel image.
a. The installation can be customized by editing the arch/<ARCH>/boot/install.sh script.
-
Install the modules. For an embedded platform do NOT run make modules_install without the INSTALL_MOD_PATH=<dir>/ variable. This ensures we don’t mess around with the system kernel modules.
Using U-Boot
A popular bootloader with embedded platforms is U-Boot. U-Boot works with a format of kernel image called uImage. This is generated from the zImage using a make uImage target execution for ARM. Newer versions of U-Boot also support booting of the ARM based kernel image zImage directly.
Some ARM platforms require the LOADADDR to be passed along with the make uImage target execution. The address associated with this variable represents the physical memory where the image is executed in.
U-Boot also has the ability to load the Device Tree Blob in memory and pass it to the kernel. The boot process follows the steps
-
Load the kernel zImage or uImage at address X
-
Load the <board>.dtb file at Y
-
Boot the kernel with bootz X -Y or bootm X - Y. The - indicates no initramfs.
Kernel Command Line
The kernel takes in a list of arguments which can affect its behavior at run time. These argument can be hardcoded during the configuration of the kernel source code by setting the CONFIG_CMDLINE option.
The command line argument can also be passed to the kernel at boot up using an environment variable like bootargs in the case of U-Boot.
There are several kernel arguments documented in Documentation/kernel-parameters.txt. We typically set:
-
root = for the root filesystem
-
console = for the destination of the kernel messages
LAB 2 : Setting Up The Beaglebone Black Board
Note
Getting familiar with the BeagleBone Black board
Knowing what technical documentation is available
Installing the lab data from Free Electrons
Access the board through the serial line.
Configure the U-boot bootloader to download files onto the board using trivial file transfer protocol (tftp)
Getting Comfortable With The Board
At this point we have to get familiar with our board. It is good to go through the features of the board given in section 4.0 of the BeagleBone Black System Reference Manual.
Connectors, LEDs and Switches
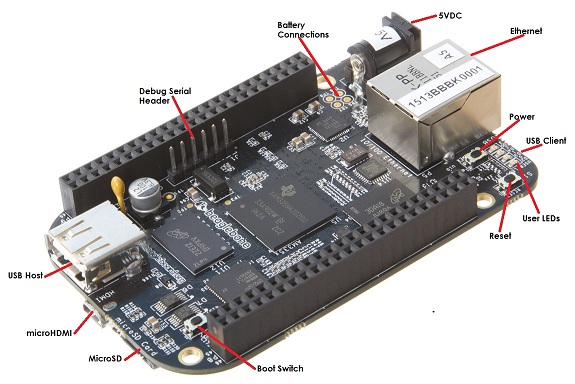
- 5V DC Power Connector
-
The main DC input which accepts 5V power. Suitable for more power hungry applications.
- Power Down Button Switch
-
Signals to the processor to initiate the power down sequence. It is used to power down the board.
- Boot Button Switch
-
Force the a boot from the micro-SD card by removing and reapplying power to the board.
- Reset Button Switch
-
Reset the processor.
- USB Client Connector
-
Mini USB port at the bottom of the board. It can be used to power the board and setup a network connection.
- 10/100 Ethernet Connector
-
The LAN interface.
- Debug Serial Header Connector
-
The header interface for the serial port.
- MicroSD Slot Connector
-
Slot at the bottom of the board to insert a micro-SD card.
- MicroHDMI Slot Connector
-
Slot at the bottom of the board to insert a micro-HDMI cable to interface to a display.
- USB Host Connector
-
This can be used to connect a USB device like keyboard, mouse, BT dongle, WiFi dongle, etc..
System Key Components
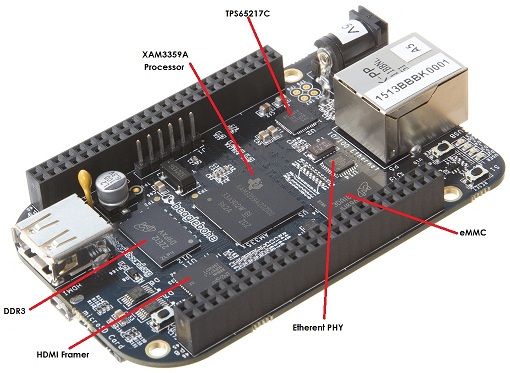
- Sitara Processor
-
ARM architecture OMAP System On Chip(SOC) from Texas Instruments. This is XAM3359AZCZ100 for revision A5A to A6A and XAM3359AZCZ100 for revision B and above. Only the A4 revision boards had the AM3352 processor.
- 512MB DDR3 RAM
-
Micron 512MB DDR3L or Kingston 512MB DDR3 Dual Data Rate RAM.
- TPS65217C PMIC
-
It is the power management IC which supplies the power rails to the different components on board.
- SMSC Ethernet PHY
-
The physical interface to the ethernet network.
- Micron eMMC
-
This was 2GB till revision B and changed to 4GB in revision C.
- HDMI Framer
-
Provides the HDMI control for and HDMI or DVI-D display with adaptor.
Downloading The Technical Documentation
Design is not possible without documentation, so we download the documents which will help us in the lab sessions. The following are needed:
Tht System Reference Manual describes the details about the design of
the board and is available on this site here
The latest document should be available at:
https://github.com/CircuitCo/BeagleBone-Black/blob/master/BBB_SRM.pdf?raw=true.
The datasheet of the TI AM335x SoCs is useful to see the PIN assignments
later when we want to configure the pinmux settings and is available
on this site here
The original link is at the TI website at:
http://www.ti.com/lit/ds/symlink/am3359.pdf
The last document is the Technical Reference Manual(TRM) of the TI
AM335x SoCs. At over 4000 pages it describes the internal IP design of
the chip. It is available here.
The same document can be retrieved from the TI website at :
http://www.ti.com/product/am3359
Installing The Free Electrons Lab Data
We will be using the lab data available from Free Electrons to setup our BeagleBone Black. First make sure the lab data is downloaded. The lab data which was available at the time of writing this journal is here.
We’ll have to uncompress the file with sudo permissions and change the permissions of the resulting folder. The prime reason being that the package contains system device node files for the NFS root filesystem:
conrad@conrad-HP-Pavilion-dm3-Notebook-PC:~/fe-kernel-training$ sudo tar xvJf linux-kernel-labs.tar.xz
[sudo] password for conrad:
no talloc stackframe at ../source3/param/loadparm.c:4864, leaking memory
linux-kernel-labs/
linux-kernel-labs/src/
linux-kernel-labs/src/patches/
.
.
.
linux-kernel-labs/modules/nfsroot/sbin/route
linux-kernel-labs/modules/nfsroot/sbin/runlevel
linux-kernel-labs/git/
conrad@conrad-HP-Pavilion-dm3-Notebook-PC:~/fe-kernel-training$
conrad@conrad-HP-Pavilion-dm3-Notebook-PC:~/fe-kernel-training$ sudo chown -R conrad:conrad linux-kernel-labs
conrad@conrad-HP-Pavilion-dm3-Notebook-PC:~/fe-kernel-training$ ls -l
total 7756
drwxrwxr-x 6 conrad conrad    4096 Mar 22 17:38 linux-kernel-labs
-rw-rw-r-- 1 conrad conrad 7931316 Mar 22 18:57 linux-kernel-labs.tar.xz
-rw-rw-r-- 1 conrad conrad      87 Mar 22 18:55 Readme.txt
-
Command to untar and decompress the package
-
Command to change the owner and group to the user name in this case conrad
-
Listing of the directory shows the owner and group has been set appropriately
The xz extension of the package indicates that it requires XZ compression utility which if not available on your system can be upgraded as follows:
conrad@conrad-HP-Pavilion-dm3-Notebook-PC:~/fe-kernel-training$ sudo apt-get install xz-utils
Making A Bootable MicroSD Card
Now we deviate slightly from the Free Electrons lab slides and first prepare our board as per the instructions provided in the linux-kernel-labs/bootloader/beaglebone-black/README.txt file. The bootable micro-SD card will automatically format the on board eMMC device.
Take the micro-SD card and insert it into a micro-SD adapter/reader like the one shown in the image below:
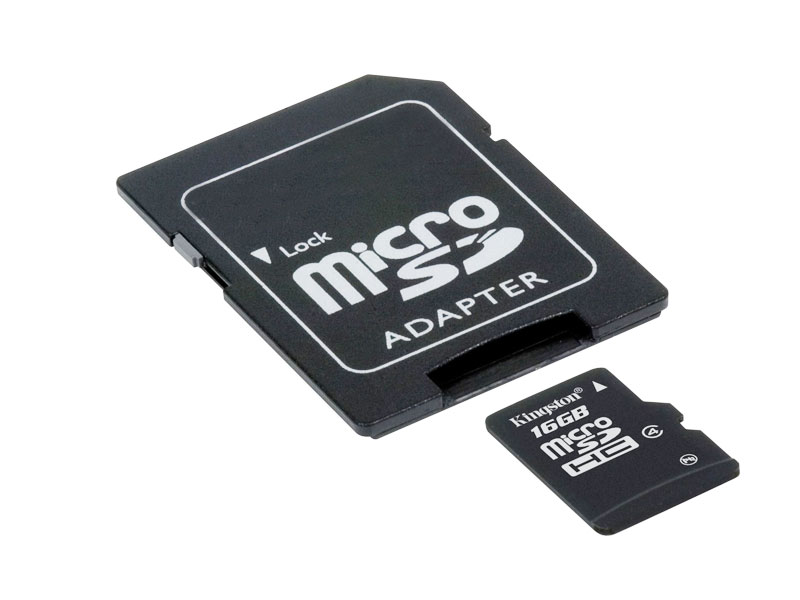
This memory card reader/adapter should be inserted into the SD card slot available. If your system has a micro-SD card slot then please use that directly. On checking the kernel logs with dmesg we should be able to identify the card detected in the system. If a micro-SD card slot is available then the system should register it as a /dev/mmcblk0 whereas in this case with a memory card reader we see it as /dev/sdb. The following shows the kernel logs:
conrad@conrad-HP-Pavilion-dm3-Notebook-PC:~/fe-kernel-training$ dmesg
.
.
.
[127595.272118] usb 1-2: new high-speed USB device number 6 using ehci-pci
[127595.405640] usb 1-2: New USB device found, idVendor=058f, idProduct=6366
[127595.405650] usb 1-2: New USB device strings: Mfr=1, Product=2, SerialNumber=3
[127595.405658] usb 1-2: Product: Mass Storage Device
[127595.405665] usb 1-2: Manufacturer: Generic
[127595.405671] usb 1-2: SerialNumber: 058F63666433
[127595.406226] usb-storage 1-2:1.0: USB Mass Storage device detected
[127595.407830] scsi9 : usb-storage 1-2:1.0
[127596.532963] scsi 9:0:0:0: Direct-Access     Multiple Card  Reader     1.00 PQ: 0 ANSI: 0
[127596.533754] sd 9:0:0:0: Attached scsi generic sg1 type 0
[127598.192274] sd 9:0:0:0: [sdb] 7744512 512-byte logical blocks: (3.96 GB/3.69 GiB)
[127598.193263] sd 9:0:0:0: [sdb] Write Protect is off
[127598.193269] sd 9:0:0:0: [sdb] Mode Sense: 03 00 00 00
[127598.194256] sd 9:0:0:0: [sdb] No Caching mode page found
[127598.194259] sd 9:0:0:0: [sdb] Assuming drive cache: write through
[127598.199023] sd 9:0:0:0: [sdb] No Caching mode page found
[127598.199028] sd 9:0:0:0: [sdb] Assuming drive cache: write through
conrad@conrad-HP-Pavilion-dm3-Notebook-PC:~/fe-kernel-training$ ls -l /dev/sdb
brw-rw---- 1 root disk 8, 16 Mar 22 21:09 /dev/sdb
-
We see the device attached as sdb
-
The device node has been created successfully as /dev/sdb
We will have to first partition the micro-SD card using the sfdisk utility which is part of the util-linux APT package. This tool helps us to list the partitions of a device, check the sizes of the partitions, check the partitions on a device and re-partition a device. We must be extra careful when we use such a tool as it could also cause damage to our workstation system if we select the wrong device file unintentionally.
conrad@conrad-HP-Pavilion-dm3-Notebook-PC:~/Git/techeuphoria$ sudo sfdisk --in-order --Linux --unit M /dev/sdb << EOF
> 1,48,0xE,*
> ,,,-
> EOF
Checking that no-one is using this disk right now ...
BLKRRPART: Device or resource busy

This disk is currently in use - repartitioning is probably a bad idea.
Umount all file systems, and swapoff all swap partitions on this disk.
Use the --no-reread flag to suppress this check.
Use the --force flag to overrule all checks.
conrad@conrad-HP-Pavilion-dm3-Notebook-PC:~/Git/techeuphoria$ mount
/dev/sda1 on / type ext4 (rw,errors=remount-ro)
proc on /proc type proc (rw,noexec,nosuid,nodev)
sysfs on /sys type sysfs (rw,noexec,nosuid,nodev)
none on /sys/fs/cgroup type tmpfs (rw)
none on /sys/fs/fuse/connections type fusectl (rw)
none on /sys/kernel/debug type debugfs (rw)
none on /sys/kernel/security type securityfs (rw)
udev on /dev type devtmpfs (rw,mode=0755)
devpts on /dev/pts type devpts (rw,noexec,nosuid,gid=5,mode=0620)
tmpfs on /run type tmpfs (rw,noexec,nosuid,size=10%,mode=0755)
none on /run/lock type tmpfs (rw,noexec,nosuid,nodev,size=5242880)
none on /run/shm type tmpfs (rw,nosuid,nodev)
none on /run/user type tmpfs (rw,noexec,nosuid,nodev,size=104857600,mode=0755)
none on /sys/fs/pstore type pstore (rw)
rpc_pipefs on /run/rpc_pipefs type rpc_pipefs (rw)
binfmt_misc on /proc/sys/fs/binfmt_misc type binfmt_misc (rw,noexec,nosuid,nodev)
systemd on /sys/fs/cgroup/systemd type cgroup (rw,noexec,nosuid,nodev,none,name=systemd)
nfsd on /proc/fs/nfsd type nfsd (rw)
gvfsd-fuse on /run/user/1000/gvfs type fuse.gvfsd-fuse (rw,nosuid,nodev,user=conrad)
/dev/sdb1 on /media/conrad/boot type vfat (rw,nosuid,nodev,uid=1000,gid=1000,shortname=mixed,dmask=0077,utf8=1,showexec,flush,uhelper=udisks2)
-
The command to re-partition the /devsdb device with sfdisk. The options --in-order indicates that the partitions are in order in the input. --Linux tells sfdisk to ignore all warnings irrelevant for Linux.
-
The device is apparently busy.
-
We do a mount to check if it is mounted
-
We see that a partition is mounted in our Workstation at /media/conrad/boot
If the micro-SD card is already partitioned and formated it may be auto mounted by our work station. We will have to un-mount all the partitions before we can proceed.
conrad@conrad-HP-Pavilion-dm3-Notebook-PC:~/Git/techeuphoria$ sudo umount /media/conrad/boot
[sudo] password for conrad:
no talloc stackframe at ../source3/param/loadparm.c:4864, leaking memory
conrad@conrad-HP-Pavilion-dm3-Notebook-PC:~/Git/techeuphoria$ mount
/dev/sda1 on / type ext4 (rw,errors=remount-ro)
proc on /proc type proc (rw,noexec,nosuid,nodev)
sysfs on /sys type sysfs (rw,noexec,nosuid,nodev)
none on /sys/fs/cgroup type tmpfs (rw)
none on /sys/fs/fuse/connections type fusectl (rw)
none on /sys/kernel/debug type debugfs (rw)
none on /sys/kernel/security type securityfs (rw)
udev on /dev type devtmpfs (rw,mode=0755)
devpts on /dev/pts type devpts (rw,noexec,nosuid,gid=5,mode=0620)
tmpfs on /run type tmpfs (rw,noexec,nosuid,size=10%,mode=0755)
none on /run/lock type tmpfs (rw,noexec,nosuid,nodev,size=5242880)
none on /run/shm type tmpfs (rw,nosuid,nodev)
none on /run/user type tmpfs (rw,noexec,nosuid,nodev,size=104857600,mode=0755)
none on /sys/fs/pstore type pstore (rw)
rpc_pipefs on /run/rpc_pipefs type rpc_pipefs (rw)
binfmt_misc on /proc/sys/fs/binfmt_misc type binfmt_misc (rw,noexec,nosuid,nodev)
systemd on /sys/fs/cgroup/systemd type cgroup (rw,noexec,nosuid,nodev,none,name=systemd)
nfsd on /proc/fs/nfsd type nfsd (rw)
gvfsd-fuse on /run/user/1000/gvfs type fuse.gvfsd-fuse (rw,nosuid,nodev,user=conrad)
-
We have to unmount the /dev/sdb1 from the mount point i.e. /media/conrad/boot
-
We check to see if anything else is mounted again
Again we attempt to repartition the micro-SD card
conrad@conrad-HP-Pavilion-dm3-Notebook-PC:~/Git/techeuphoria$ sudo sfdisk --in-order --Linux --unit M /dev/sdb << EOF
1,48,0xE,*
,,,-
EOF
Checking that no-one is using this disk right now ...
OK

Disk /dev/sdb: 1023 cylinders, 122 heads, 62 sectors/track
Old situation:
Units = mebibytes of 1048576 bytes, blocks of 1024 bytes, counting from 0

   Device Boot Start   End    MiB    #blocks   Id  System
/dev/sdb1   *     1     48     48      49152    e  W95 FAT16 (LBA)
/dev/sdb2        49   3780   3732    3821568   83  Linux
/dev/sdb3         0      -      0          0    0  Empty
/dev/sdb4         0      -      0          0    0  Empty
New situation:
Units = mebibytes of 1048576 bytes, blocks of 1024 bytes, counting from 0

   Device Boot Start   End    MiB    #blocks   Id  System
/dev/sdb1   *     1     48     48      49152    e  W95 FAT16 (LBA)
/dev/sdb2        49   3780   3732    3821568   83  Linux
/dev/sdb3         0      -      0          0    0  Empty
/dev/sdb4         0      -      0          0    0  Empty
Successfully wrote the new partition table

Re-reading the partition table ...
BLKRRPART: Device or resource busy
The command to re-read the partition table failed.
Run partprobe(8), kpartx(8) or reboot your system now,
before using mkfs
If you created or changed a DOS partition, /dev/foo7, say, then use dd(1)
to zero the first 512 bytes:  dd if=/dev/zero of=/dev/foo7 bs=512 count=1
(See fdisk(8).)
-
The sfdisk utility is invoked supplying the information about the partitions
-
sfdisk checking to see that no one is using the disk
-
The old partition map is displayed first. This will vary based on the history of the micro-SD card
-
The new partition map is displayed. The first partition is a W95 FAT16 one which is 48 MB. This is the first line of input to sfdisk. The remaining has been converted to a Linux partition.
We will have to format the first partition of the disk using the mkfs.vfat partition.
conrad@conrad-HP-Pavilion-dm3-Notebook-PC:~/Git/techeuphoria$ sudo mkfs.vfat -F 16 /dev/sdb1 -n boot
[sudo] password for conrad:
no talloc stackframe at ../source3/param/loadparm.c:4864, leaking memory
mkfs.fat 3.0.26 (2014-03-07)
mkfs.fat: warning - lowercase labels might not work properly with DOS or Windows
conrad@conrad-HP-Pavilion-dm3-Notebook-PC:~/Git/techeuphoria$ echo $?
0
-
mkfs.vfat is run on the partition /dev/sdb1. The label of the partition is set to boot with the -n option and the -F option specifies the type of file allocation tables used (12, 16 or 32 bit).
-
Checks the return value of the command
We now remove and re-insert the micro-SD card into the system to see if it gets detected and automatically mounted. It does and we see that Ubuntu opens up the directory located in /media/conrad/boot.
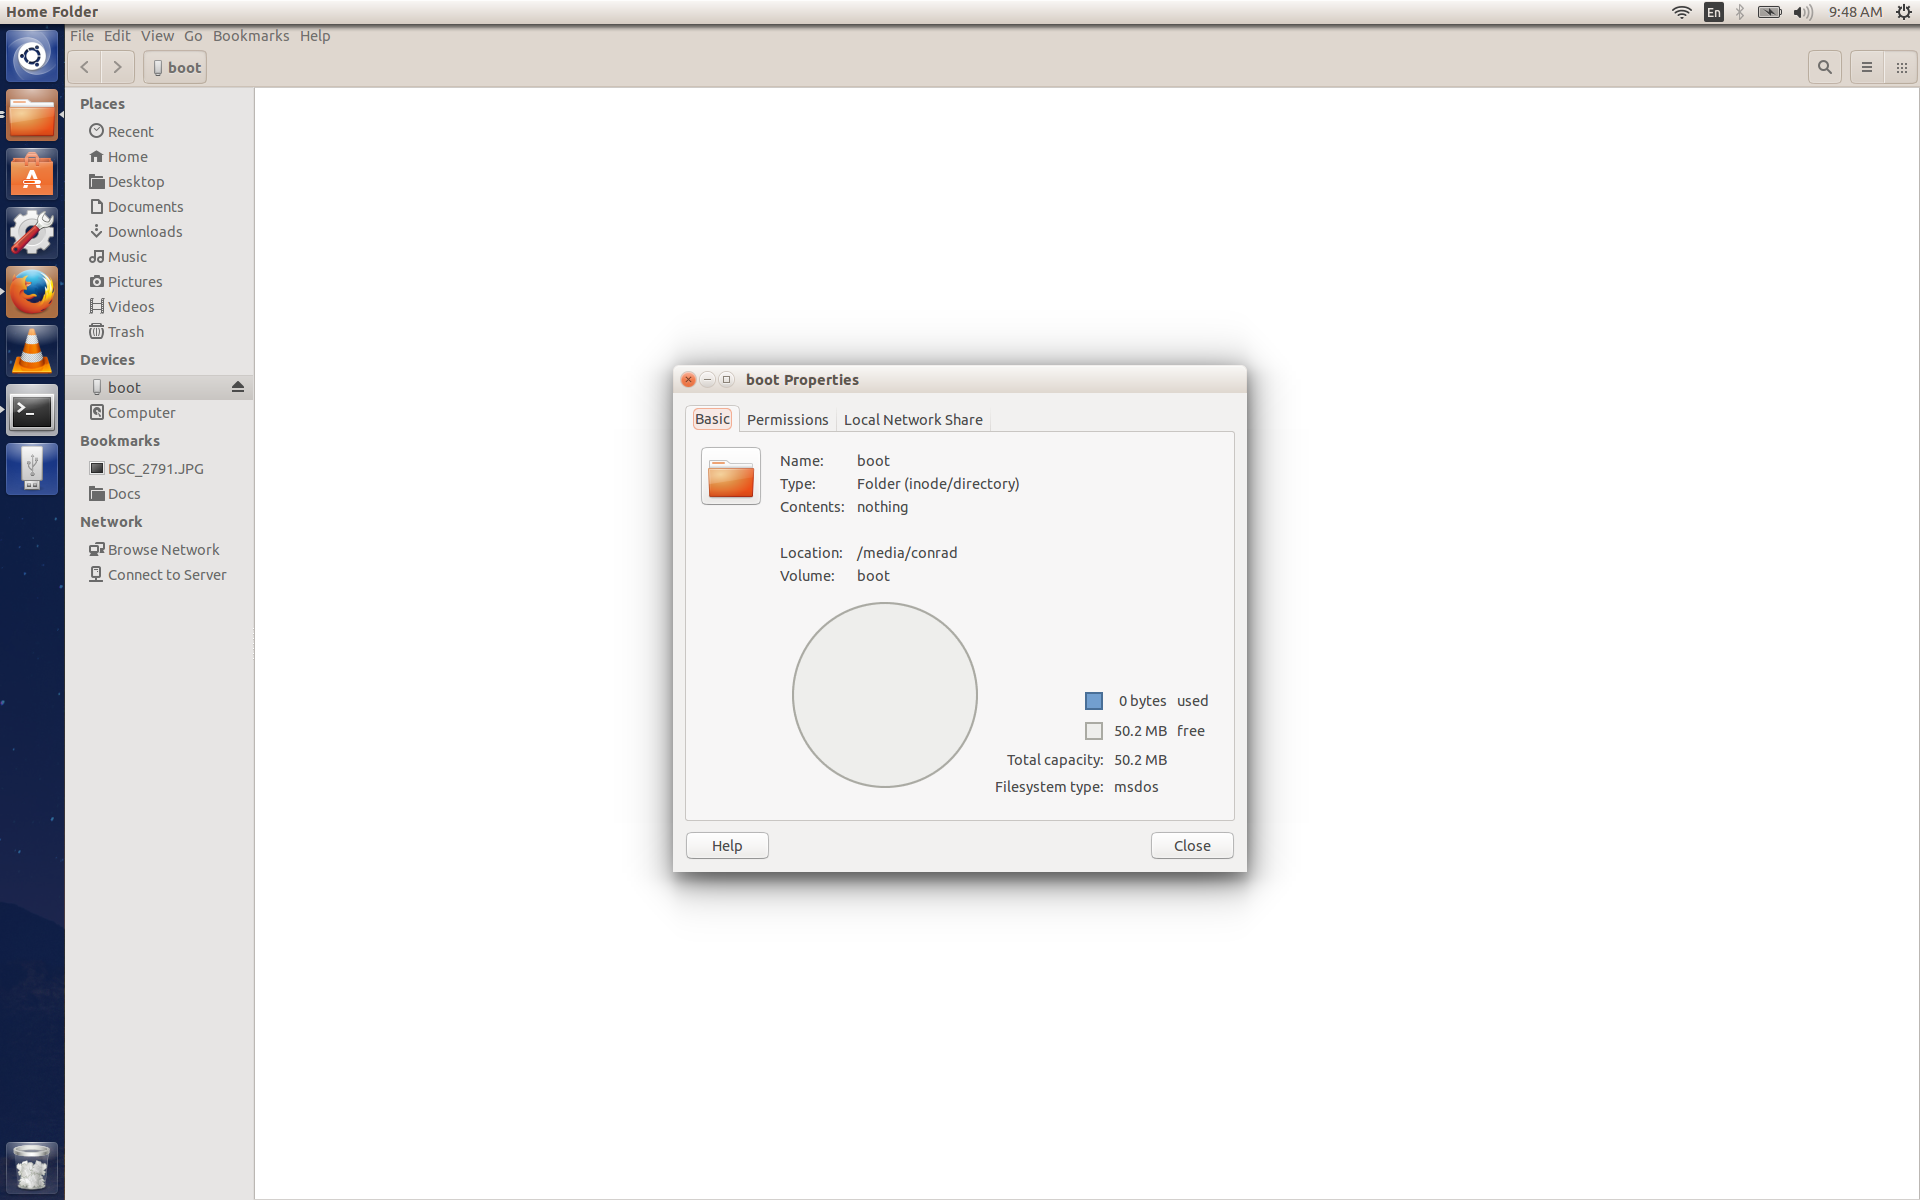
conrad@conrad-HP-Pavilion-dm3-Notebook-PC:~/Git/techeuphoria$ mount
/dev/sda1 on / type ext4 (rw,errors=remount-ro)
proc on /proc type proc (rw,noexec,nosuid,nodev)
sysfs on /sys type sysfs (rw,noexec,nosuid,nodev)
none on /sys/fs/cgroup type tmpfs (rw)
none on /sys/fs/fuse/connections type fusectl (rw)
none on /sys/kernel/debug type debugfs (rw)
none on /sys/kernel/security type securityfs (rw)
udev on /dev type devtmpfs (rw,mode=0755)
devpts on /dev/pts type devpts (rw,noexec,nosuid,gid=5,mode=0620)
tmpfs on /run type tmpfs (rw,noexec,nosuid,size=10%,mode=0755)
none on /run/lock type tmpfs (rw,noexec,nosuid,nodev,size=5242880)
none on /run/shm type tmpfs (rw,nosuid,nodev)
none on /run/user type tmpfs (rw,noexec,nosuid,nodev,size=104857600,mode=0755)
none on /sys/fs/pstore type pstore (rw)
rpc_pipefs on /run/rpc_pipefs type rpc_pipefs (rw)
binfmt_misc on /proc/sys/fs/binfmt_misc type binfmt_misc (rw,noexec,nosuid,nodev)
systemd on /sys/fs/cgroup/systemd type cgroup (rw,noexec,nosuid,nodev,none,name=systemd)
nfsd on /proc/fs/nfsd type nfsd (rw)
gvfsd-fuse on /run/user/1000/gvfs type fuse.gvfsd-fuse (rw,nosuid,nodev,user=conrad)
/dev/sdb1 on /media/conrad/boot type vfat (rw,nosuid,nodev,uid=1000,gid=1000,shortname=mixed,dmask=0077,utf8=1,showexec,flush,uhelper=udisks2)
-
We use mount to check explicitly what’s there in the system
-
Our partition has been mounted at /media/conrad/boot
We will finally have to copy the files from the lab data folder to this partition and un mount the device.
conrad@conrad-HP-Pavilion-dm3-Notebook-PC:~/fe-kernel-training/linux-kernel-labs/bootloader/beaglebone-black$ cp am335x-boneblack.dtb MLO MBR u-boot.img MLO.final u-boot.img.final uEnv.txt uImage /media/conrad/boot/
conrad@conrad-HP-Pavilion-dm3-Notebook-PC:~/fe-kernel-training/linux-kernel-labs/bootloader/beaglebone-black$ umount /media/conrad/boot
-
Copying the necessary files from the Free Electrons lab data folder which we unpacked earlier
-
Unmounting the mounted partition
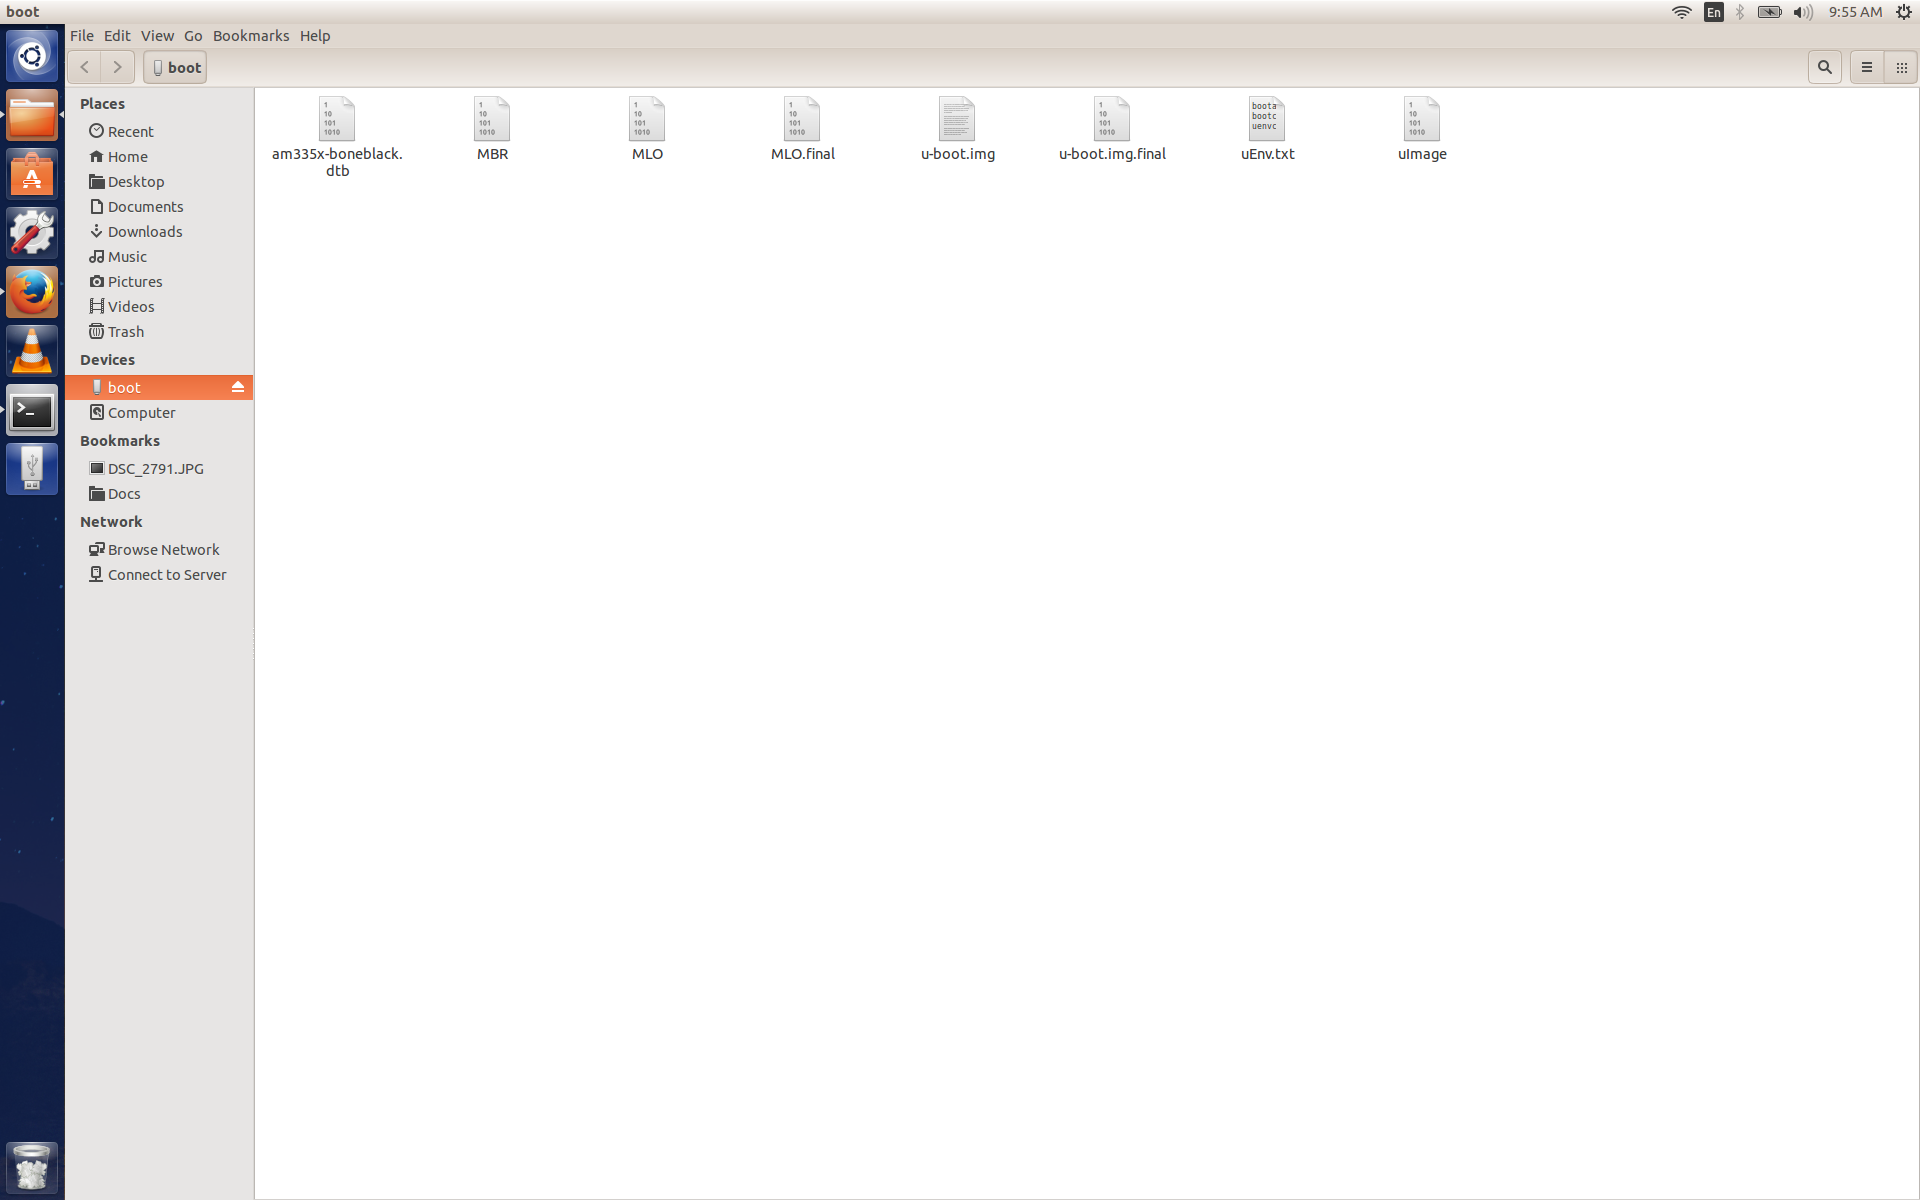
We can now safely eject or remove the micro-SD card from the work station.
Source For Binaries
The binaries that are copied can be built from source however we’re not going to do that for now. Instructions to build them are given in the linux-kernel-labs/bootloader/beaglebone-black/README.txt of the lab data downloaded.
Reflashing The eMMC With The micro-SD Card
The bootable micro-SD card will now be used to reflash the eMMC device to get it ready for the lab session. The process is short but the steps maybe a bit confusing so follow the pictures to nail it down correctly.
Insert The micro-SD Card
This step is self-explanatory. The bootable micro-SD card has to be inserted into the micro-SD card slot on the BeagleBone Black board. The micro-SD card has 8 contacts with a golden hue which are at the bottom of the card. The picture below shows the top of the micro-SD card which is placed in the slot. All that is left is to press it into the slot until a click is felt.
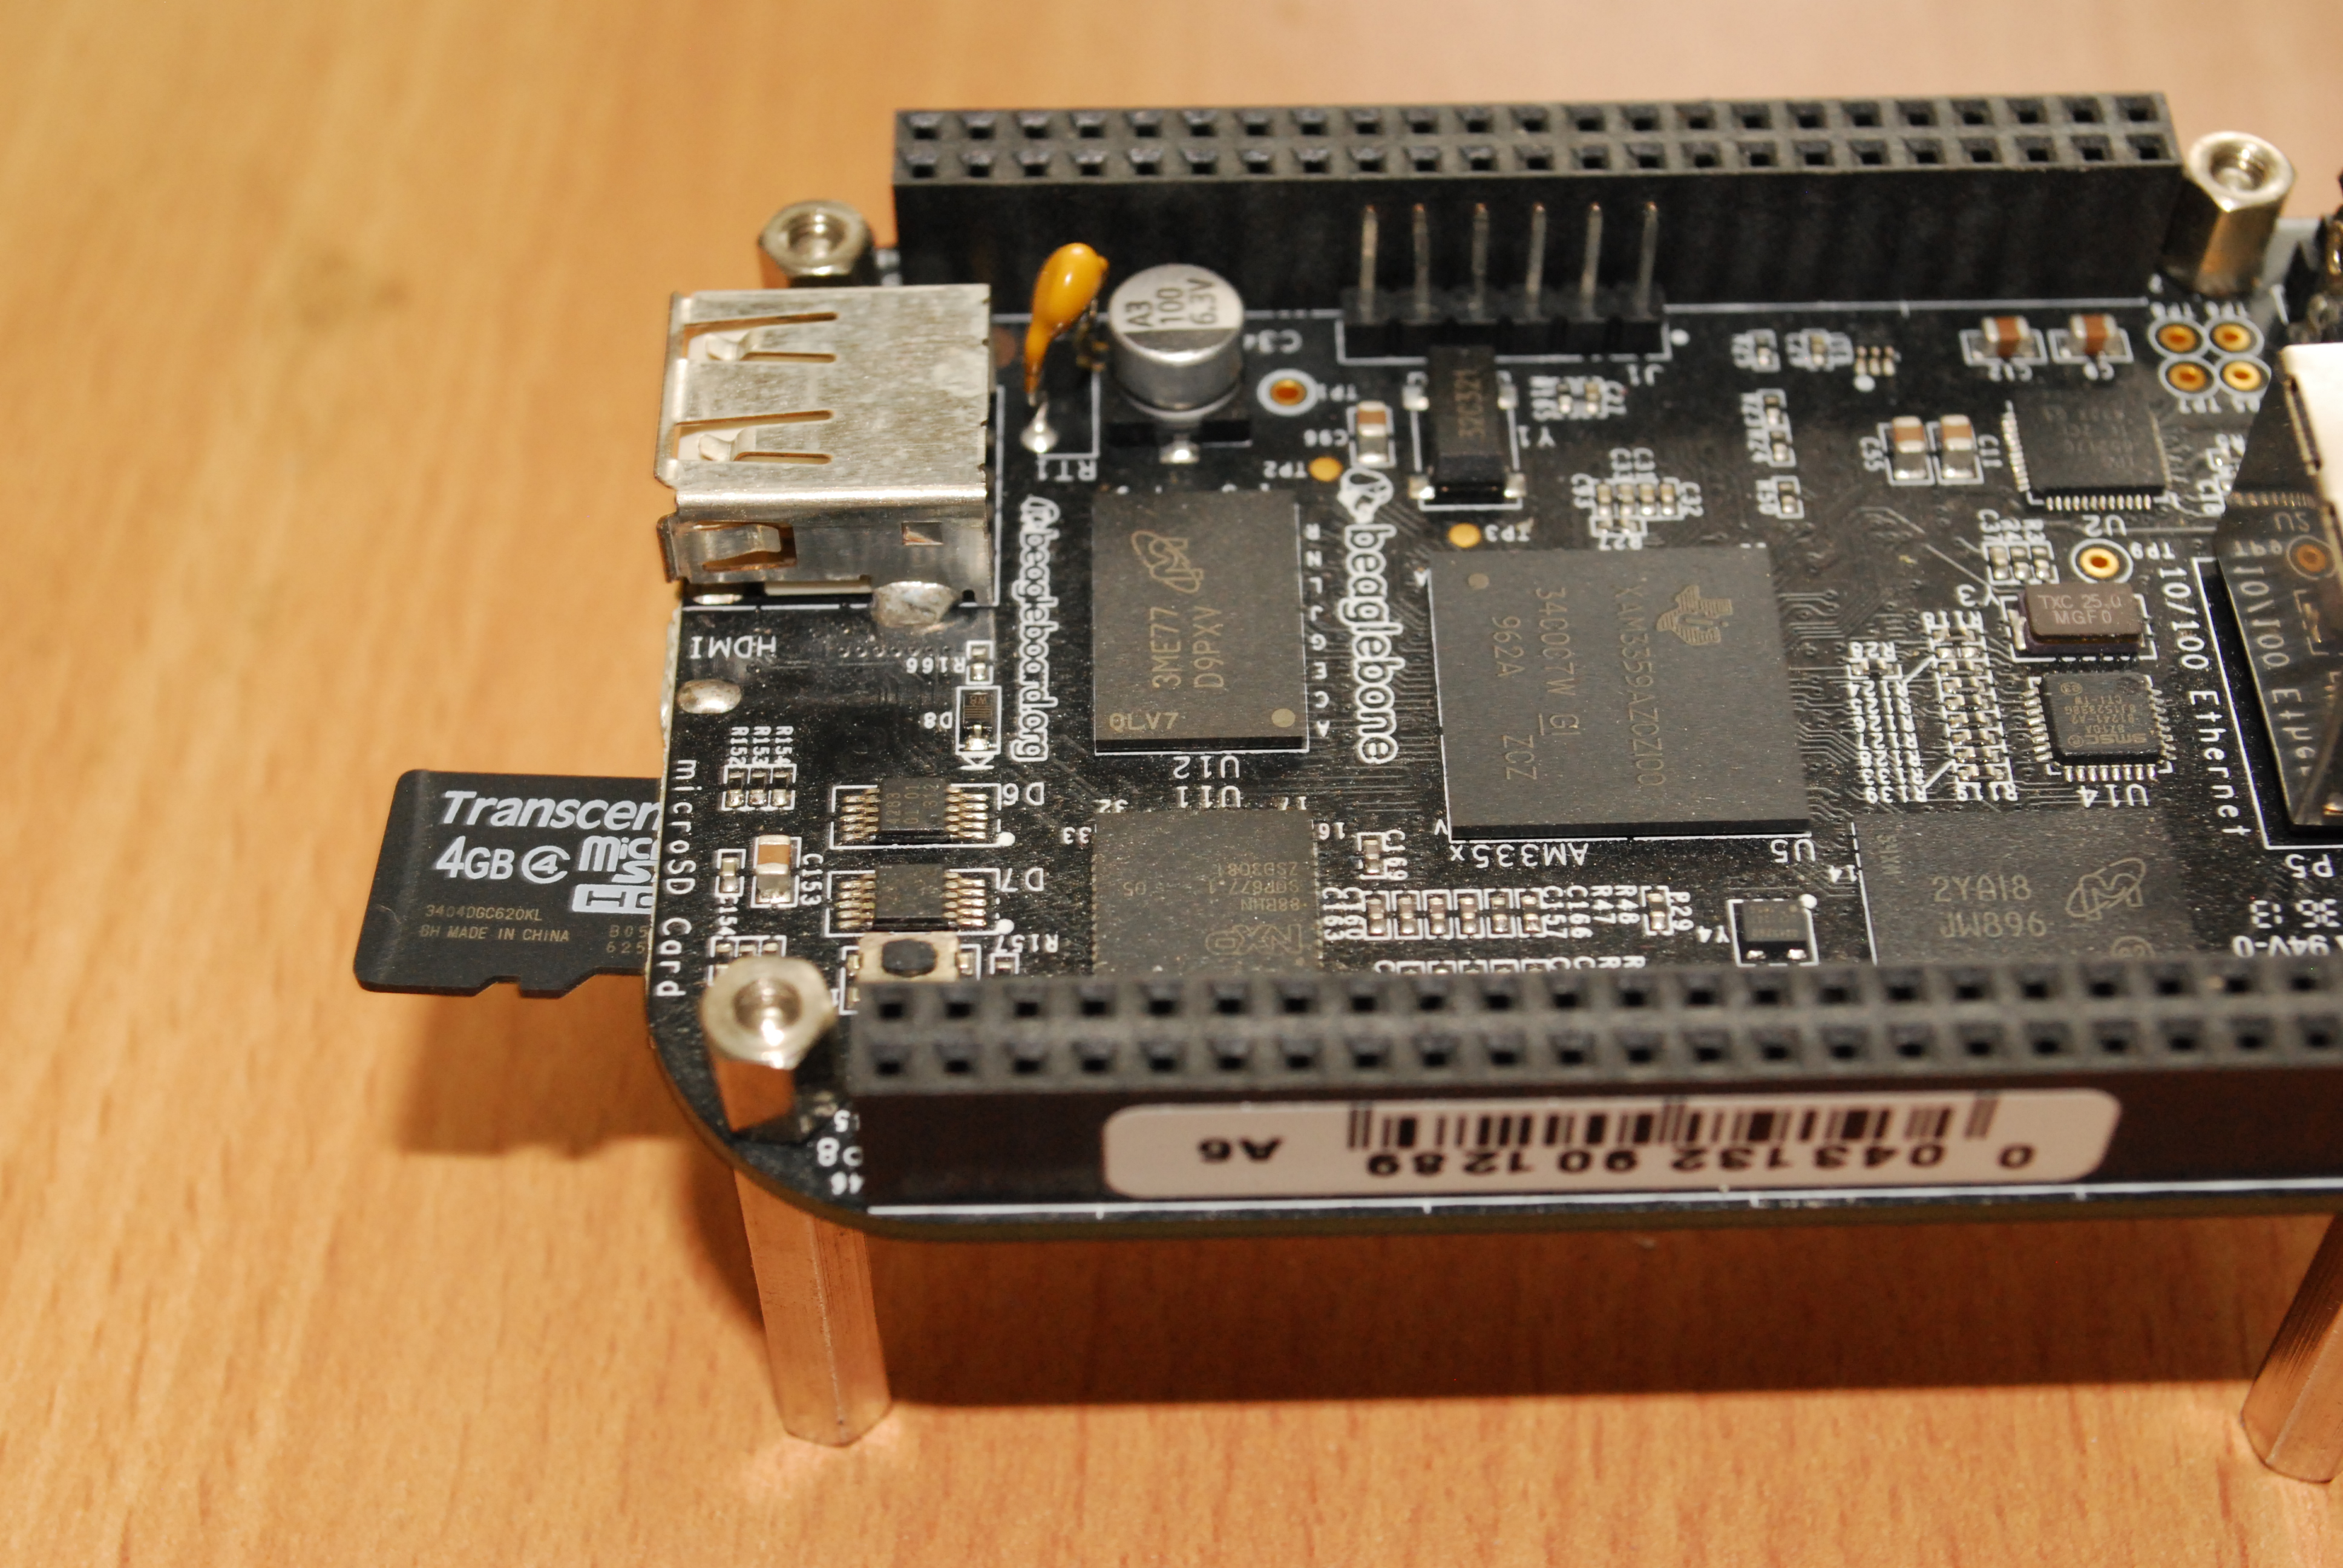
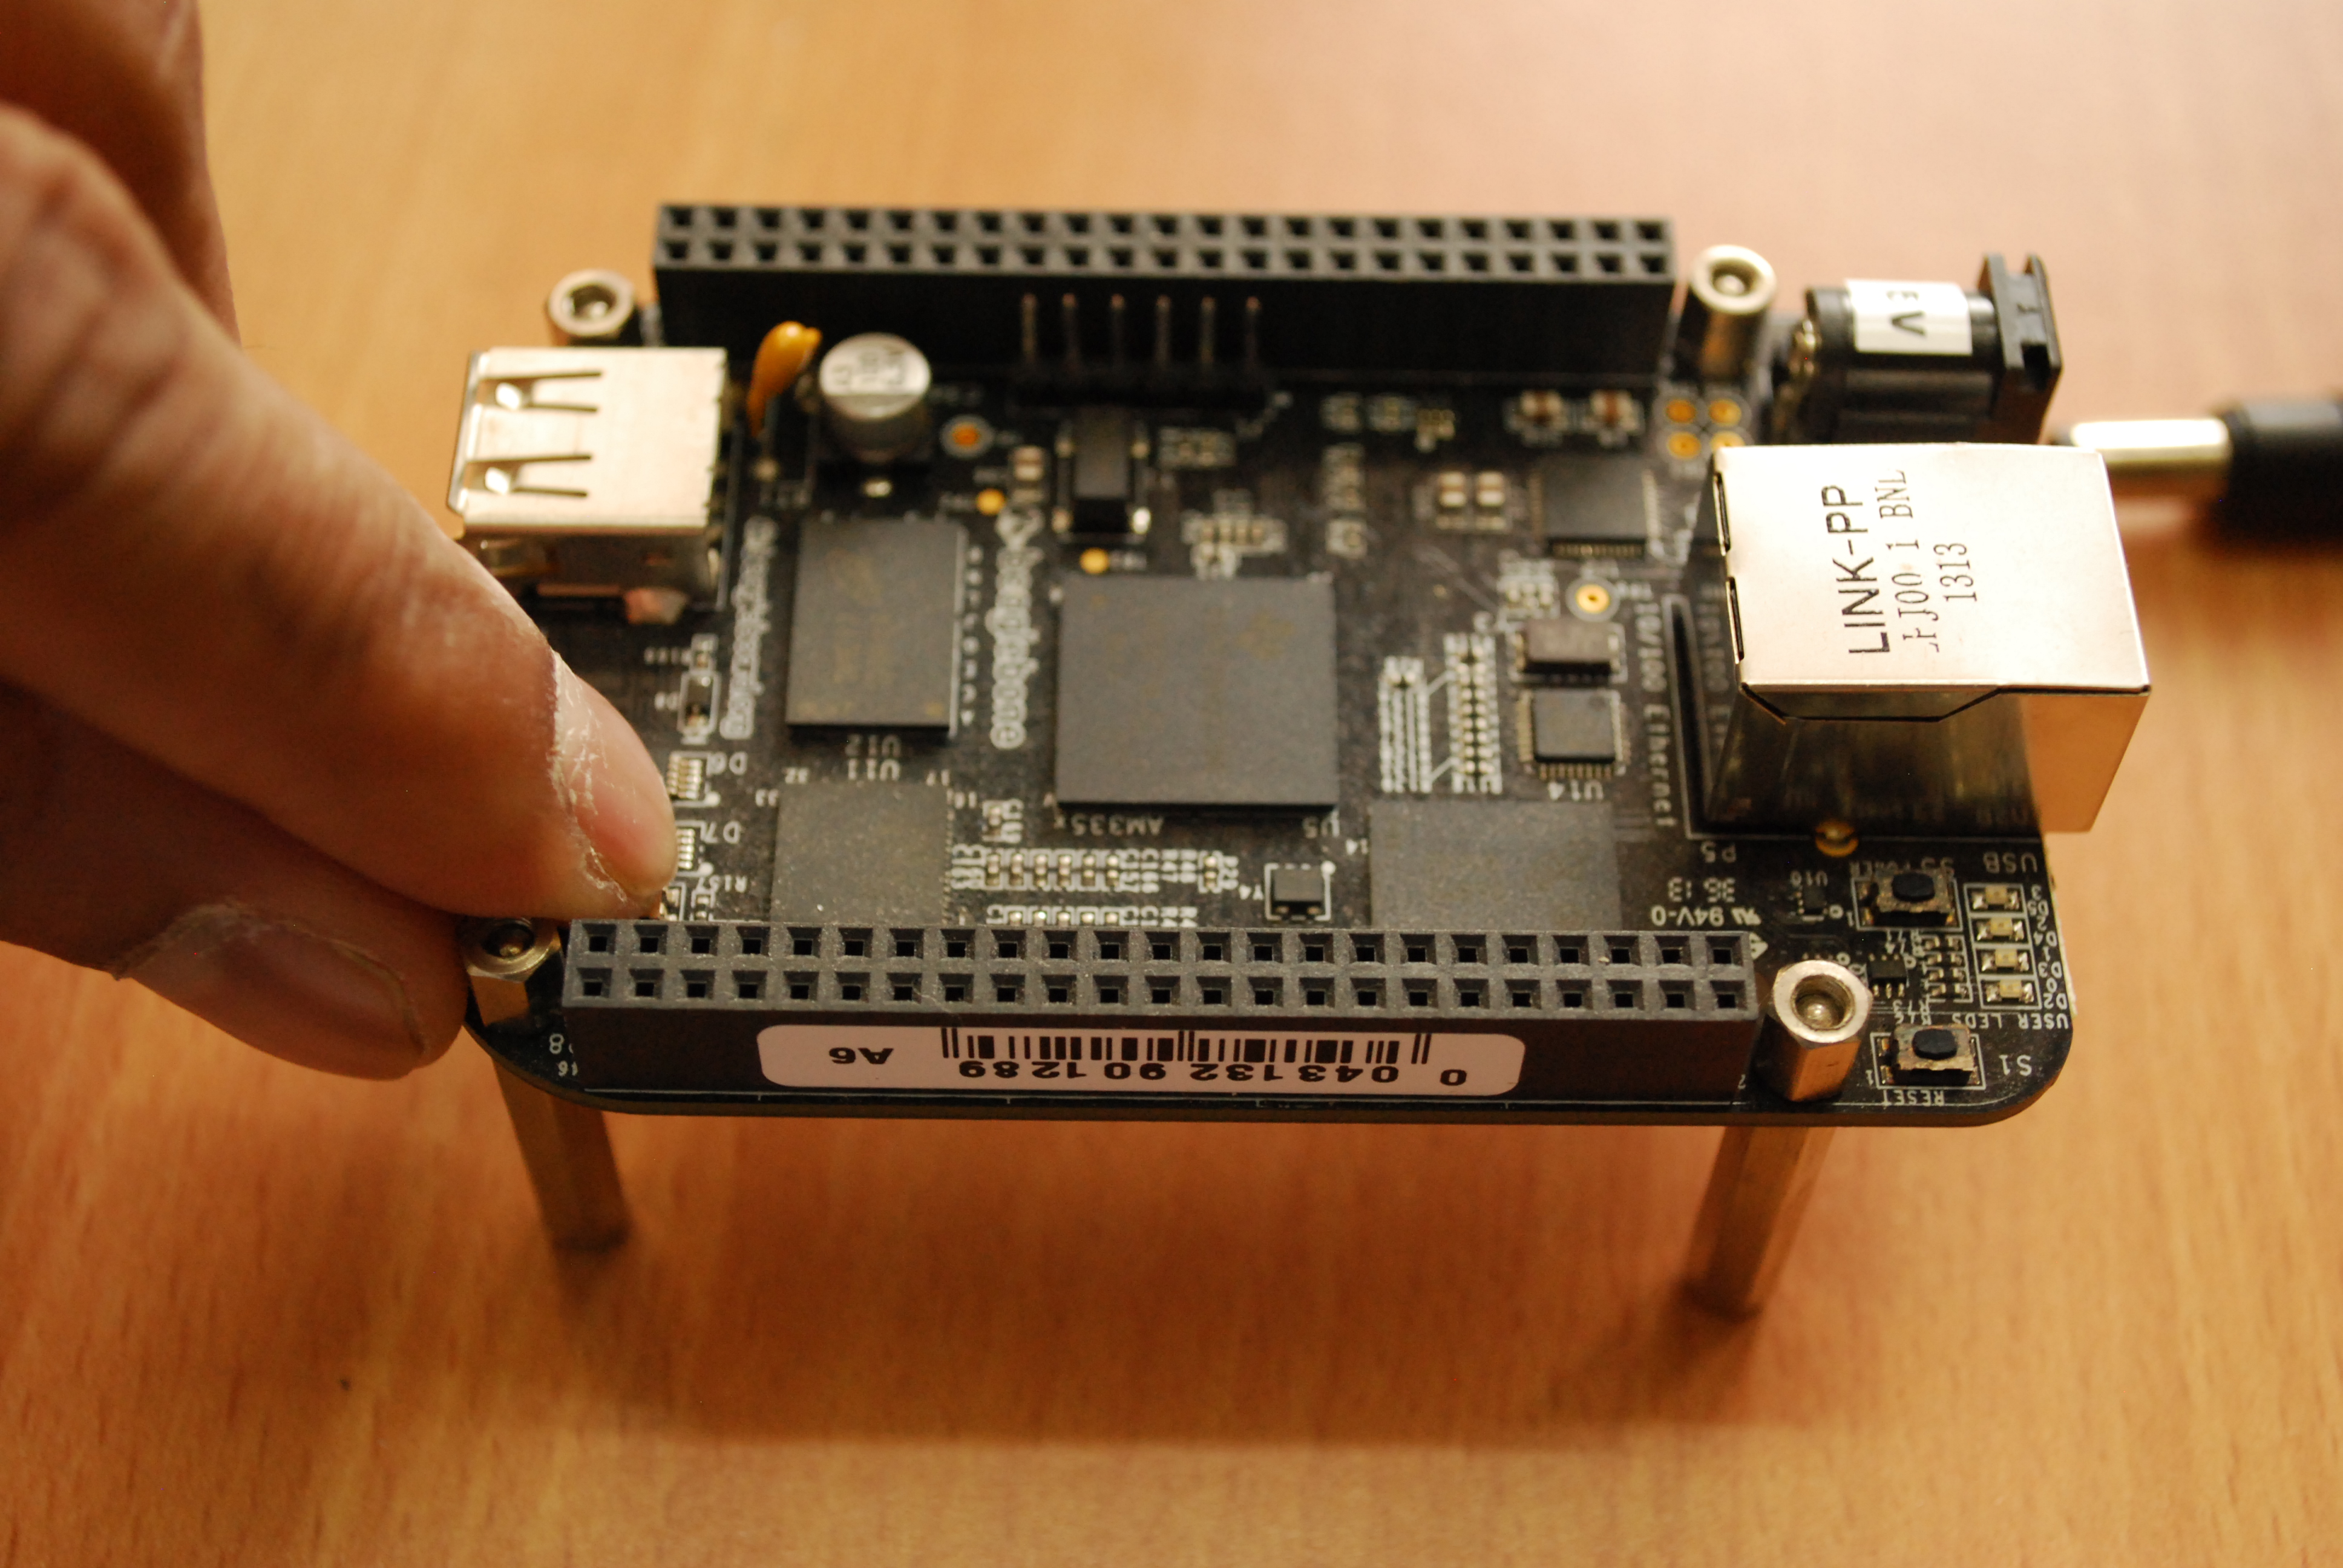
Pressing The Boot Switch
After inserting the micro-SD card we have to press the boot switch which is located near the micro-SD card slot as shown in the picture below. Also note that the micro-SD card has been inserted properly into its slot.
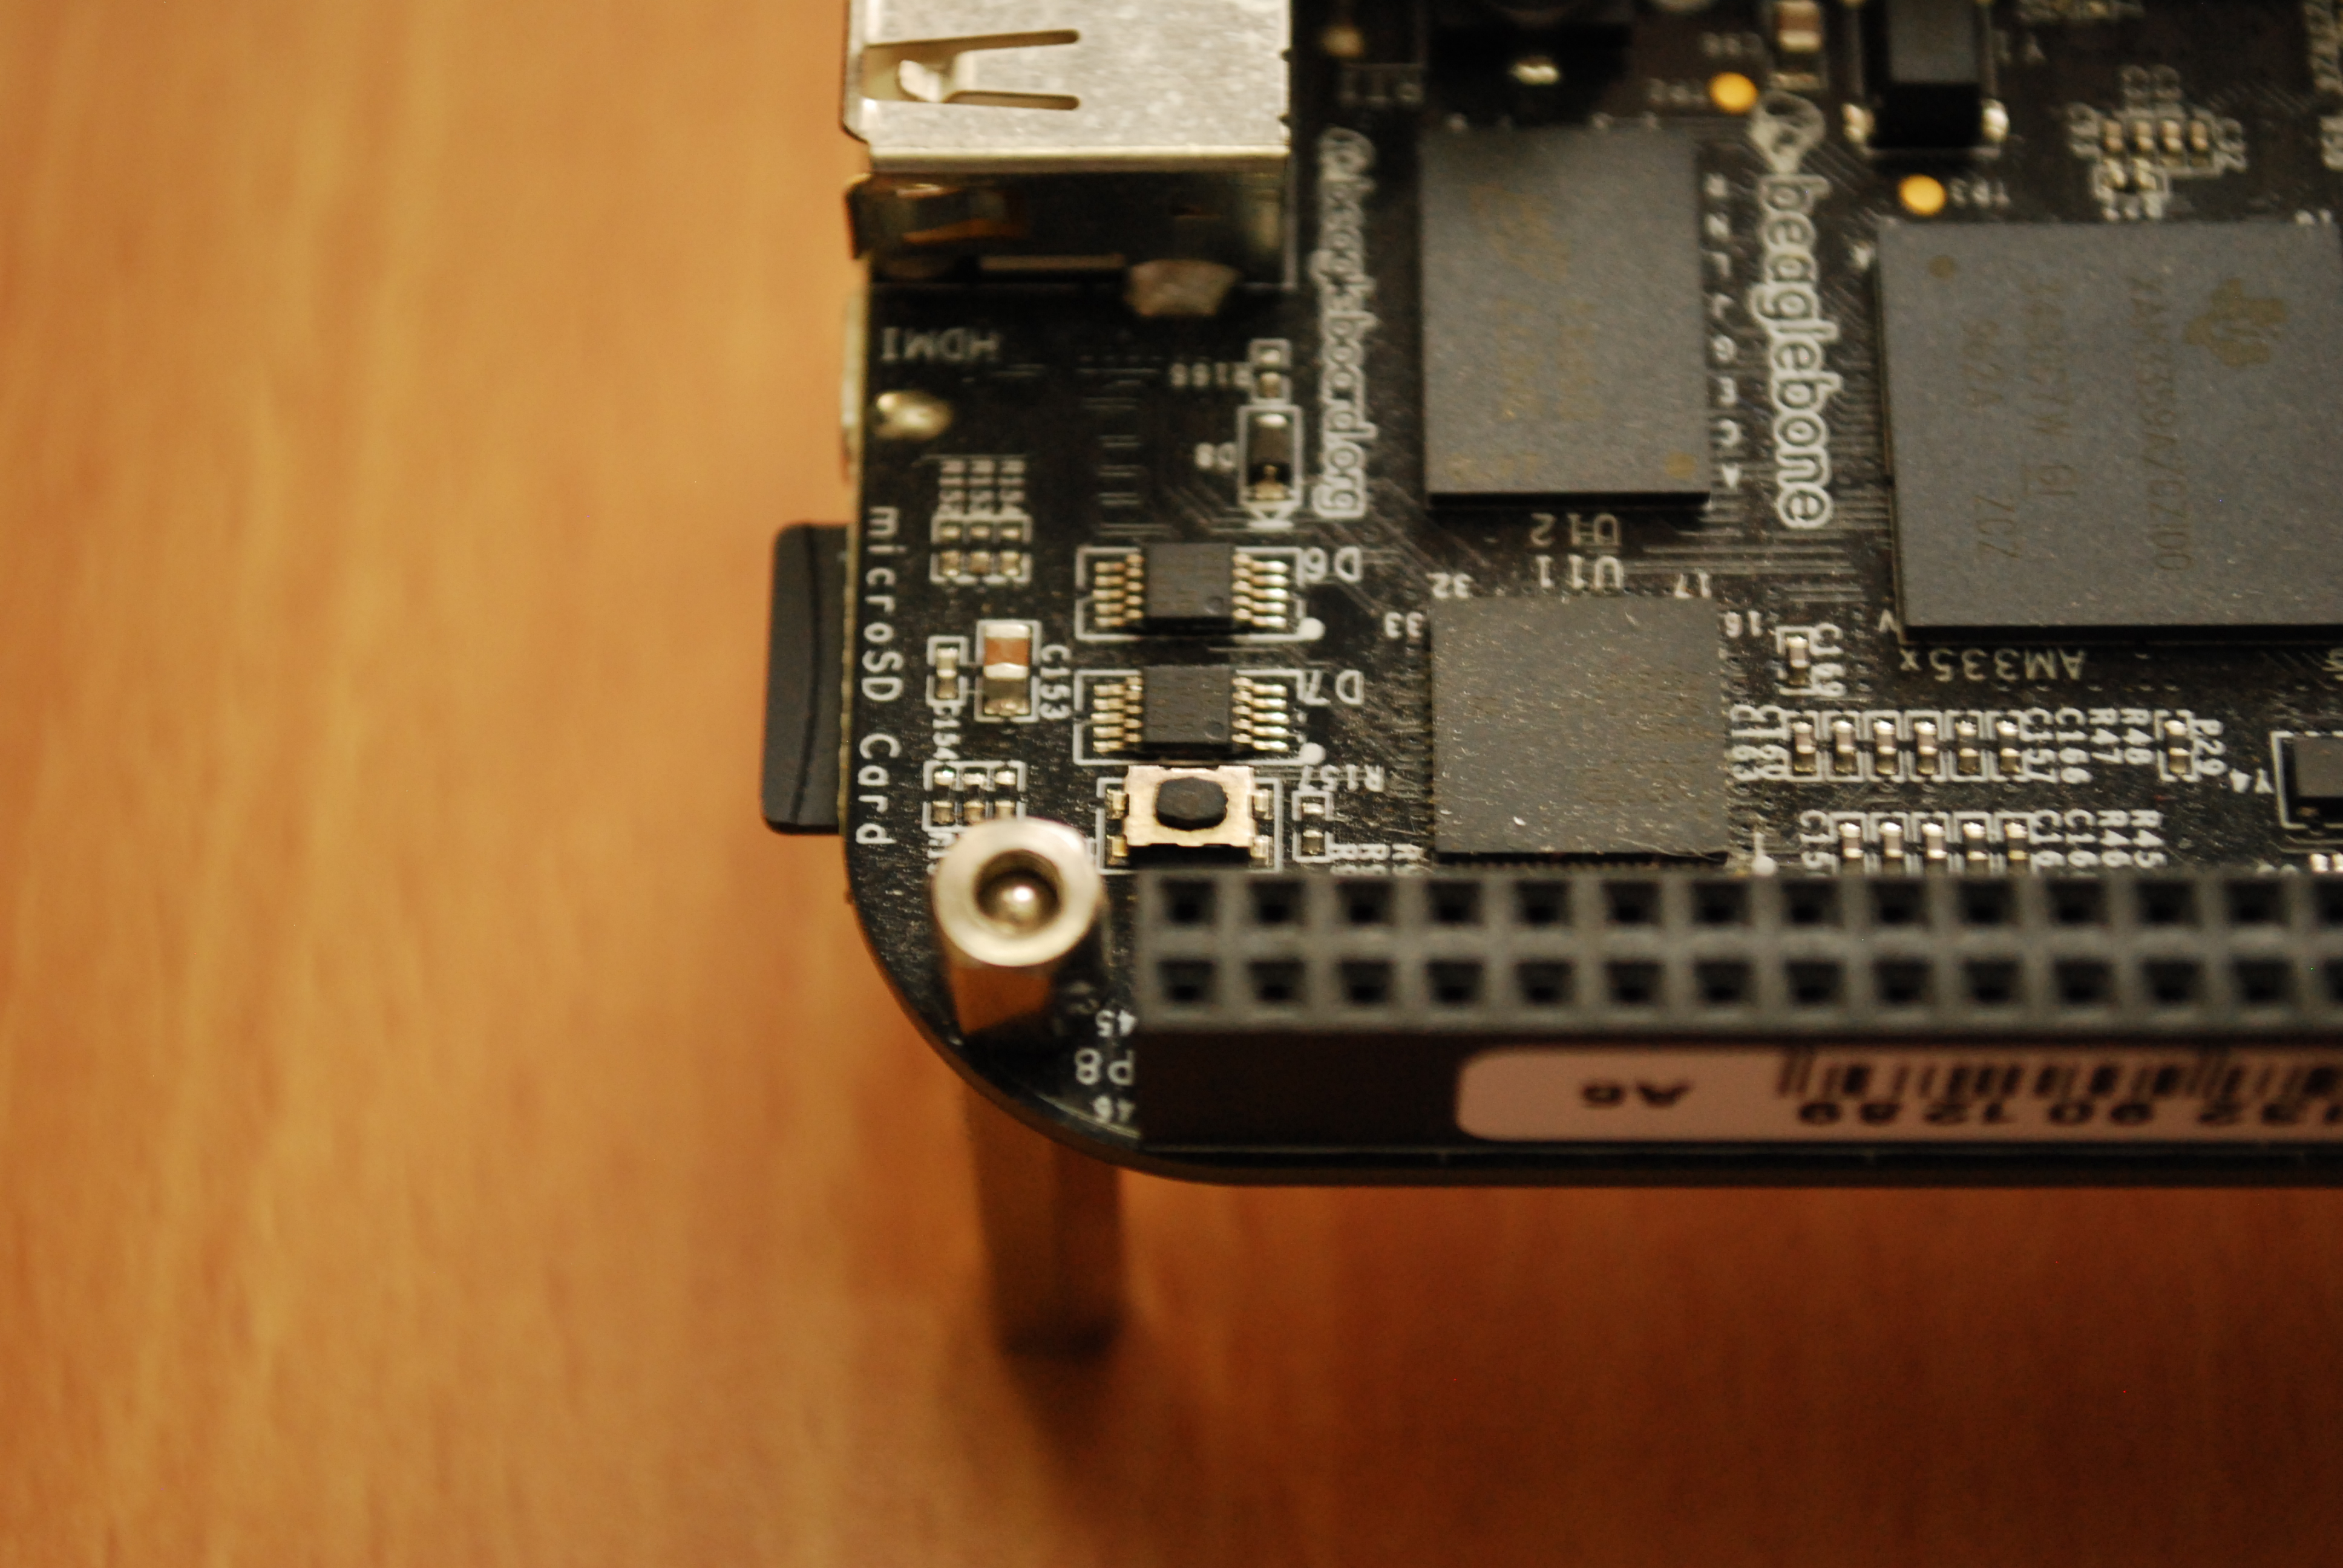
Applying Power
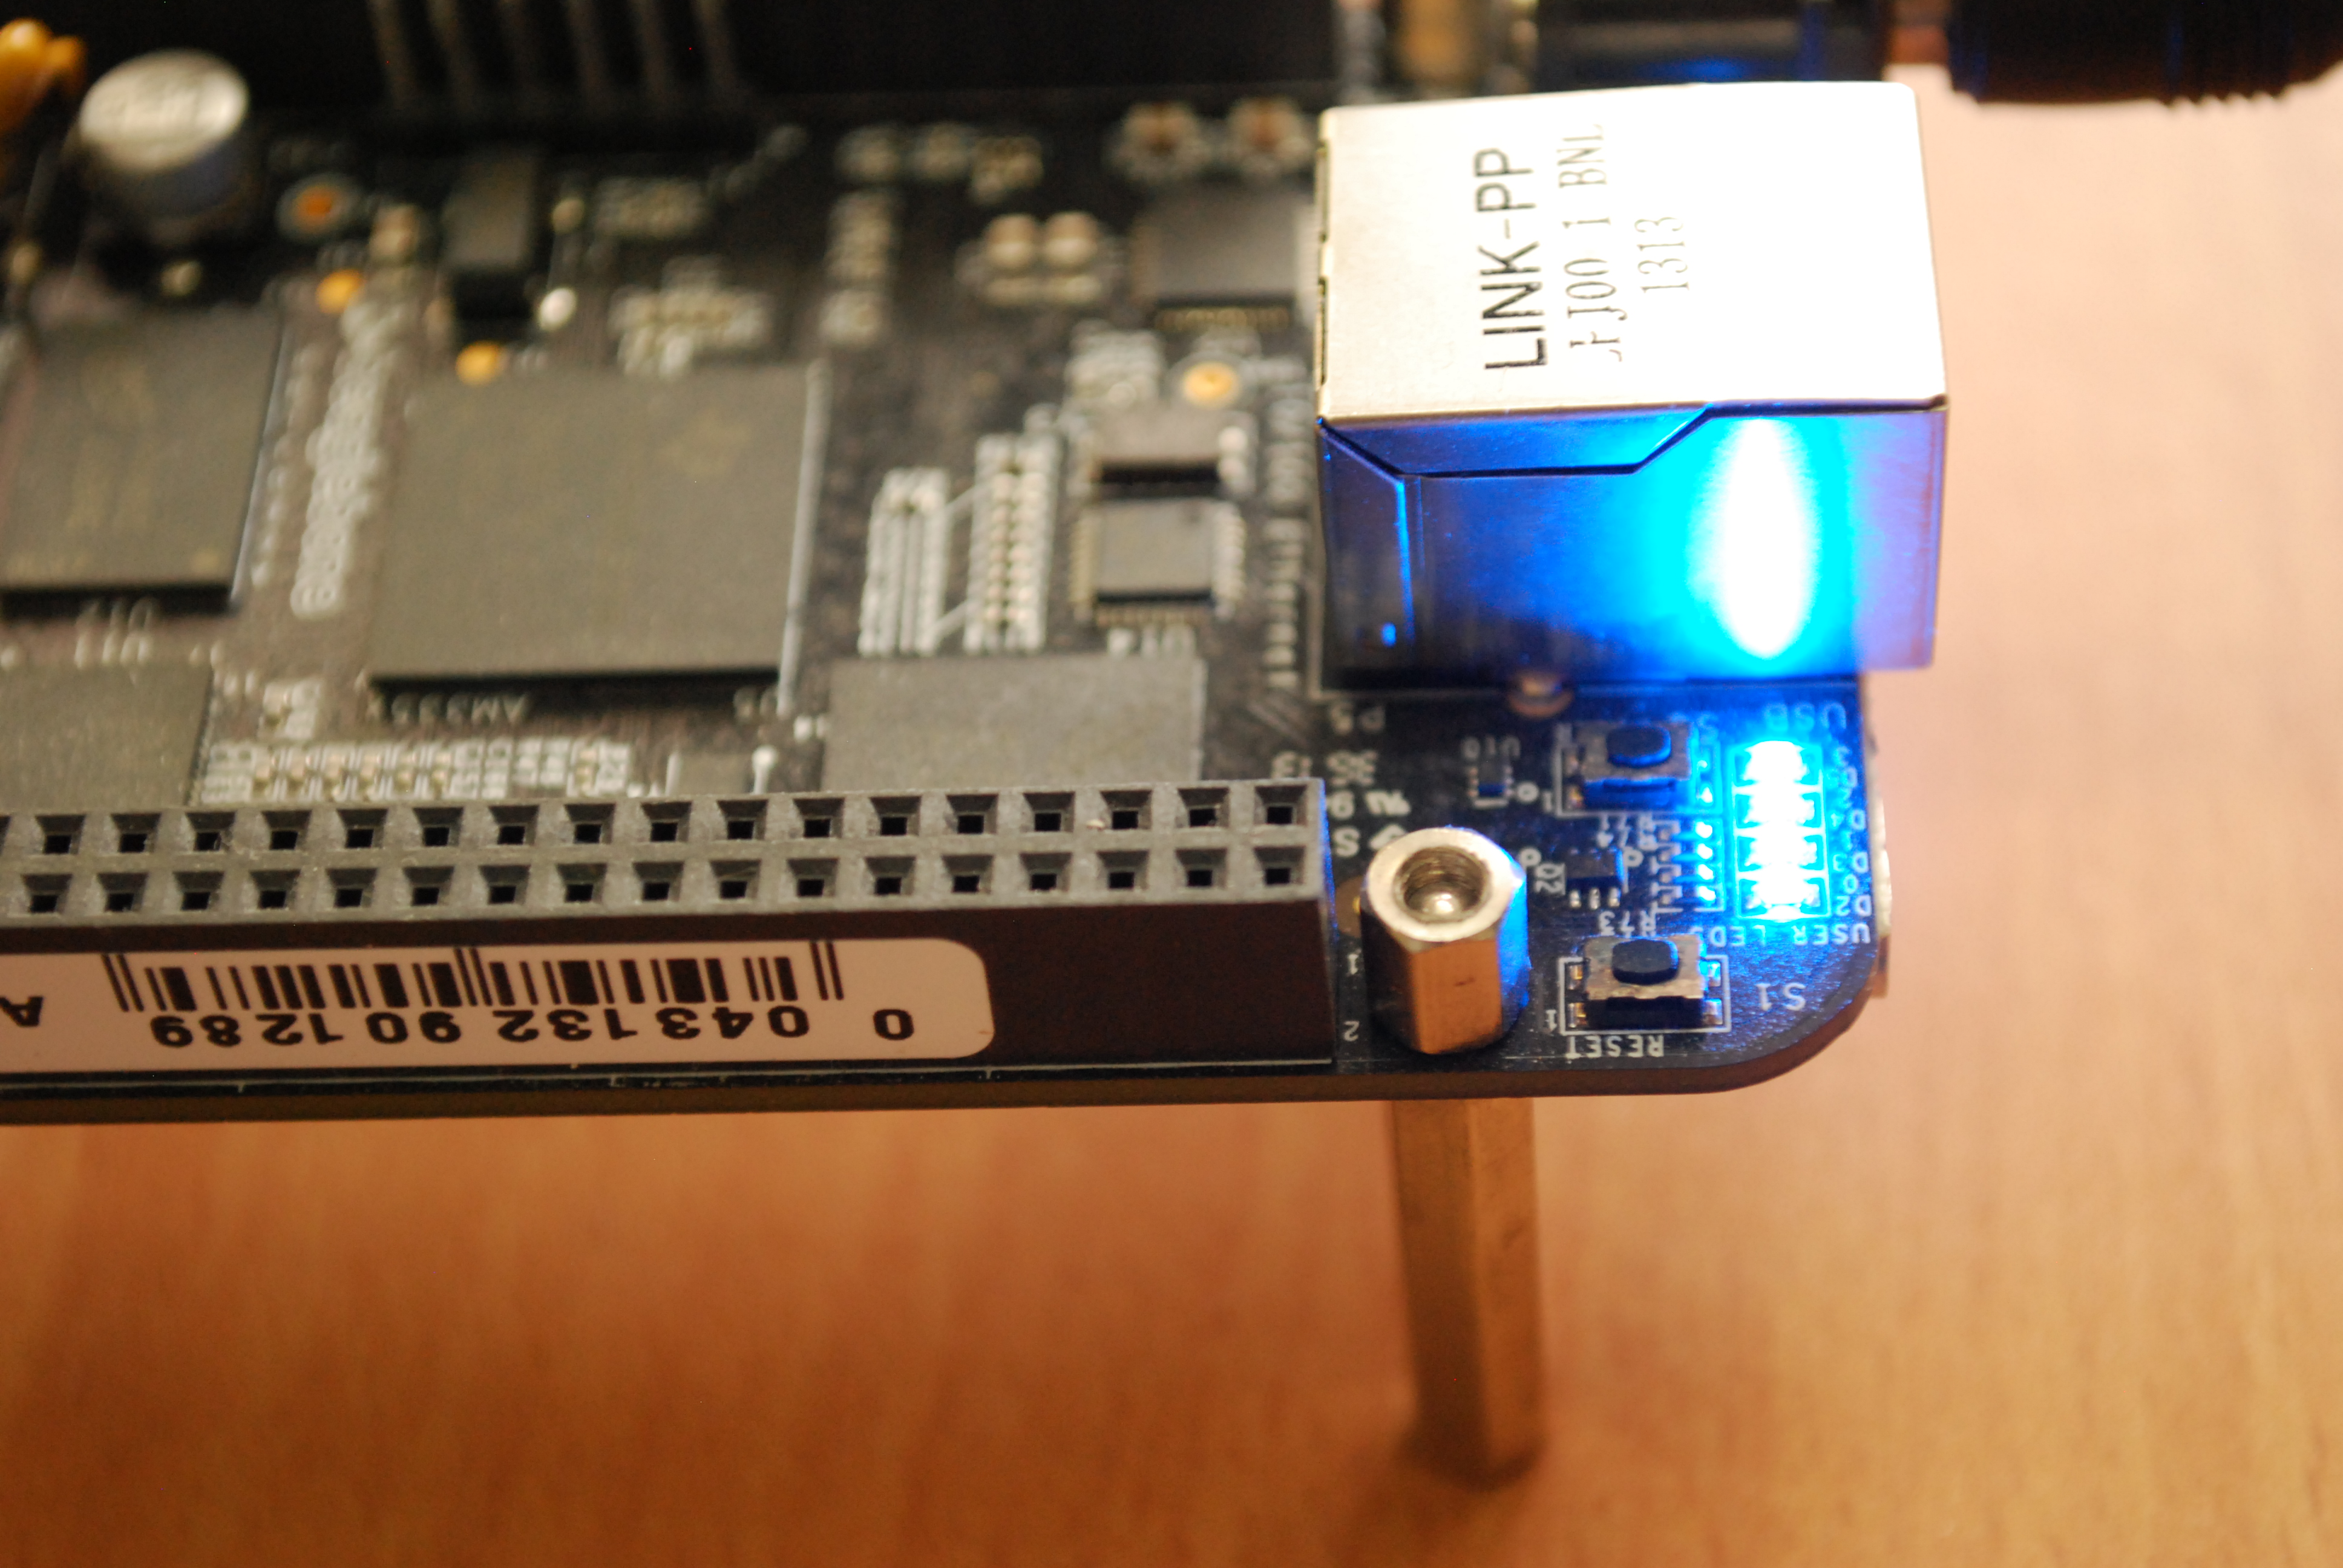
The last step is to apply power i.e. either through the USB connector or power connector. Make sure your power supply is built for 5V 1A output before inserting it into the power supply connector. You can depress the boot switch after 1 second after applying power. On applying power the leds will start blinking. The entire reflashing process takes about 20 to 30 seconds. At the end of the process all 4 leds will be on as shown:
Troubleshooting
In case there is an issue with the process and the 4 leds do not light up after a minute then try again. If it still fails then go through the steps given in the lab data folder i.e. linux-kernel-labs/bootloader/beaglebone-black/README.txt. The procedure given here has been taken from that document. There’s a section on "Fixing issues (if any)" which might help.
Setting Up Serial Communication With The Board
The debug serial header connector has been descibed in the Getting Comfortable With The Board section and should be easy to locate with the labelled image in that section. It is a 1x6 header. Serial capability is provided by UART0 of the processor. It would be good to read the section on the debug serial header given in the Technical Reference Manual.
The only two signals available are TX and RX on the connector and the
levels on these signals is 3.3V. A FTDI USB to serial cable is
recommended as this serves to provide a serial port to PCs/Laptops
making use of the available USB port. The FTDI chip translates the USB
data to serial and vice versa. There are several provided in the
elinux.org website link at:
http://elinux.org/Beagleboard:BeagleBone_Black_Serial.
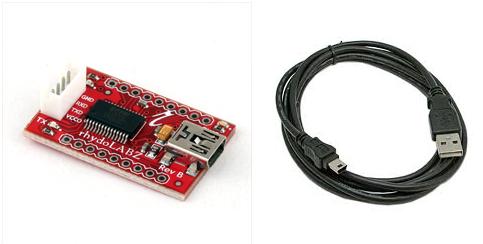
Rhydolabz FTDI USB To Serial Breakout Board
In this journal a breakout board was purchased from
Rhydolabz. There are several
boards available but one without a 1x6 connector was chosen. All the
signals of the FTDI can be exposed by soldering a bergstrip pin-out for
advanced users but for our use case GND, RX and TX are provided with an
easy to access 4 pin connector. The board is also capable of outputing
both 5V and 3.3V. This is controlled by soldering the 3.3V leads at the
back of the breakout board. The board can be picked up from:
http://www.rhydolabz.com/index.php?main_page=product_info&cPath=80&products_id=1090
Connecting The Breakout Board
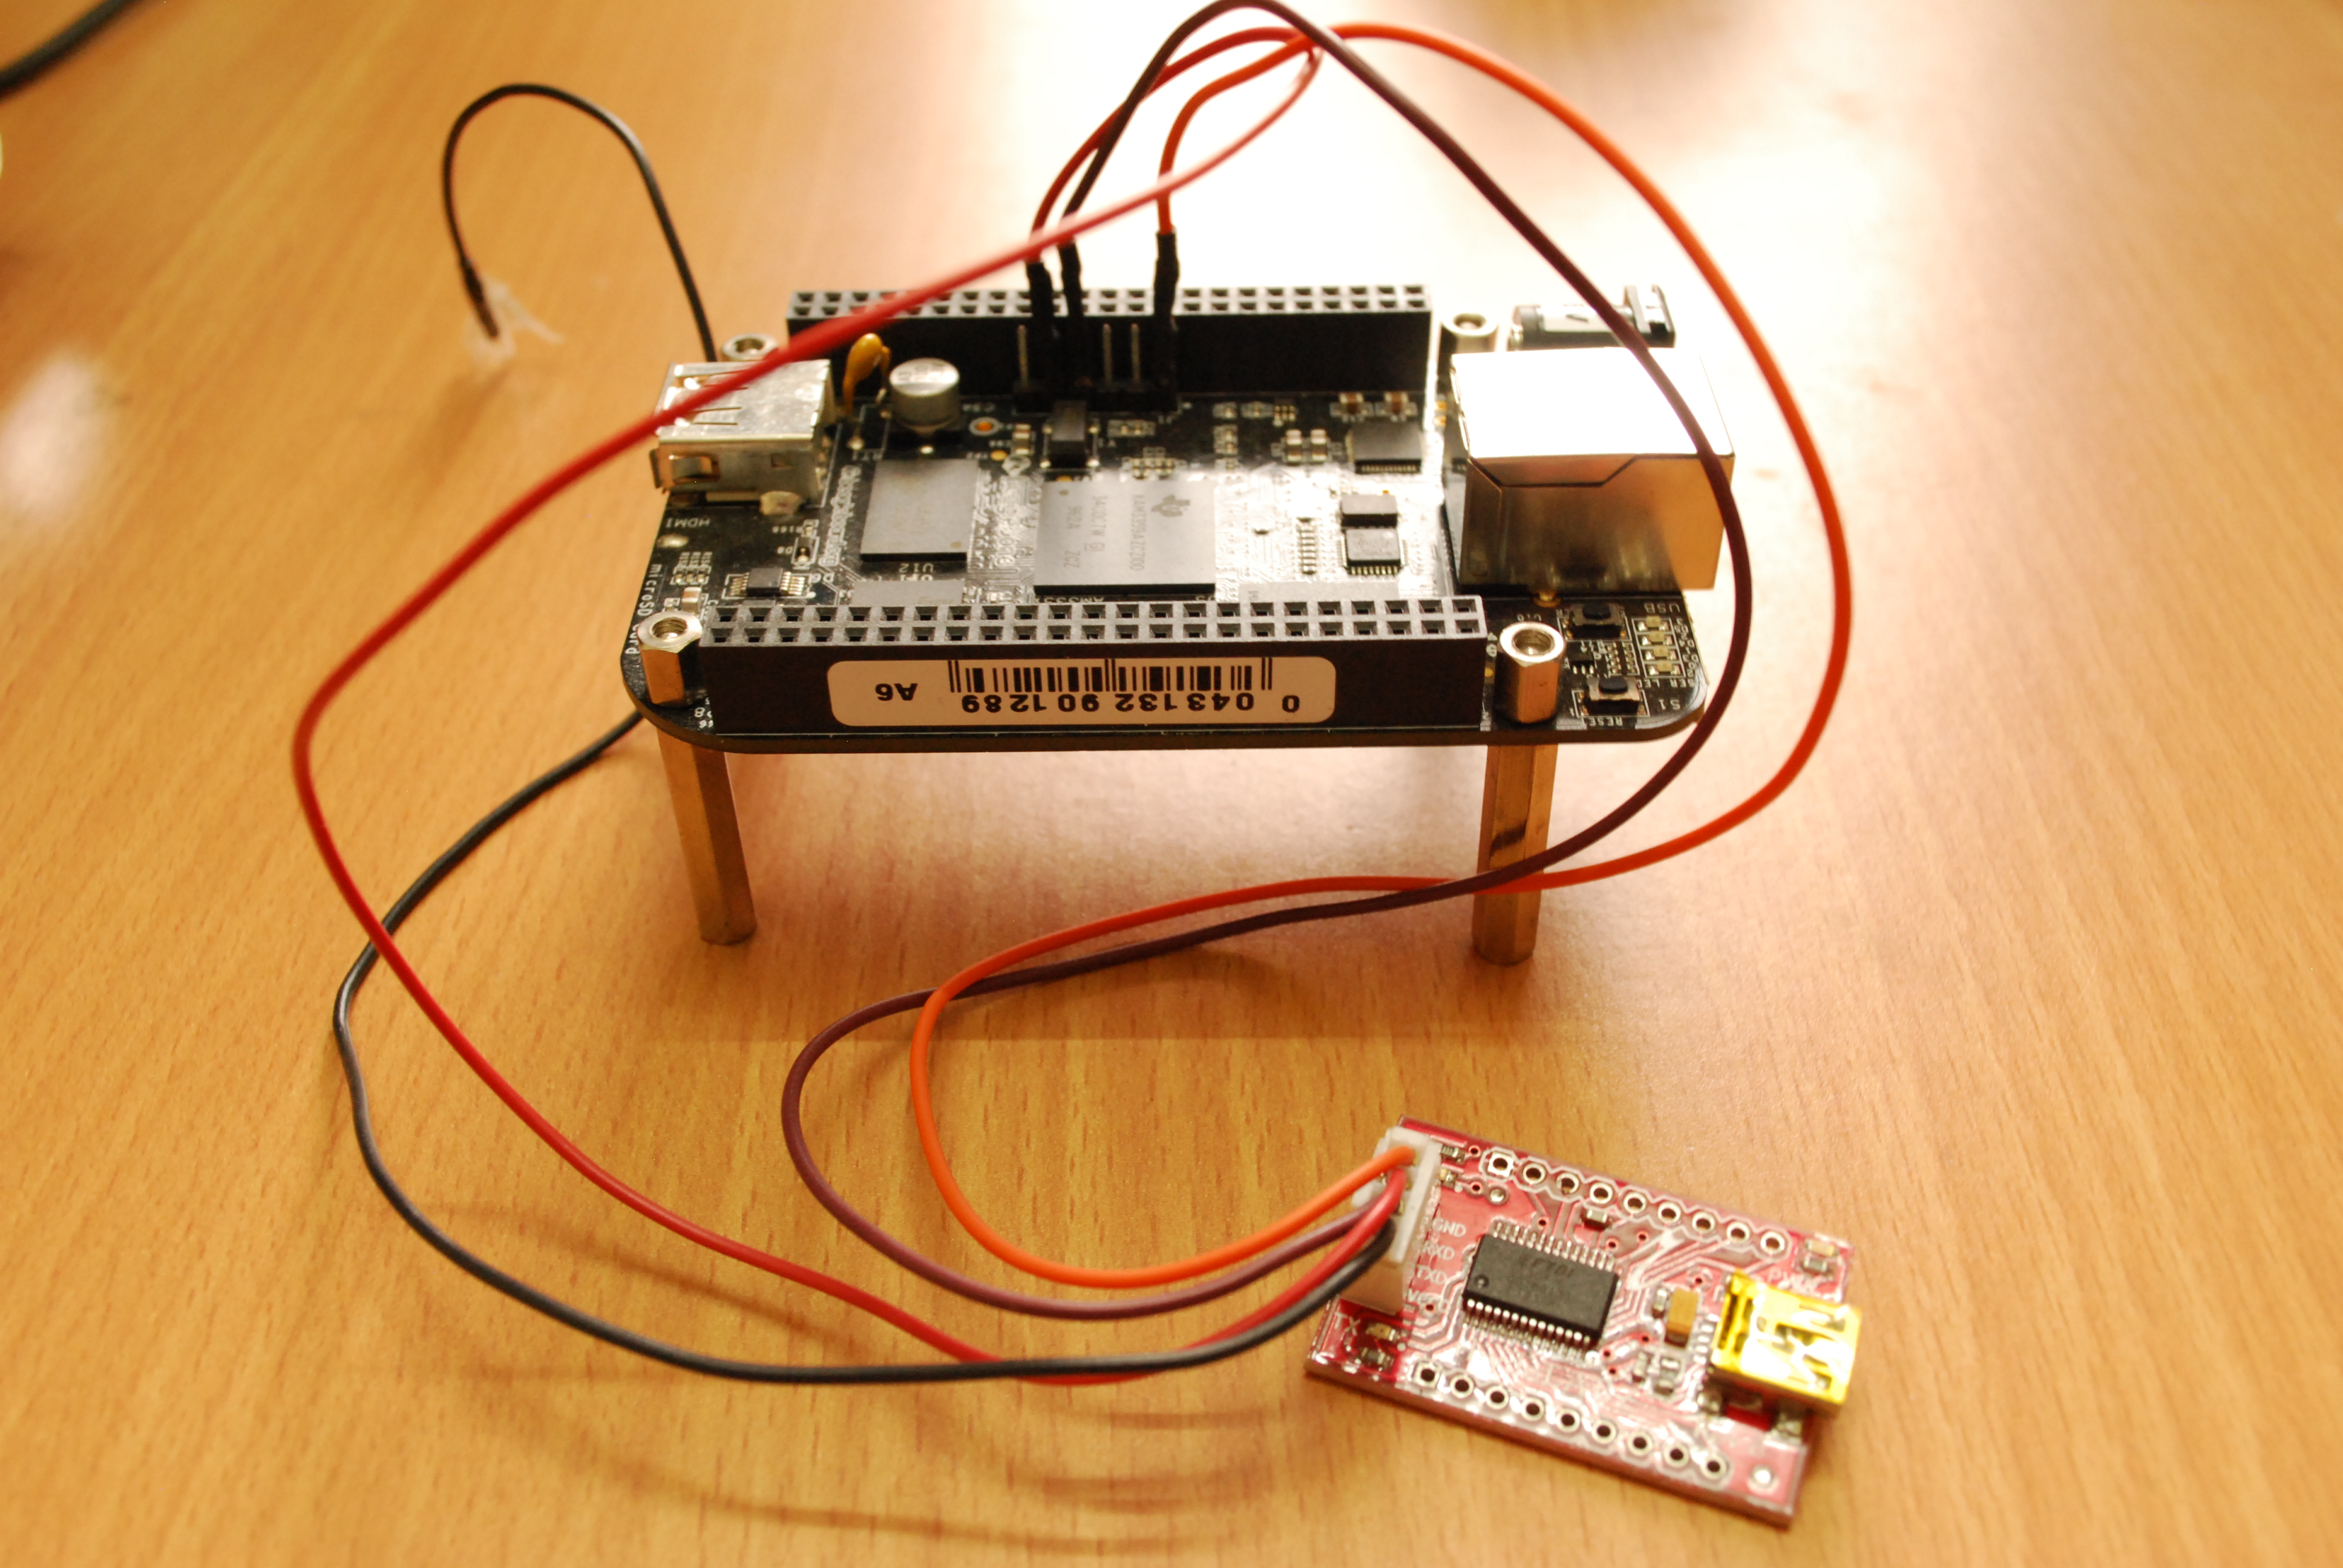
The FTDI breakout board comes with a Grove 4 pin Female jumper to 4 pin conversion cable. Each of the cables can be connected to female connectors to be slotted into the serial debug header pins. We need only the GND, RXD and TXD signals from the board. Before connecting the board signals make sure the 3.3V leads are shorted at the bottom of the board. The board from Rhydolabz comes with the 5V lead shorted and must be converted for the Beagle Bone Black.
-
Connect the GND cable of the FTDI breakout board to pin 1 of the serial header.
-
Next connect RXD of the FTDI breakout board to pin 5 which is the TX of the serial debug header.
-
Finally connect TXD of the board to pin 4 which is the RX of the serial debug header.
It is always good to understand the specifications of the connectors whenever interfacing electronic circuits. In this case we know that the BeagleBone Black takes 3.3V from the System Reference Manual. If a different cable is to be used check and see if its connector is compatible with the header. The figure below shows the setup where GND is the orange cable on the right, next RXD is the brown cable followed by the TXD which is the red cable.
Once the connections are in place between the BeagleBone Black serial debug header and the FTDI cable or breakout board then connect the USB cable to the breakout board. The picture shows that the board lights up.
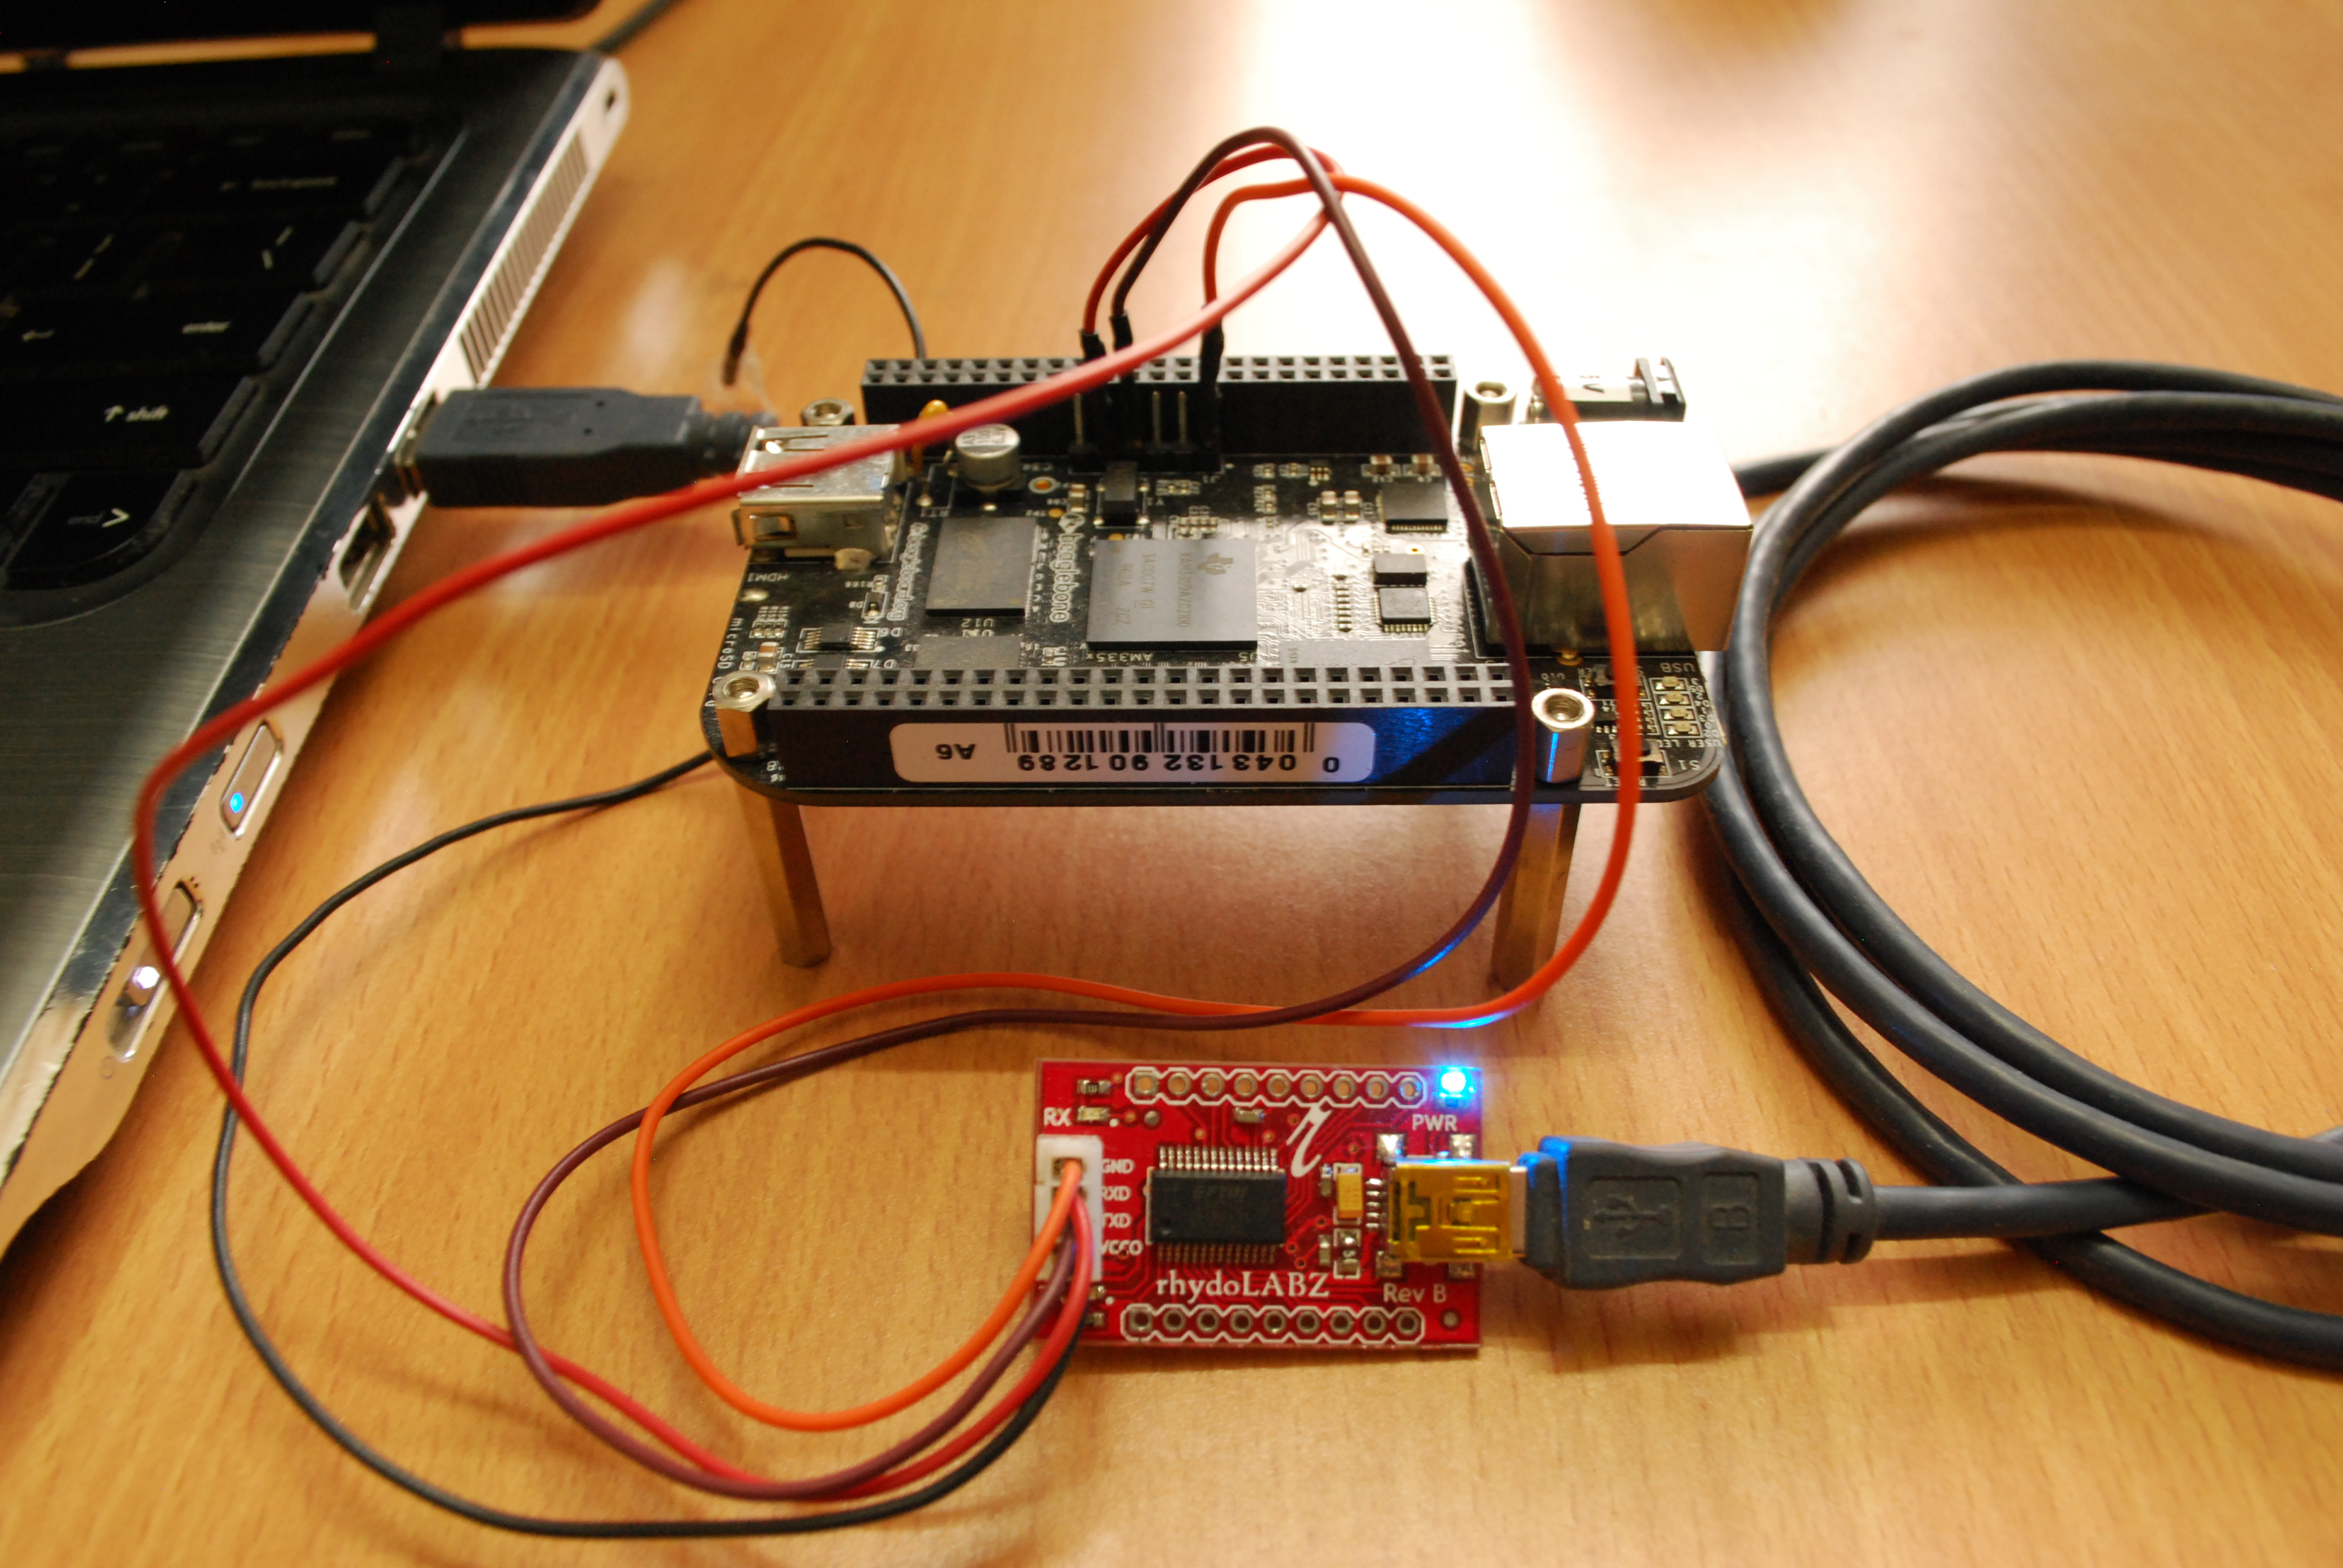
The linux kernel running on the workstation should register the new USB device connected. We can probe the kernel logs to see if there is any activity using dmesg.
conrad@conrad-HP-Pavilion-dm3-Notebook-PC:~/fe-kernel-training/linux-kernel-labs$ dmesg
.
.
.
[60269.932101] usb 6-1: new full-speed USB device number 2 using uhci_hcd
[60270.125794] usb 6-1: New USB device found, idVendor=0403, idProduct=6001
[60270.125804] usb 6-1: New USB device strings: Mfr=1, Product=2, SerialNumber=3
[60270.125812] usb 6-1: Product: FT232R USB UART
[60270.125819] usb 6-1: Manufacturer: FTDI
[60270.125825] usb 6-1: SerialNumber: A602I2CN
[60270.212583] usbcore: registered new interface driver usbserial
[60270.212599] usbcore: registered new interface driver usbserial_generic
[60270.212611] usbserial: USB Serial support registered for generic
[60270.230288] usbcore: registered new interface driver ftdi_sio
[60270.230305] usbserial: USB Serial support registered for FTDI USB Serial Device
[60270.230972] ftdi_sio 6-1:1.0: FTDI USB Serial Device converter detected
[60270.231033] usb 6-1: Detected FT232RL
[60270.231036] usb 6-1: Number of endpoints 2
[60270.231039] usb 6-1: Endpoint 1 MaxPacketSize 64
[60270.231041] usb 6-1: Endpoint 2 MaxPacketSize 64
[60270.231043] usb 6-1: Setting MaxPacketSize 64
[60270.233850] usb 6-1: FTDI USB Serial Device converter now attached to ttyUSB0
conrad@conrad-HP-Pavilion-dm3-Notebook-PC:~/fe-kernel-training/linux-kernel-labs$ ls -l /dev/ttyUSB0
crw-rw---- 1 root dialout 188, 0 Mar 25 22:28 /dev/ttyUSB0
-
The device has been recognized as a tty device and is named ttyUSB0
-
A device node /dev/ttyUSB0 is created in the root filesystem
Accessing The Serial Port With Picocom
We can now access the serial port with a terminal application like picocom. This can be installed as follows:
conrad@conrad-HP-Pavilion-dm3-Notebook-PC:~/fe-kernel-training/linux-kernel-labs$ sudo apt-get install picocom
conrad@conrad-HP-Pavilion-dm3-Notebook-PC:~/fe-kernel-training/linux-kernel-labs$ sudo adduser $USER dialout
-
Installing picocom with apt-get
-
Adding $USER to the dialout group to use picocom without sudo. $USER is set to the username i.e conrad in the above case.
We can now start picocom and connect it to the /dev/ttyUSB0 device which was created earlier. The baud rate is specified with the -b option. The default serial port settings for the board are:
-
Baud 115,200
-
Bits 8
-
Parity N
-
Stop Bits 1
-
Handshake None
After starting the picocom application we should be able to see the serial port is opened and the settings should be the default settings. If they are not then try to get the settings by providing options to picocom. Once we get the desired settings we can apply power to the connected BeagleBone Black. At this point we will boot up the board for the first time and should see the serial logs of the bootloader U-Boot. The boot process can be interrupted by hitting any key on the keyboard and allowing us to configure the U-Boot environment.
conrad@conrad-HP-Pavilion-dm3-Notebook-PC:~/Git/techeuphoria/quests/beagleboneblacktux/free_electrons_linux_kernel$ picocom -b 115200 /dev/ttyUSB0
picocom v1.7

port is        : /dev/ttyUSB0
flowcontrol    : none
baudrate is    : 115200
parity is      : none
databits are   : 8
escape is      : C-a
local echo is  : no
noinit is      : no
noreset is     : no
nolock is      : no
send_cmd is    : sz -vv
receive_cmd is : rz -vv
imap is        :
omap is        :
emap is        : crcrlf,delbs,

Terminal ready

U-Boot SPL 2013.10 (Nov 28 2013 - 06:36:11)
reading args
spl: error reading image args, err - -1
reading u-boot.img
reading u-boot.img


U-Boot 2013.10 (Nov 28 2013 - 06:36:11)

I2C:   ready
DRAM:  512 MiB
WARNING: Caches not enabled
MMC:   OMAP SD/MMC: 0, OMAP SD/MMC: 1
Using default environment

Net:   <ethaddr> not set. Validating first E-fuse MAC
cpsw, usb_ether
Hit any key to stop autoboot:  0
U-Boot#
-
We run the picocom application setting the baud rate to 115200 and choosing the device as /dev/ttyUSB0
-
picocom shows that the terminal is ready after printing the serial port settings
-
On application of power to the BeagleBone Black this is the first print from U-Boot
-
We can interrupt U-boot before it tries to boot the kernel by hitting any key
Setting Default Environment Variables For U-Boot
We need to make sure the version of the U-Boot running is 2013.10. We use the command version to get the information.
U-Boot#     version

U-Boot 2013.10 (Nov 28 2013 - 06:36:11)
arm-linux-gnueabi-gcc (Ubuntu/Linaro 4.7.3-1ubuntu1) 4.7.3
GNU ld (GNU Binutils for Ubuntu) 2.23.52.20130913
-
version checks the version of U-Boot in the system
-
Our version has to be 2013.10 to save the U-Boot environment to the eMMC storage
Finally we reset the settings of the U-Boot environment to its default values using the command env default -f -a as shown below. Finally saveenv is used to save the environment settings whenever we want to retain it across reboots.
U-Boot# env default -f -a
## Resetting to default environment
U-Boot# saveenv
Saving Environment to MMC...
Writing to redundant MMC(1)... done
U-Boot#
-
Resetting the environment variables to a default value
-
Saving the environment values
-
The environment values are saved to the eMMC device
Setting Up Ethernet Communication With The Board
We will now need to setup the board in such a way so as to allow us to download files to its system memory using U-Boot. To do this we will use Trivial File Transfer Protocol (TFTP) through an ethernet cable. Our board will be the TFTP client and we will configure our Ubuntu work station to act as a TFTP server. TFTP can be installed as shown below using APT.
conrad@conrad-HP-Pavilion-dm3-Notebook-PC:~/fe-kernel-training$ sudo apt-get install tftpd-hpa
Now we will connect an ethernet cable between our workstation and the BeagleBone Black ethernet connector. If the workstation does not have any more connections then we will have to use a USB ethernet adapter. In this case we have an unused connection so we will connect the cable as shown.
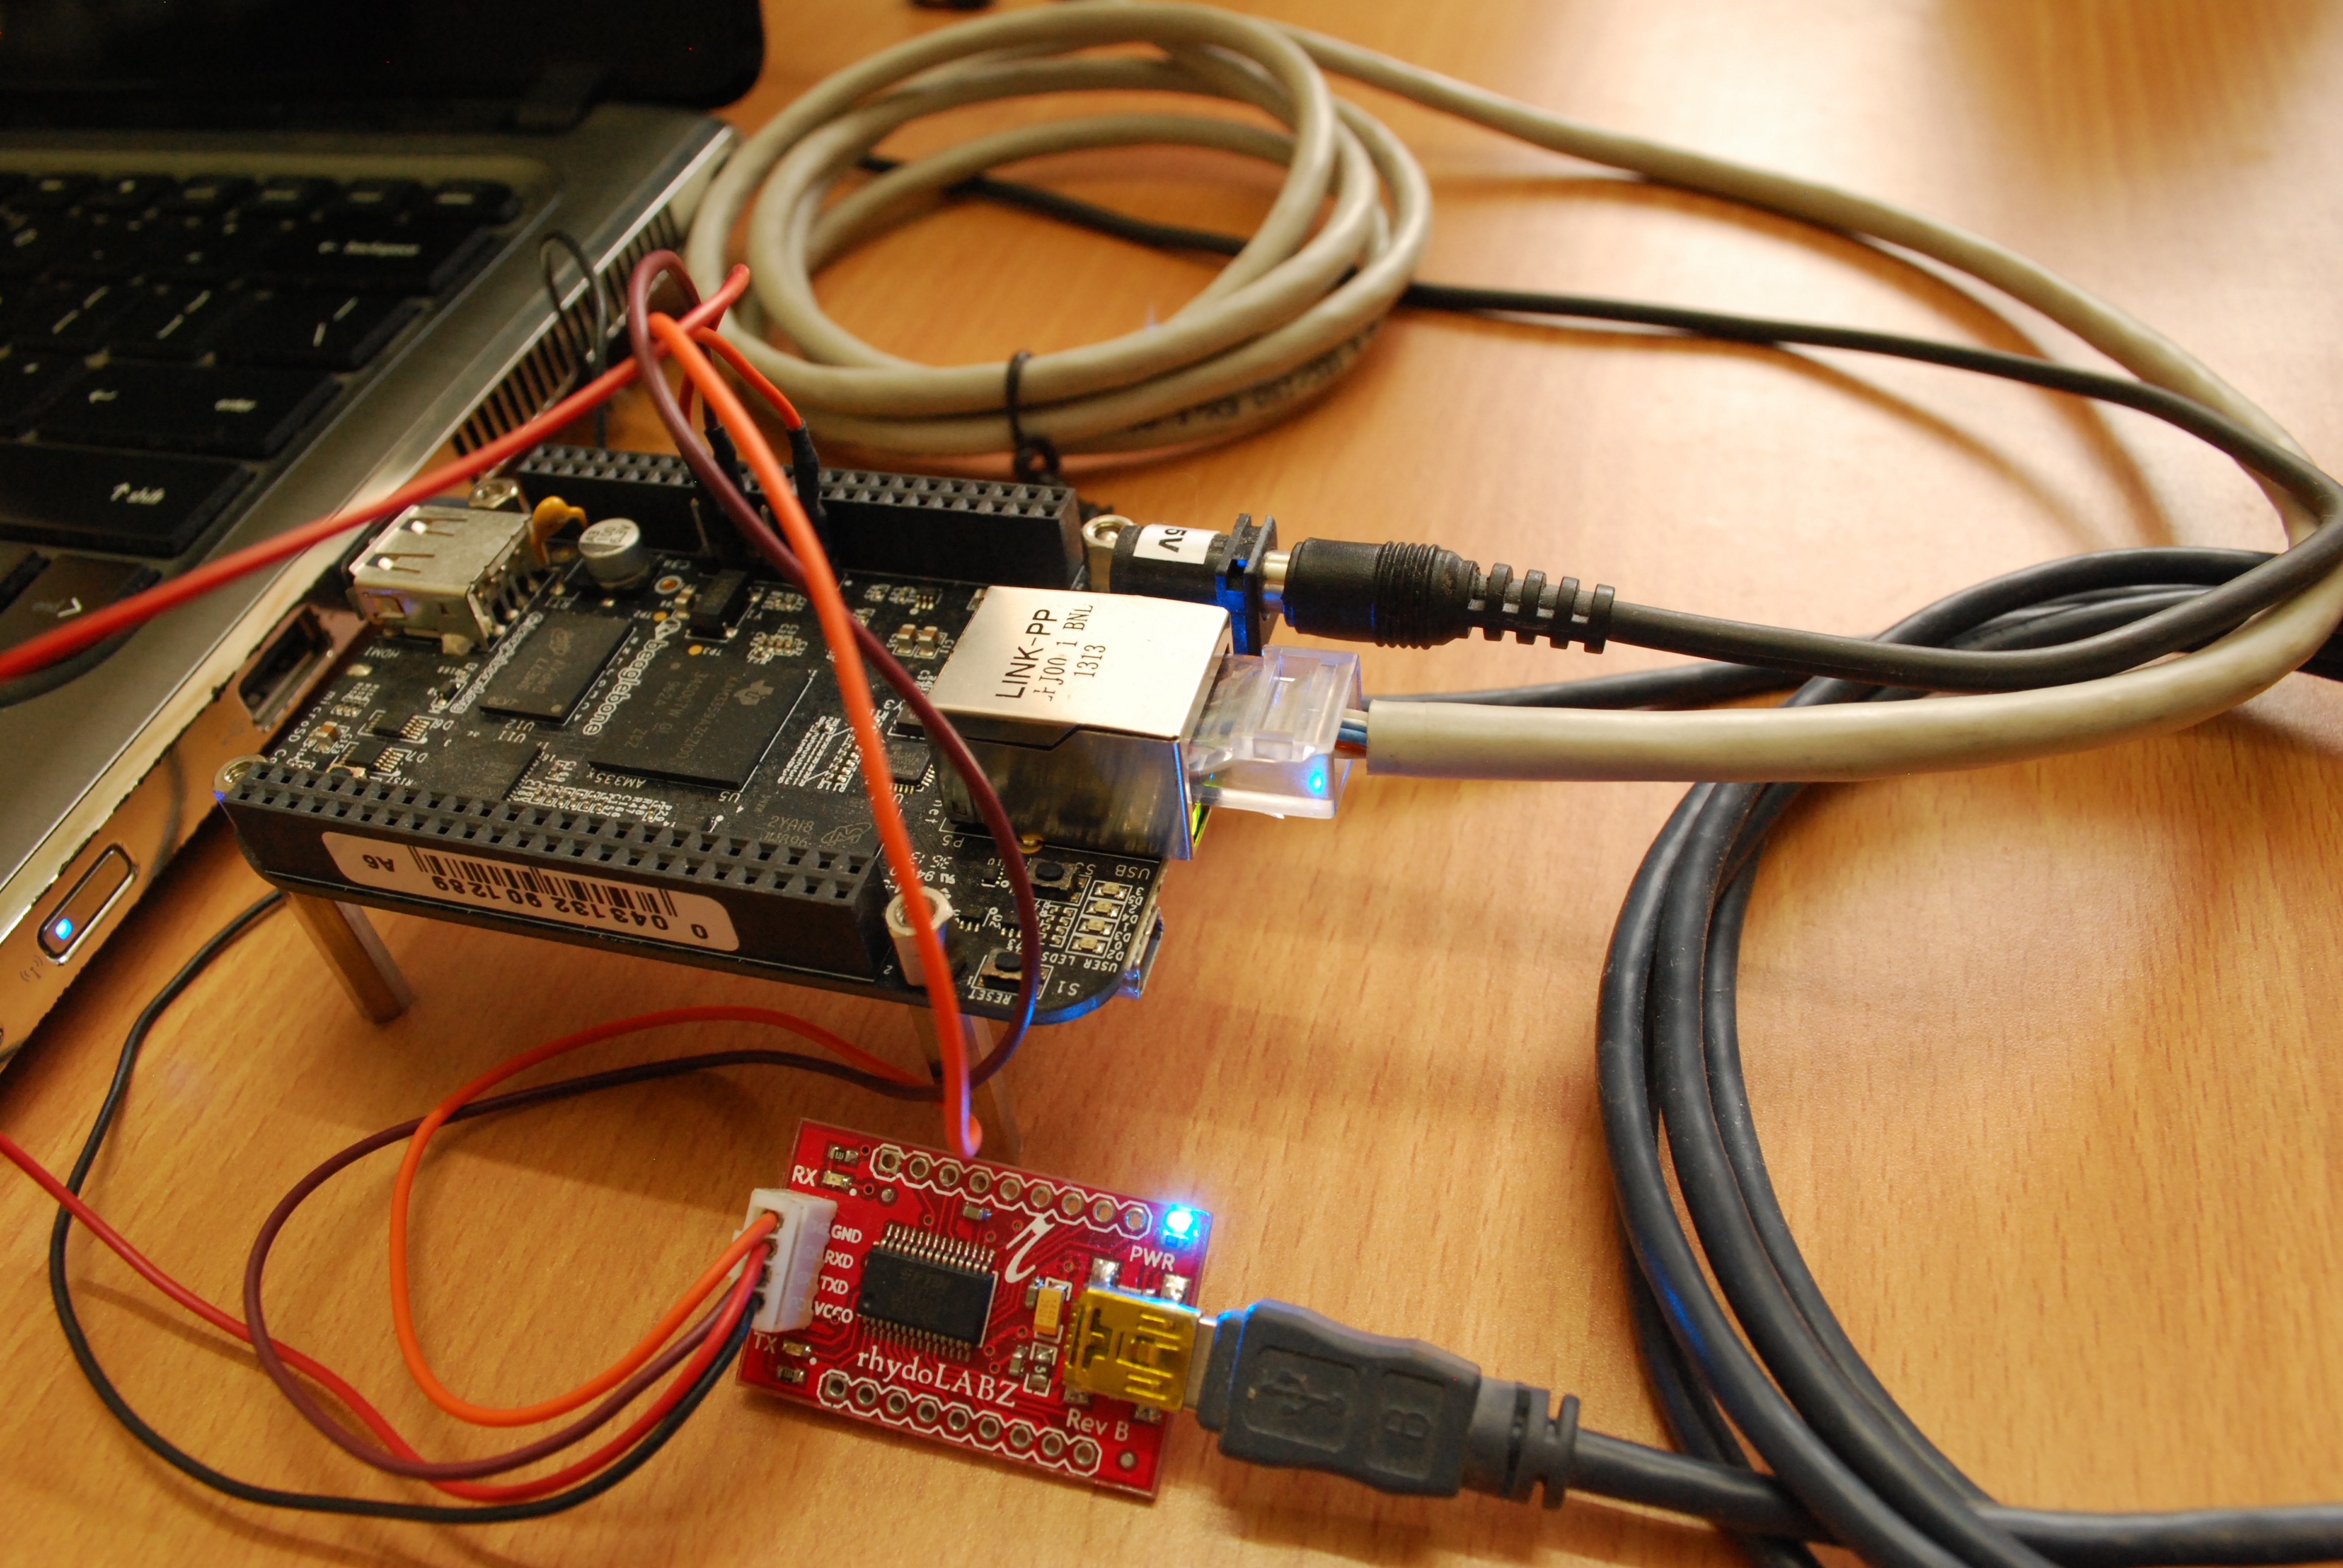
We next have to configure the network interface on the workstation side. Click on the network manager tasklet on the desktop and select Edit Connections.
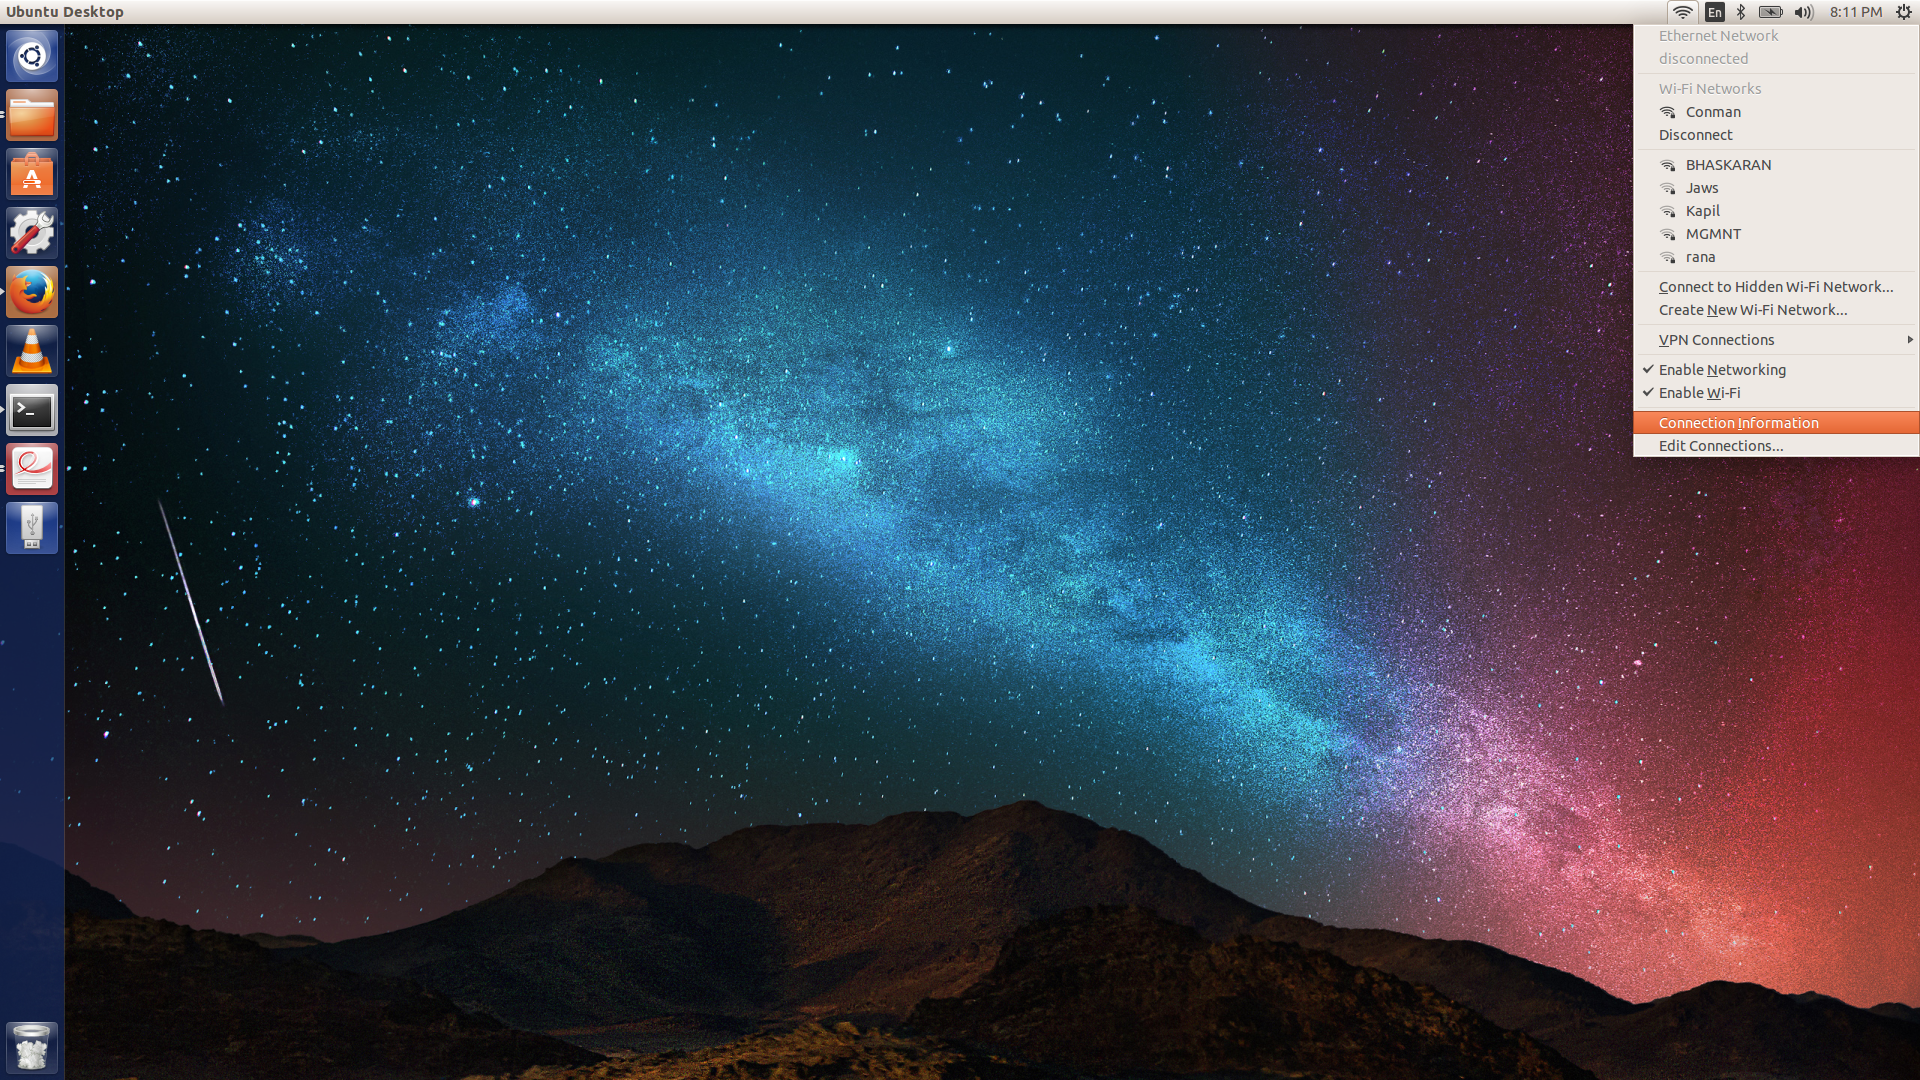
Click on the Add button on the left and then Create.. an ethernet connection.
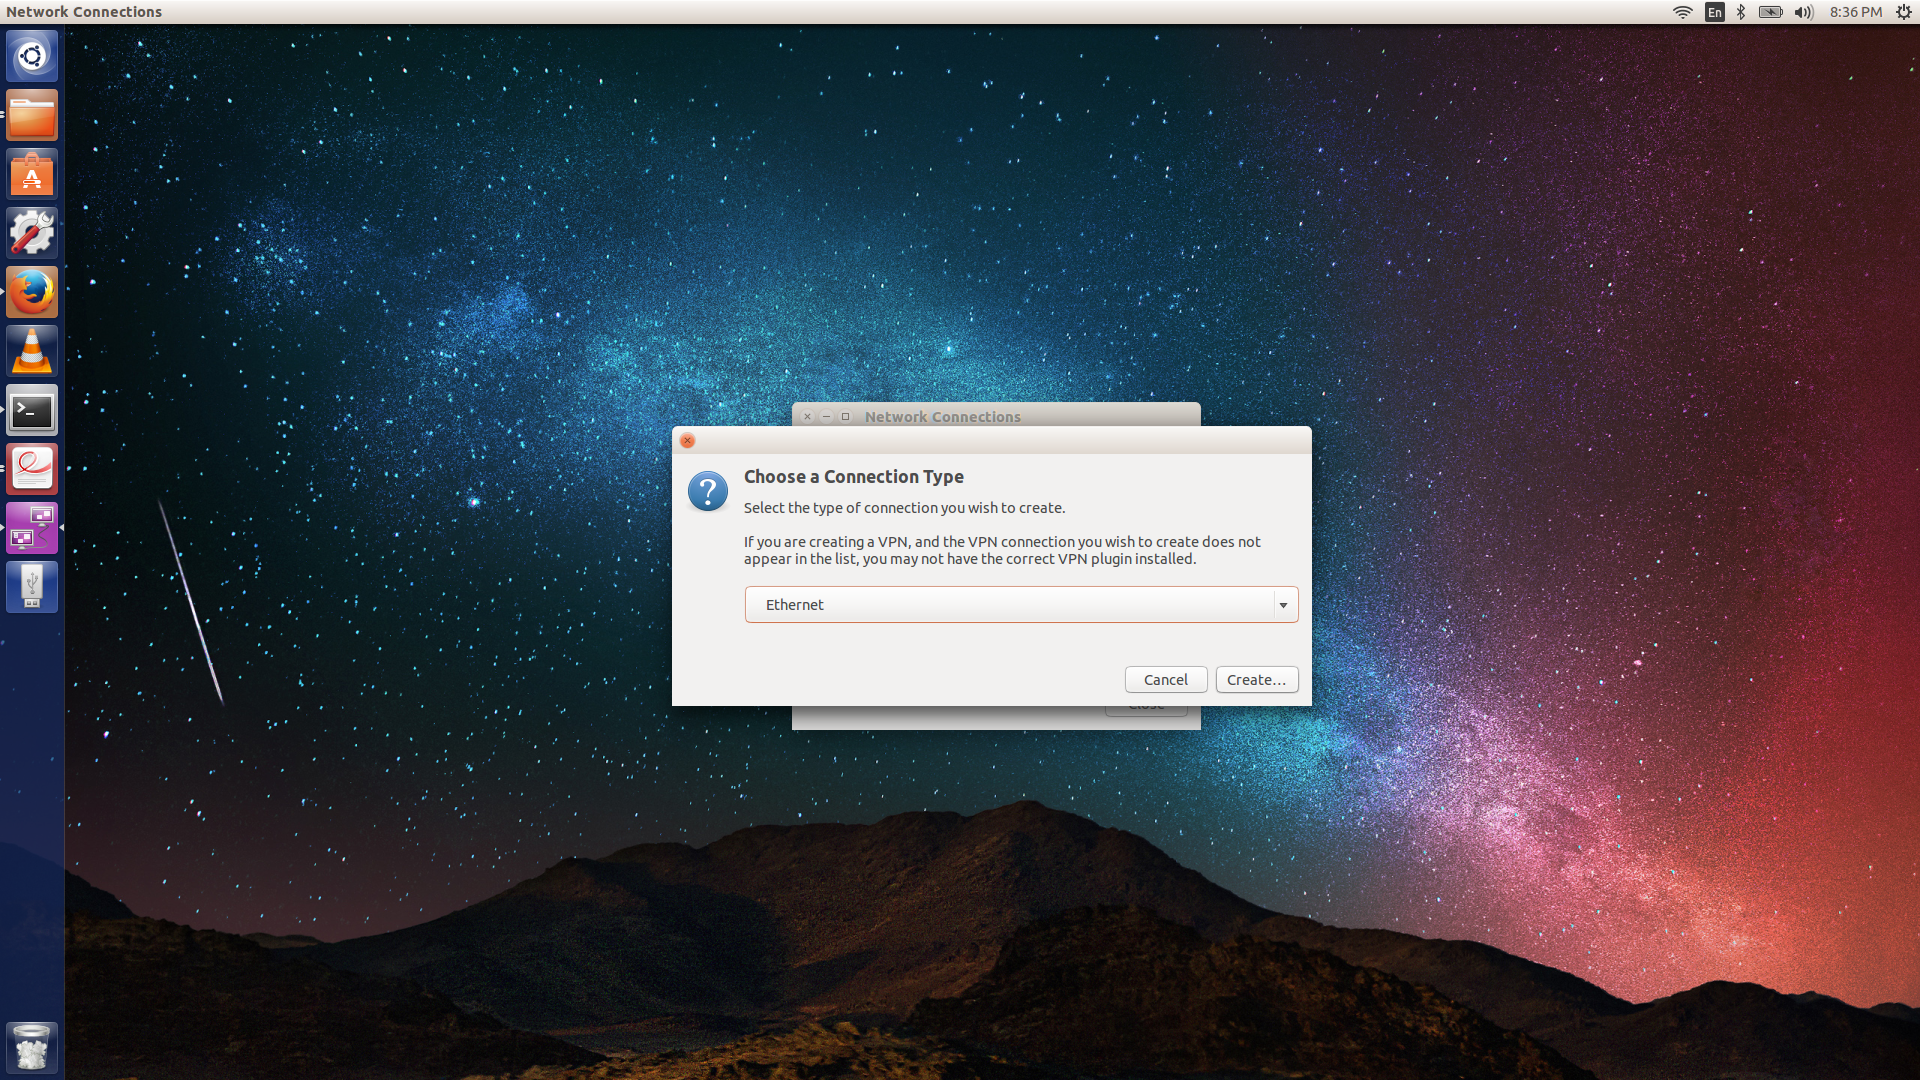
Edit the new ethernet connection by changing its name to BBB. Change the IPV4 settings by selecting the method as manual. And finally add the static address as 192.168.0.1 and netmask as 255.255.255.0. There’s no need to add a gateway but if the cursor is in the textbox enter 0.0.0.0. Save the settings and the interface is set up on the workstation.
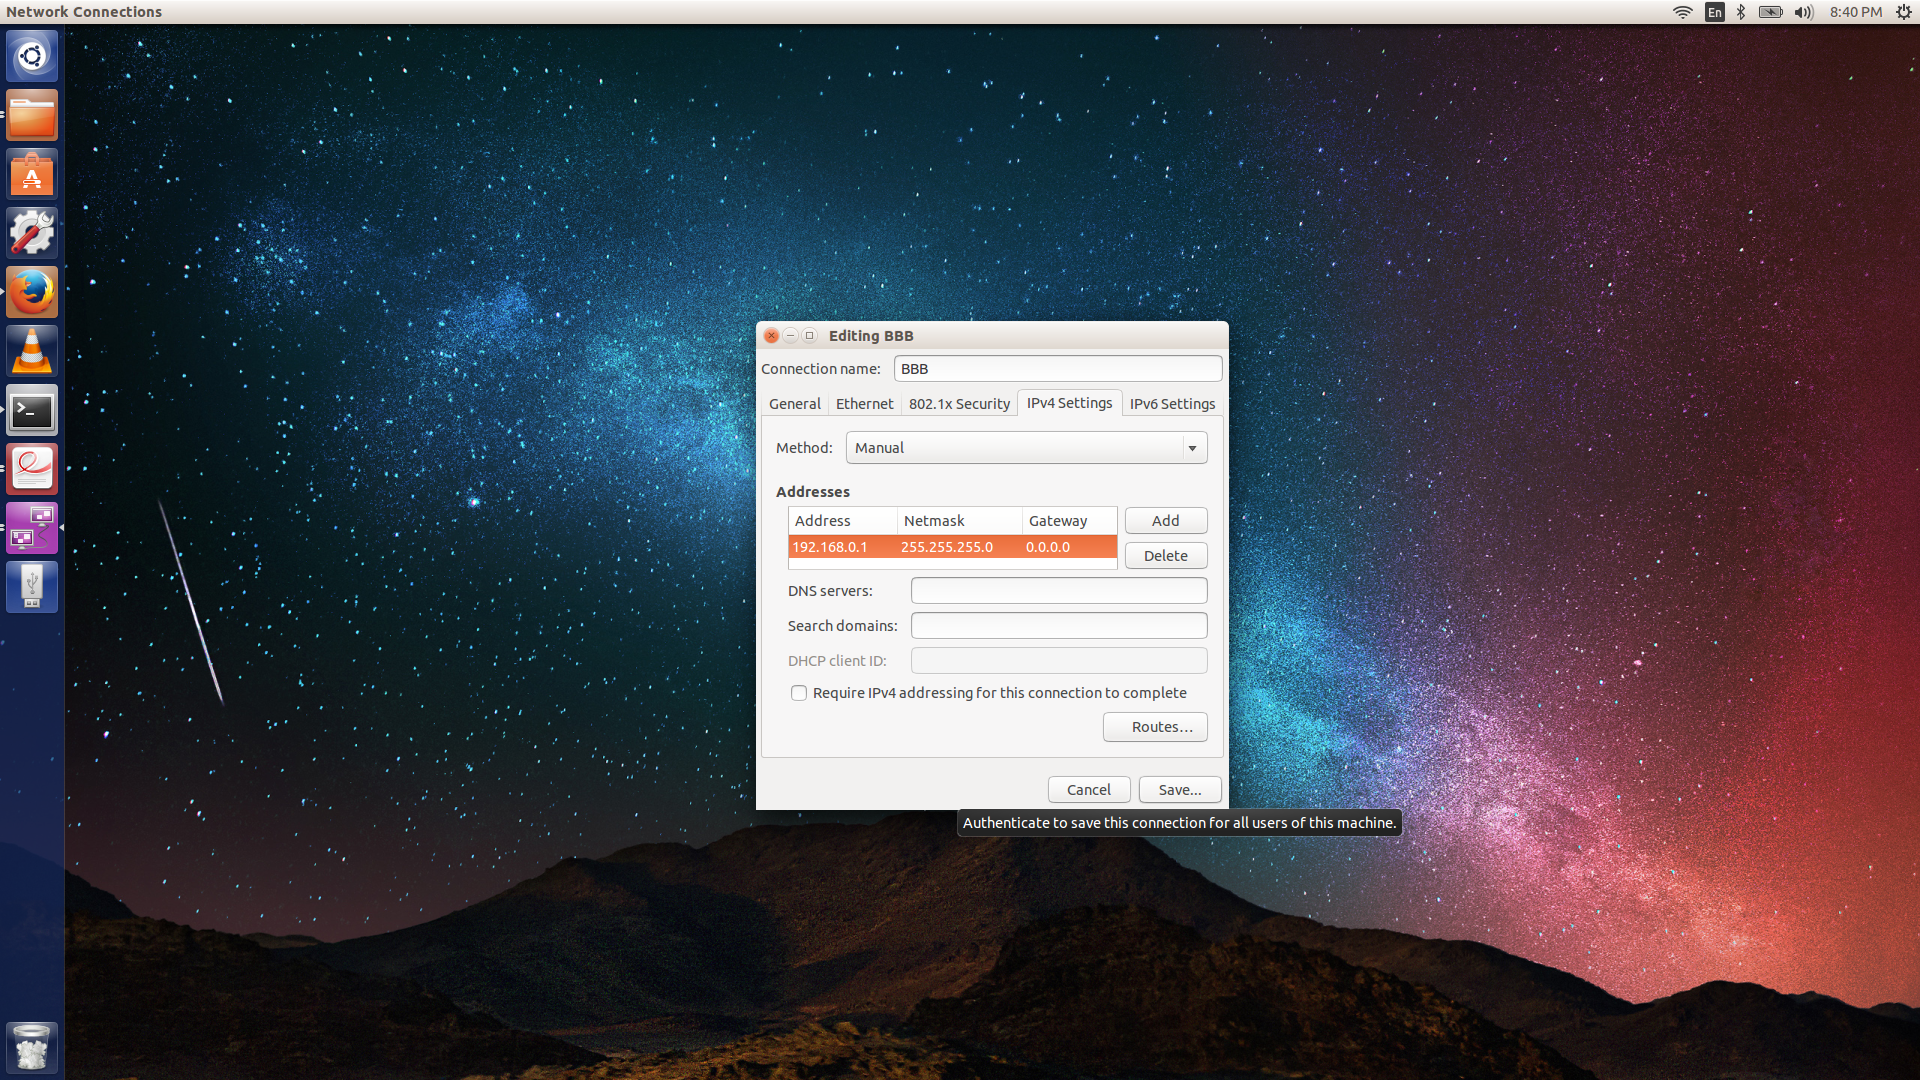
Now that we have our workstation ethernet interface configured we can setup networking on U-Boot’s side. We can print the environment to check what the variables are set to by running printenv which will give out the values of all the variables in the U-Boot environment. In our case with the default environment values we see that the IP address and TFTP server IP is not set.
U-Boot#
U-Boot# printenv
arch=arm
baudrate=115200
board=am335x
board_name=A335BNLT
board_rev=00A6
.
.
.
stderr=serial
stdin=serial
stdout=serial
usbnet_devaddr=90:59:af:49:c8:ef
vendor=ti
ver=U-Boot 2013.10 (Nov 28 2013 - 06:36:11)

Environment size: 3471/131067 bytes
U-Boot# printenv ipaddr
## Error: "ipaddr" not defined
U-Boot# printenv serverip
## Error: "serverip" not defined
-
Print all the environment variables
-
Print value of the IP address
-
Print value of TFTP server IP
We will set the server IP to the static IP we assigned to our ethernet interface on our workstation and IP address to a different value as follows:
U-Boot# setenv ipaddr 192.168.0.100
U-Boot# printenv ipaddr
ipaddr=192.168.0.100
U-Boot# setenv serverip 192.168.0.1
U-Boot# printenv serverip
serverip=192.168.0.1
U-Boot# saveenv
Saving Environment to MMC...
Writing to MMC(1)... done
-
Setting the IP address to 192.168.0.100
-
Setting the server IP to the workstation ethernet interface IP
-
Saving the environment variables
The next step is to test the connection by creating a file called testfile.txt in /var/lib/tftpboot/. We will attempt to download the file through the tftp command in U-Boot.
U-Boot# tftp 0x81000000 testfile.txt
link up on port 0, speed 100, full duplex
Using cpsw device
TFTP from server 192.168.0.1; our IP address is 192.168.0.100
Filename 'testfile.txt'.
Load address: 0x81000000
Loading: T T T T T T T T
Abort
-
The tftp command takes a memory address in our BBB system and the file name as parameters.
-
We abort the command with CTRL-C after a while as nothing seems to be happening.
This may happen if the tftp service has not been started properly. So we can restart the service using the following command on the workstation.
conrad@conrad-HP-Pavilion-dm3-Notebook-PC:~/fe-kernel-training$ sudo service tftpd-hpa restart
tftpd-hpa stop/waiting
tftpd-hpa start/running, process 12562
Now when we try the tftp command again in the U-Boot command prompt we are able to successfully download the file.
U-Boot# tftp 0x81000000 testfile.txt
link up on port 0, speed 100, full duplex
Using cpsw device
TFTP from server 192.168.0.1; our IP address is 192.168.0.100
Filename 'testfile.txt'.
Load address: 0x81000000
Loading: #
     6.8 KiB/s
done
Bytes transferred = 23 (17 hex)
U-Boot# md 0x81000000
81000000: 67616542 6f42656c 4220656e 6b63616c    BeagleBone Black
81000010: 61776120 fa0a2179 3477dfe5 36c5771d     away!....w4.w.6
81000020: ddfddd53 acb6fdf7 bff3df47 8df4e90d    S.......G.......
81000030: 51bbd157 4bbfd90f 5f723ff2 ae63b73f    W..Q...K.?r_?.c.
81000040: e777dbbd ff1f5774 d43f27c9 bcefd75d    ..w.tW...'?.]...
81000050: fdb7eff5 fd7ff7bd 6c7e5ebc df50576c    .........^~llWP.
81000060: f6fdad24 e24de9dd fdaf3f3f 97cfffbe    $.....M.??......
81000070: fec7fc3d fbed8ff7 bfdd7bbe 57df759c    =........{...u.W
81000080: 7fbbd68d 3cb2b137 a71377cf 1754bdff    ....7..<.w....T.
81000090: ef4cf775 bbee4a85 fe75553d f137bfec    u.L..J..=Uu...7.
810000a0: f9997e33 f5f77735 df4cbffb dd7d4d49    3~..5w....L.IM}.
810000b0: f077f636 b5e5d555 5c7fb5f7 d7f69374    6.w.U......\t...
810000c0: f27f9d5f f1d4fd65 74a5db11 b5b6734d    _...e......tMs..
810000d0: 77d75f6f 3ef5757e d327f1d7 91255fd7    o_.w~u.>..'.._%.
810000e0: f5c47f7f fe5d77fe 445ebfdd ed78dbbf    .....w]...^D..x.
810000f0: 7fb36aff 4fffe7bf d7bd7f5f 9fdffe6d    .j.....O_...m...
U-Boot#
-
The file was successfully transferred this time.
-
We read the contents of the load address at 0x81000000 and see "BeagleBone Black away!" as expected.
We have successfully setup U-Boot to download the kernel.
LAB 3 : Cross Compiling The Kernel And Booting It From The Workstation
Note
Cross-compile the Linux kernel for the ARM platform
Boot the cross-compiled kernel with a NFS root filesystem, using the workstation as a NFS server
Enabling Networking To Speed Up Embedded Development
In the previous lab we enabled network connectivity between the board and workstation by configuring the U-Boot environment appropriately. This enables us to build our binaries on the workstation and test it on the board without having to flash the board which saves time as well as prolongs the life of the eMMC device or micro-SD card. We will also enable a NFS type of root filesystem which will allow us to test cross-compiled modules on board.

Installing The Prerequisites
We will need to install a couple of packages before we can proceed with the lab.
conrad@conrad-HP-Pavilion-dm3-Notebook-PC:~/fe-kernel-training/linux-kernel-labs/src$ sudo apt-get install libqt4-dev g++ u-boot-tools
.
.
.
conrad@conrad-HP-Pavilion-dm3-Notebook-PC:~/fe-kernel-training/linux-kernel-labs/src$ sudo apt-get install gcc-arm-linux-gnueabi
.
.
.
conrad@conrad-HP-Pavilion-dm3-Notebook-PC:~/fe-kernel-training/linux-kernel-labs/src$ dpkg -L gcc-arm-linux-gnueabi
/.
/usr
/usr/bin
/usr/share
/usr/share/doc
/usr/share/man
/usr/share/man/man1
/usr/bin/arm-linux-gnueabi-gcc
/usr/bin/arm-linux-gnueabi-gcov
/usr/share/doc/gcc-arm-linux-gnueabi
/usr/share/man/man1/arm-linux-gnueabi-gcov.1.gz
/usr/share/man/man1/arm-linux-gnueabi-gcc.1.gz
-
libtqy4-dev, g++ are required for make xconfig. u-boot-tools are required for mkuimage
-
gcc-arm-linux-gnueabi is the cross compiler toolchain from Linaro
-
Path and name of the cross-compiler can be determined by examining the cross-compiler installed.
Configuring The Kernel
We start with configuring the kernel source code with a default configuration. Since our board has a processor(AM335x) which belongs to the OMAP2 family we will use a default configuration file for that board i.e. omap2plus_defconfig.
conrad@conrad-HP-Pavilion-dm3-Notebook-PC:~/Git/linux$ find arch/arm/configs/ -iname '*omap*'
arch/arm/configs/omap2plus_defconfig
arch/arm/configs/omap1_defconfig
arch/arm/configs/da8xx_omapl_defconfig
conrad@conrad-HP-Pavilion-dm3-Notebook-PC:~/Git/linux$ make ARCH=arm CROSS_COMPILE=arm-linux-gnueabi- omap2plus_defconfig
#
# configuration written to .config
#
conrad@conrad-HP-Pavilion-dm3-Notebook-PC:~/Git/linux$
-
The default configuration for omap2 boards
-
Setting the default configuration to omap2dplus_defconfig
Now configure the kernel to use a NFS root filesystem. This can be done with any of the configuration targets i.e. menuconfig, nconfig, gconfig or xconfig.
conrad@conrad-HP-Pavilion-dm3-Notebook-PC:~/Git/linux$ make ARCH=arm CROSS_COMPILE=arm-linux-gnueabi- menuconfig
scripts/kconfig/mconf Kconfig
.
.
To identify the configuration option for NFS root filesystem search for CONFIG_ROOT_NFS once the menuconfig screen appears.
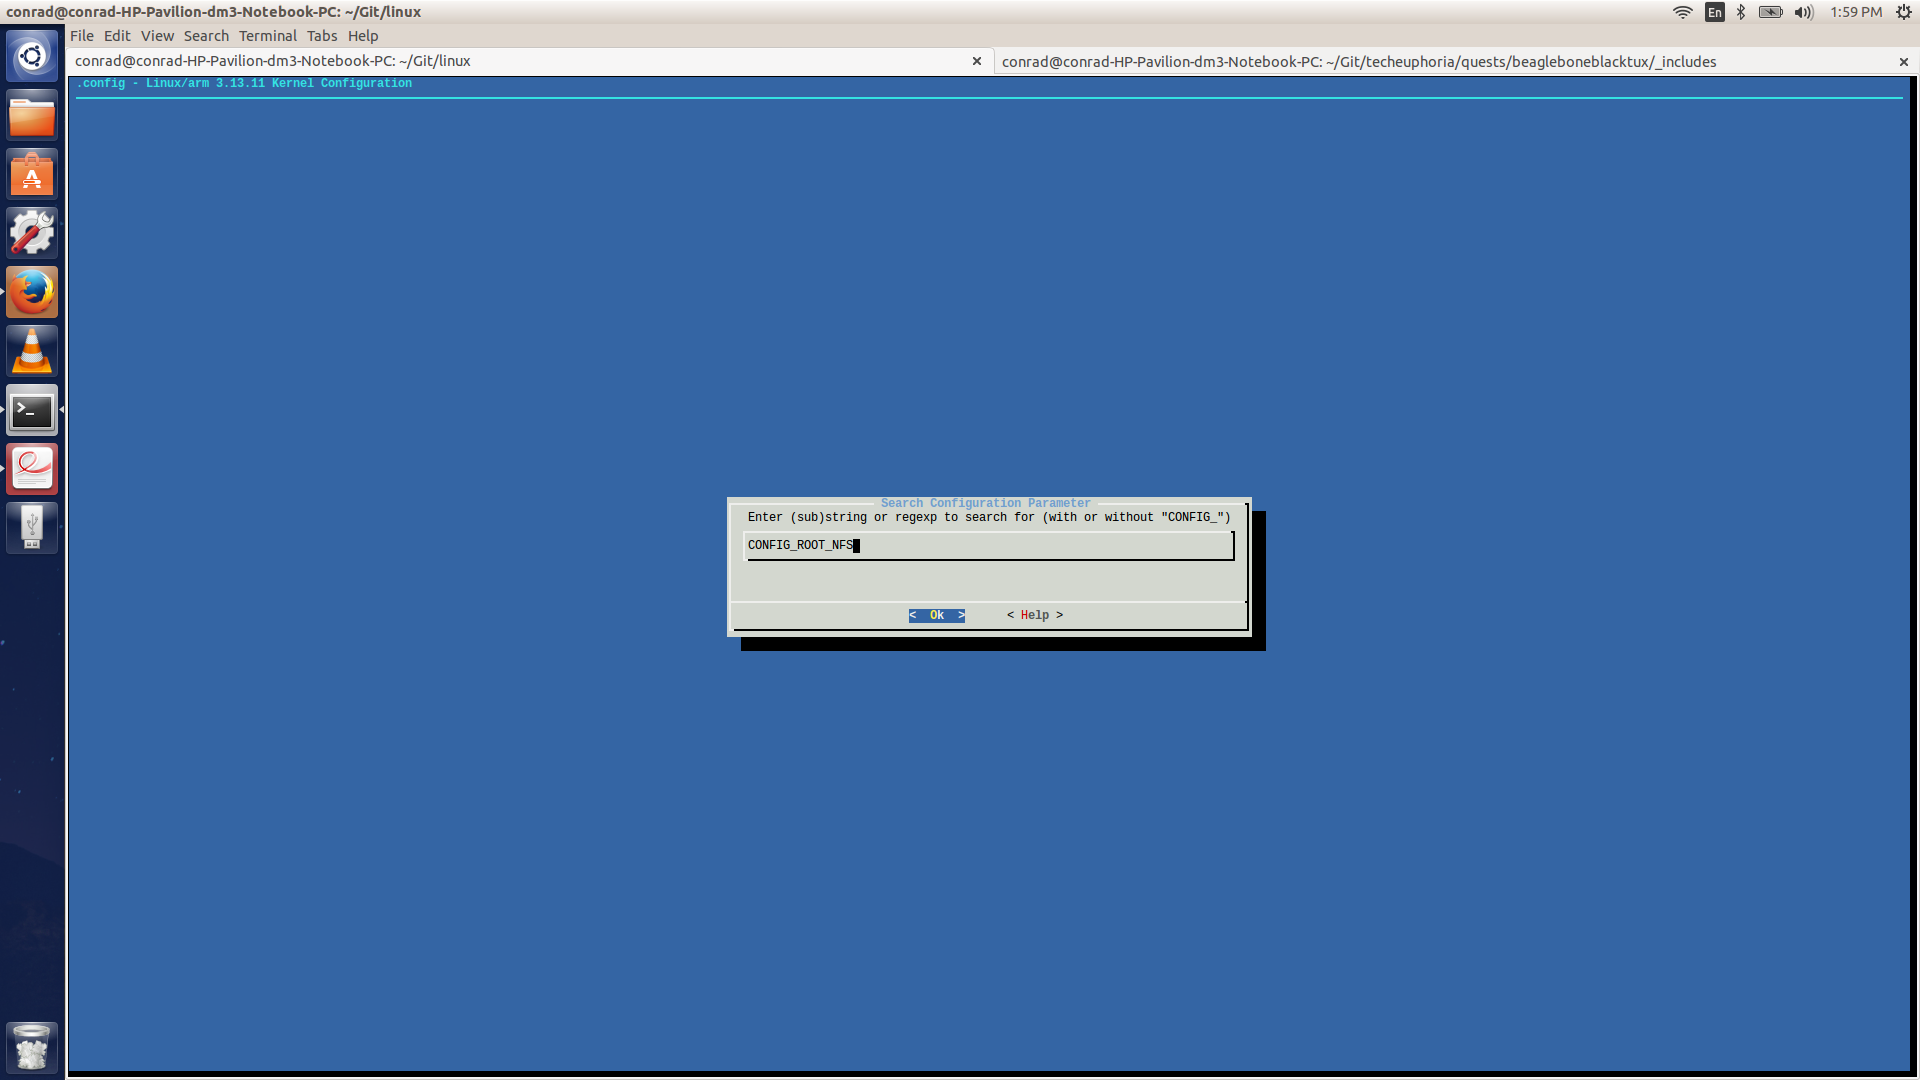
We see that CONFIG_ROOT_NFS can be reached through "File systems" and "Network File Systems"
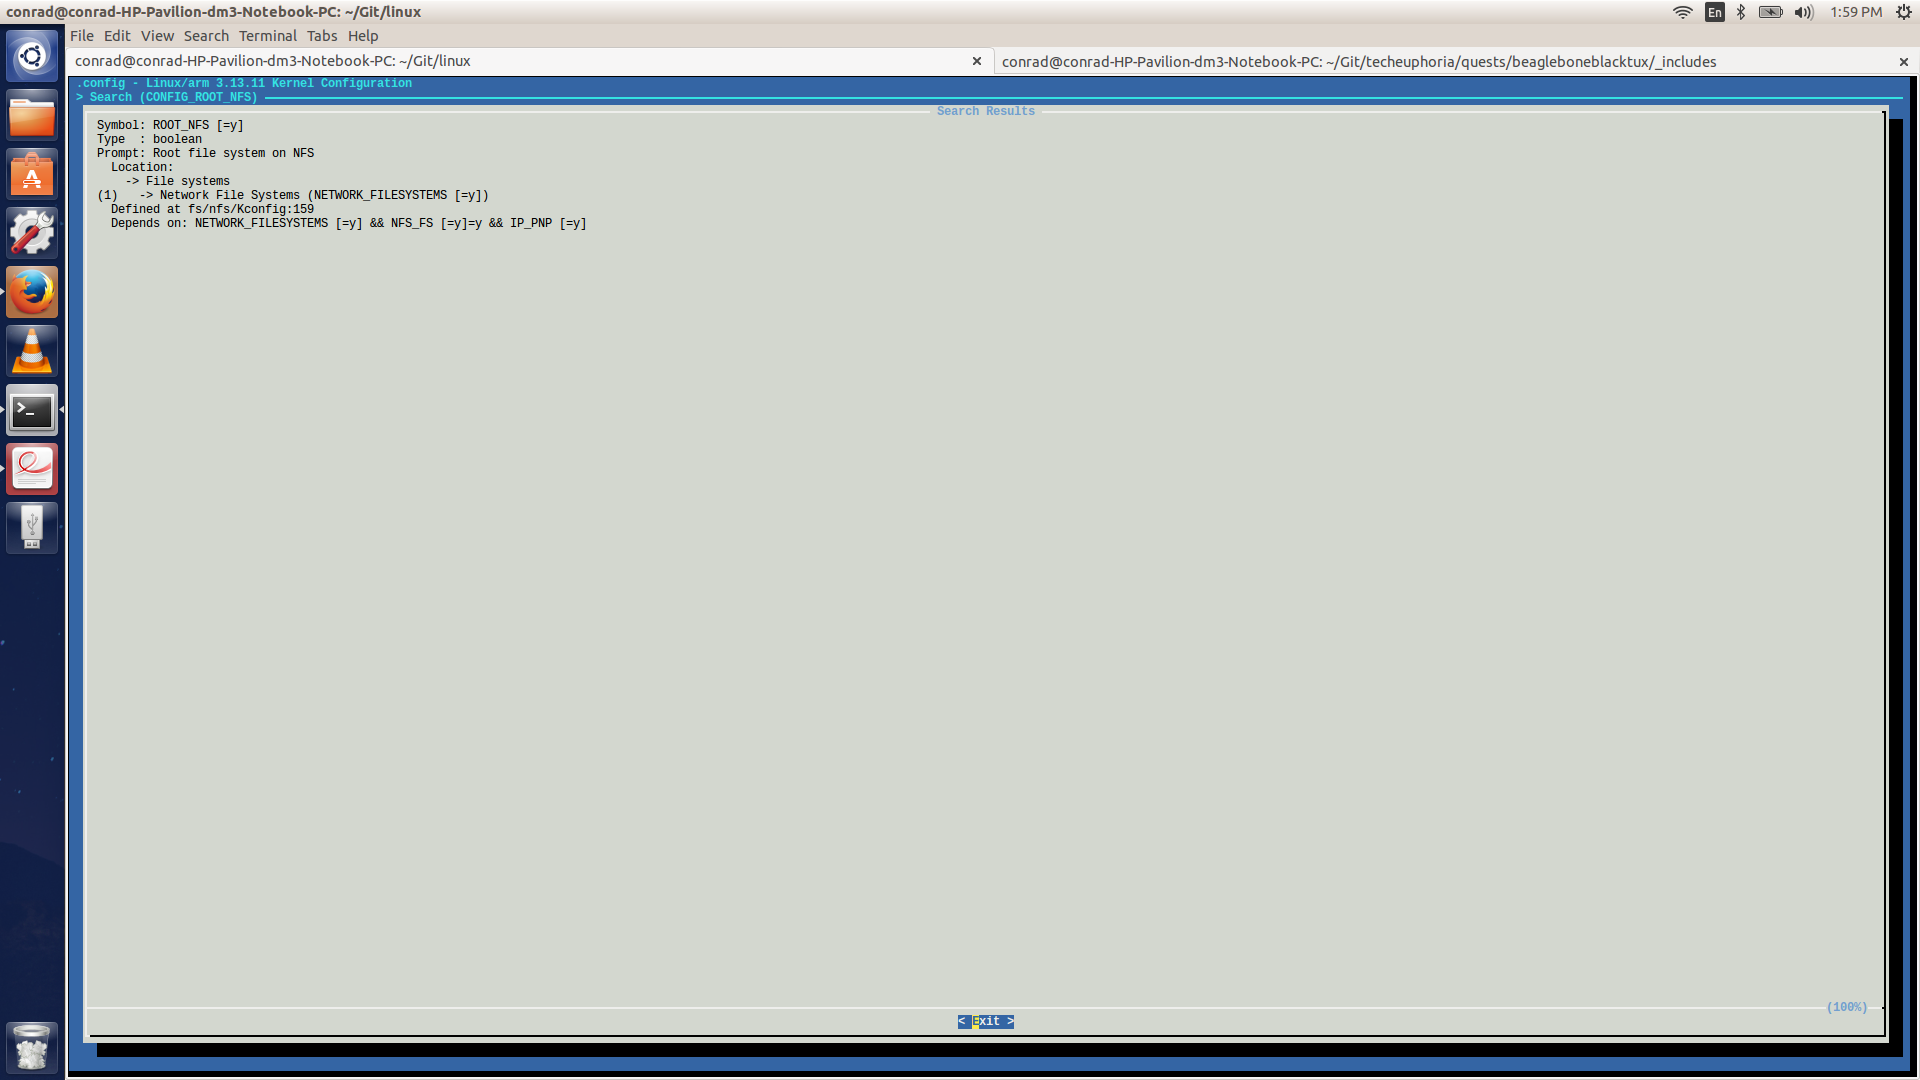
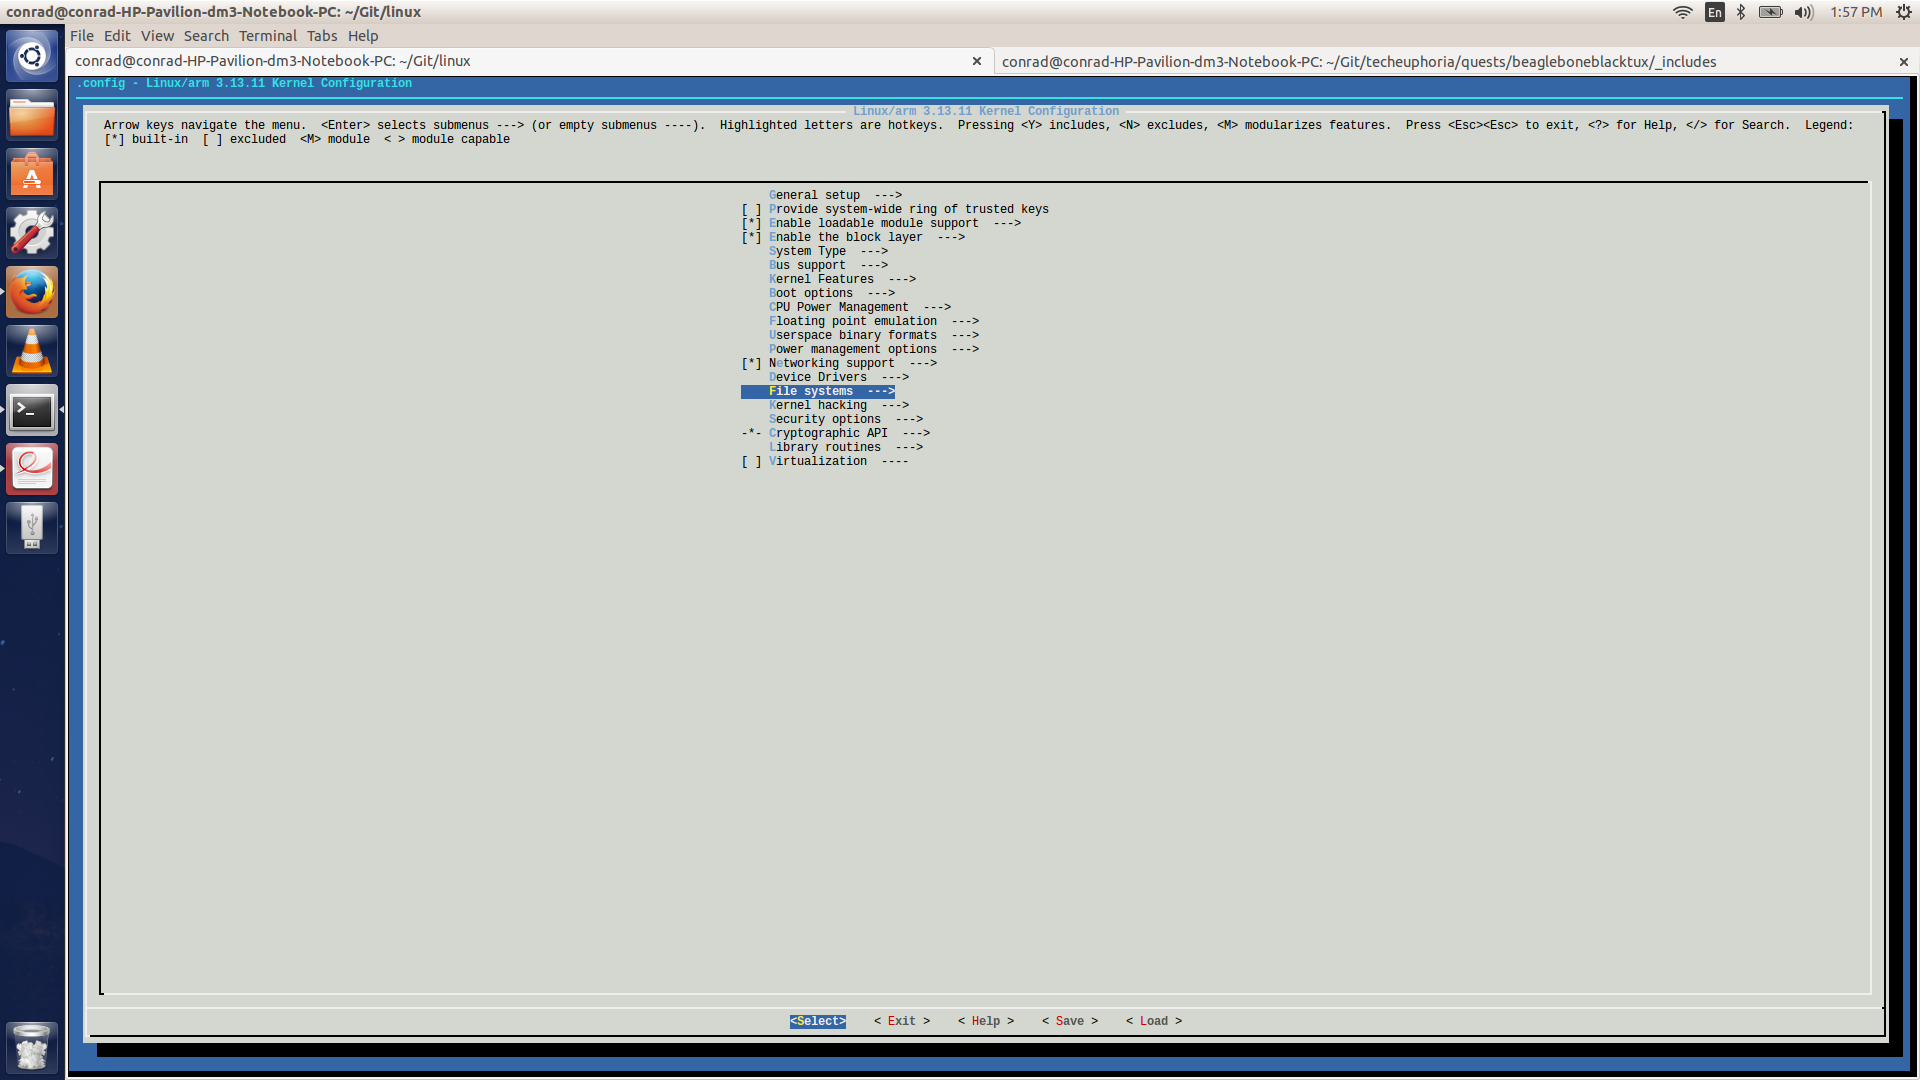
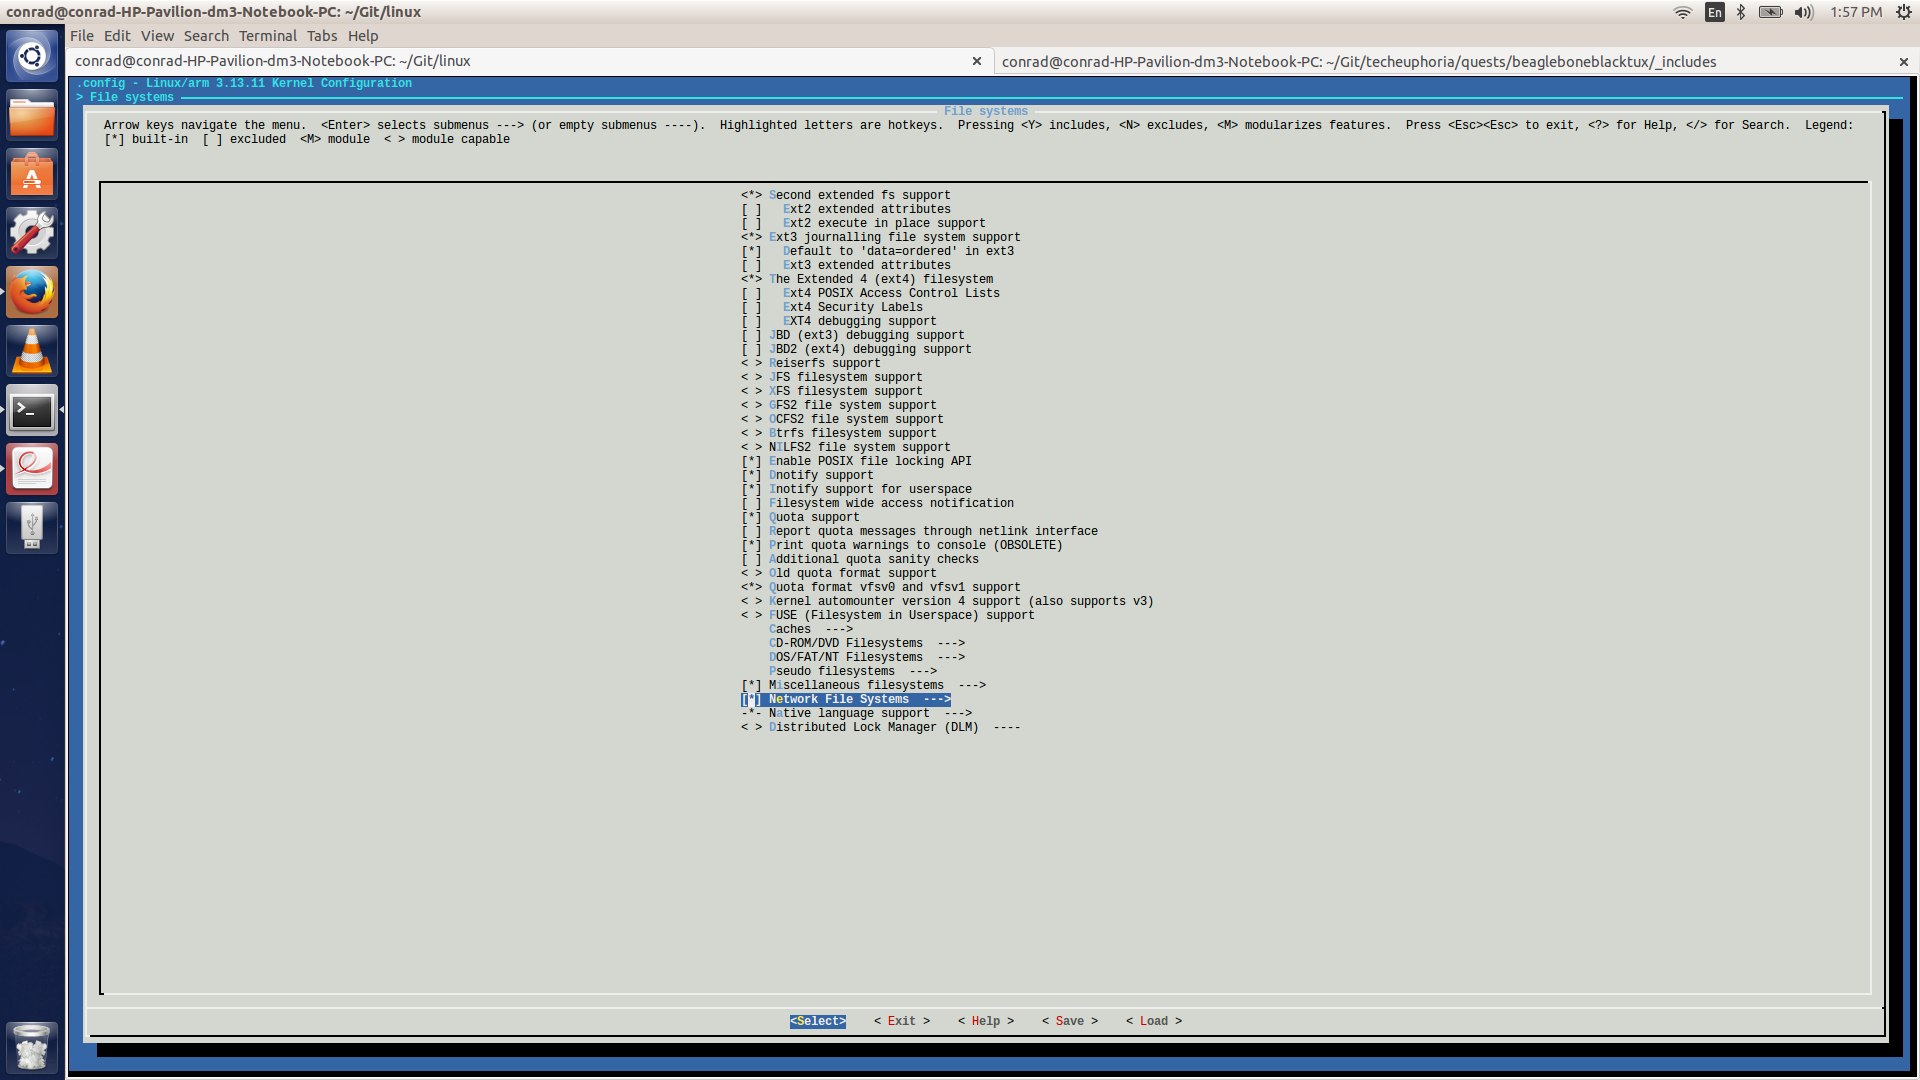
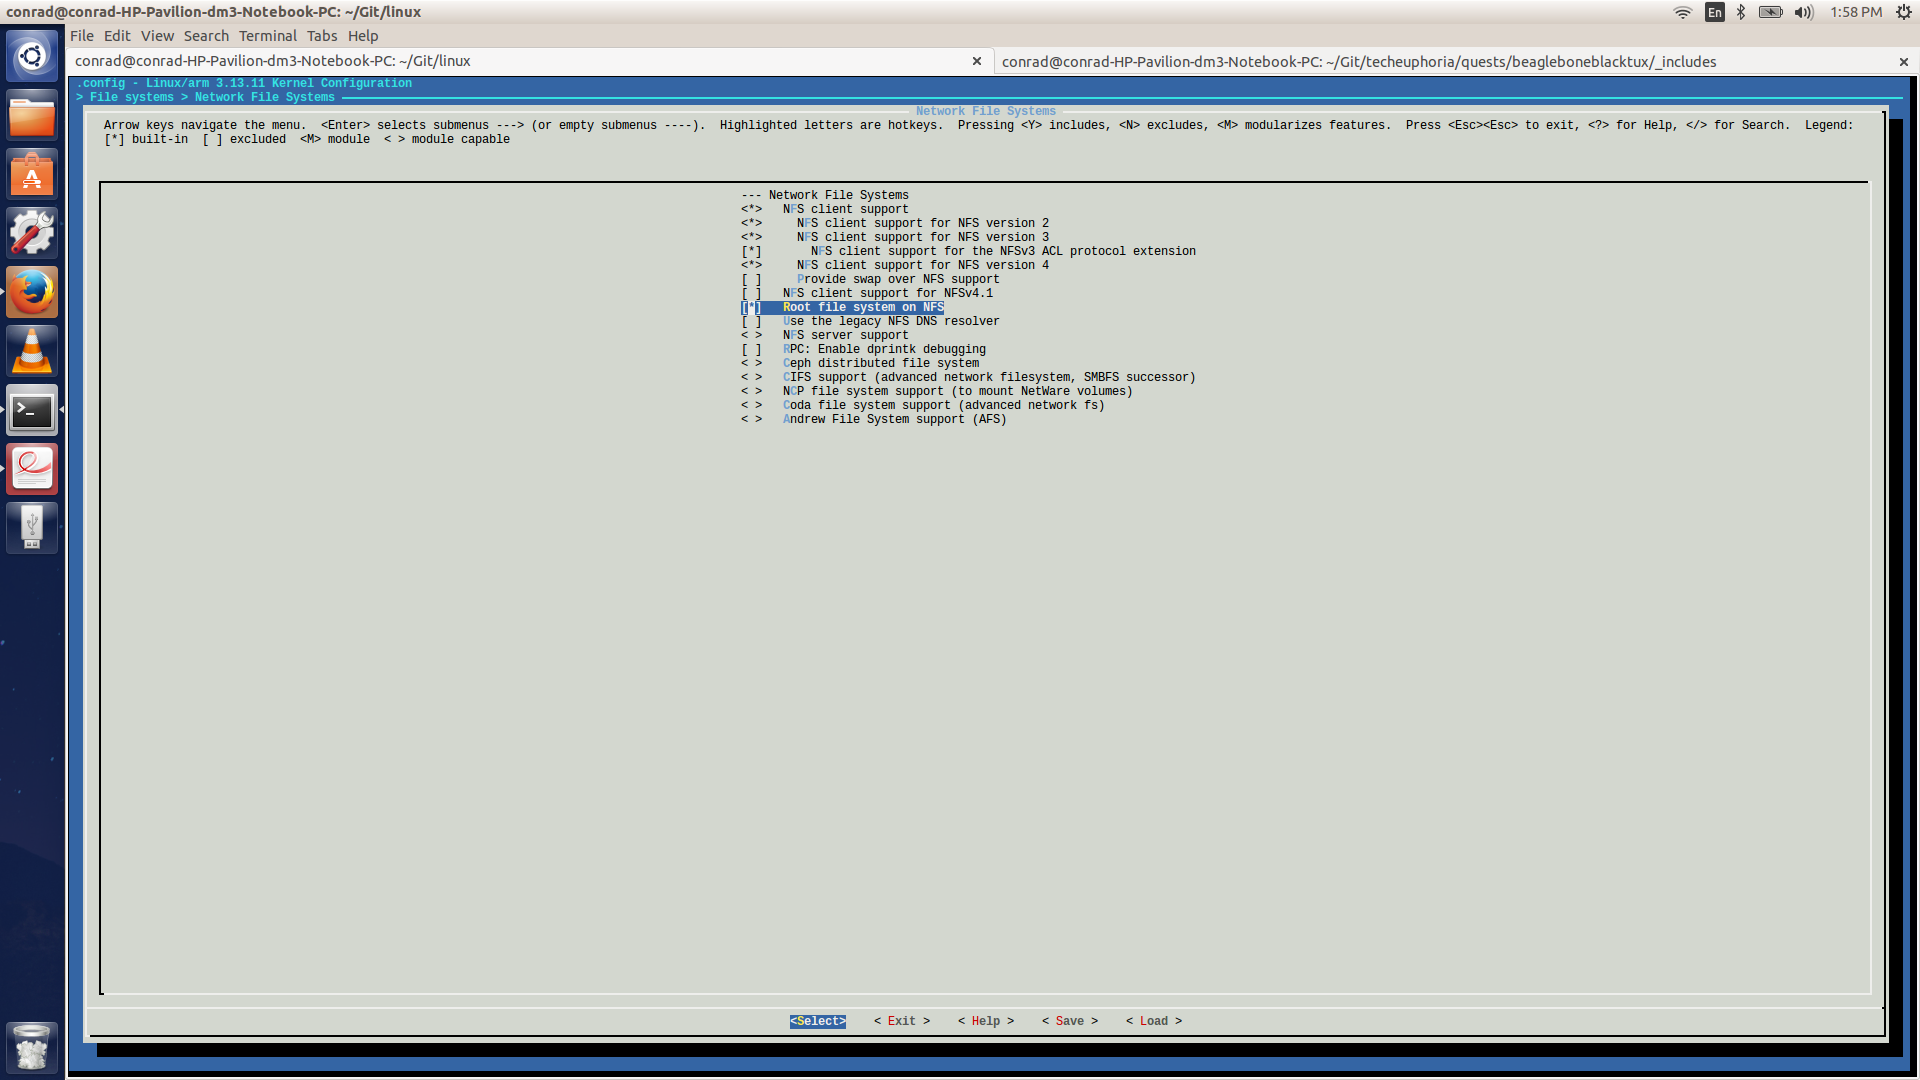
Cross-compiling The Kernel
Now it is time to cross-compile the kernel after we have configured it correctly. We will first do a clean on the source code to make sure we’re compiling fresh
Clean The Sources
conrad@conrad-HP-Pavilion-dm3-Notebook-PC:~/Git/linux$ make ARCH=arm CROSS_COMPILE=arm-linux-gnueabi- clean
  CLEAN   .
  CLEAN   arch/arm/kernel
  CLEAN   drivers/eisa
  CLEAN   drivers/gpu/drm/radeon
  CLEAN   drivers/net/wan
  CLEAN   drivers/scsi/aic7xxx
  CLEAN   drivers/scsi
  CLEAN   drivers/tty/vt
  CLEAN   drivers/video/logo
  CLEAN   firmware
  CLEAN   kernel/debug/kdb
  CLEAN   kernel
  CLEAN   lib/raid6
  CLEAN   lib
  CLEAN   security/apparmor
  CLEAN   security/selinux
  CLEAN   usr
  CLEAN   arch/arm/boot/compressed
  CLEAN   arch/arm/boot/dts
  CLEAN   arch/arm/boot
  CLEAN   .tmp_versions
We compile the source code by invoking make with no target and by passing ARCH as arm and CROSS_COMPILE as arm-linux-gnueabi-. The compilation process may take a while.
Build zImage
conrad@conrad-HP-Pavilion-dm3-Notebook-PC:~/Git/linux$ make ARCH=arm CROSS_COMPILE=arm-linux-gnueabi-
  CHK     include/config/kernel.release
  CHK     include/generated/uapi/linux/version.h
  CHK     include/generated/utsrelease.h
  HOSTCC  scripts/basic/fixdep
make[1]: `include/generated/mach-types.h' is up to date.
  CC      kernel/bounds.s
.
.
.
  CC      sound/soc/omap/snd-soc-omap3pandora.mod.o
  LD [M]  sound/soc/omap/snd-soc-omap3pandora.ko
  CC      sound/soc/snd-soc-core.mod.o
  LD [M]  sound/soc/snd-soc-core.ko
  CC      sound/soundcore.mod.o
  LD [M]  sound/soundcore.ko
  CC      sound/usb/snd-usb-audio.mod.o
  LD [M]  sound/usb/snd-usb-audio.ko
  CC      sound/usb/snd-usbmidi-lib.mod.o
  LD [M]  sound/usb/snd-usbmidi-lib.ko
conrad@conrad-HP-Pavilion-dm3-Notebook-PC:~/Git/linux$
conrad@conrad-HP-Pavilion-dm3-Notebook-PC:~/Git/linux$ ls -l arch/arm/boot/
total 12828
drwxrwxr-x 2 conrad conrad    4096 Nov 12 23:07 bootp
drwxrwxr-x 2 conrad conrad    4096 Mar 30 21:28 compressed
drwxrwxr-x 4 conrad conrad   36864 Mar 30 21:28 dts
-rwxrwxr-x 1 conrad conrad 8843712 Mar 30 21:28 Image
-rw-rw-r-- 1 conrad conrad    1648 Oct 19  2013 install.sh
-rw-rw-r-- 1 conrad conrad    3148 Oct 19  2013 Makefile
-rwxrwxr-x 1 conrad conrad 4229384 Mar 30 21:28 zImage
conrad@conrad-HP-Pavilion-dm3-Notebook-PC:~/Git/linux$ file arch/arm/boot/zImage
arch/arm/boot/zImage: Linux kernel ARM boot executable zImage (little-endian)
-
The cross-compilation command in the kernel source directory
-
The zImage generated after cross-compilation
-
We check the type of file of zImage using the file command
Build uImage
In order to boot the kernel image with U-Boot we need to convert it into a special format called uImage. The kernel Makefile has a target that can do this and which uses mkimage tool found in the u-boot-tools package. The file will contain the zImage kernel and information about load address of the kernel. The load address will vary based on the platform for the BeagleBone Black board it is 0x80008000.
conrad@conrad-HP-Pavilion-dm3-Notebook-PC:~/Git/linux$ make LOADADDR=0x80008000 uImage
  CHK     include/config/kernel.release
  CHK     include/generated/uapi/linux/version.h
  CHK     include/generated/utsrelease.h
make[1]: `include/generated/mach-types.h' is up to date.
  CALL    scripts/checksyscalls.sh
  CHK     include/generated/compile.h
  CHK     kernel/config_data.h
  Kernel: arch/arm/boot/Image is ready
  Kernel: arch/arm/boot/zImage is ready
  UIMAGE  arch/arm/boot/uImage
Image Name:   Linux-3.13.11
Created:      Tue Mar 31 21:50:14 2015
Image Type:   ARM Linux Kernel Image (uncompressed)
Data Size:    4229384 Bytes = 4130.26 kB = 4.03 MB
Load Address: 80008000
Entry Point:  80008000
  Image arch/arm/boot/uImage is ready
conrad@conrad-HP-Pavilion-dm3-Notebook-PC:~/Git/linux$
-
Invoking the uImage target with LOADADDR set to 0x80008000
-
The image is located at arch/arm/boot/uImage
Generate The Device Tree Binaries
We also need to generate the Device Tree Binaries (DTBs)
conrad@conrad-HP-Pavilion-dm3-Notebook-PC:~/Git/linux$ make dtbs
Copy To TFTP Server Home Directory
Finally we can copy the uImage and the am335x-boneblack.dtb files to the TFTP server home directory i.e. /var/lib/tftpboot.
conrad@conrad-HP-Pavilion-dm3-Notebook-PC:~/Git/linux$ cp arch/arm/boot/dts/am335x-boneblack.dtb /var/lib/tftpboot/.
conrad@conrad-HP-Pavilion-dm3-Notebook-PC:~/Git/linux$ cp arch/arm/boot/uImage /var/lib/tftpboot/.
Setting Up The NFS Server
We will now need to setup our workstation as a NFS server. This will require installation of the nfs-kernel-server package.
conrad@conrad-HP-Pavilion-dm3-Notebook-PC:~/fe-kernel-training$ sudo apt-get install nfs-kernel-server
Once installed we need to edit the /etc/exports file to configure the server to allow a NFS client to connect to it and mount a directory. In this case we want to configure the NFS server in such a way so as to allow our BeagleBone Black platform to mount the root filesystem which is there in our workstation lab data directory.
conrad@conrad-HP-Pavilion-dm3-Notebook-PC:~/fe-kernel-training$ cat /etc/exports
# /etc/exports: the access control list for filesystems which may be exported
#       to NFS clients.  See exports(5).
#
# Example for NFSv2 and NFSv3:
# /srv/homes       hostname1(rw,sync,no_subtree_check) hostname2(ro,sync,no_subtree_check)
#
# Example for NFSv4:
# /srv/nfs4        gss/krb5i(rw,sync,fsid=0,crossmnt,no_subtree_check)
# /srv/nfs4/homes  gss/krb5i(rw,sync,no_subtree_check)
#
/home/conrad/fe-kernel-training/linux-kernel-labs/modules/nfsroot 192.168.0.100(rw,no_root_squash,no_subtree_check)
-
After editing the file we cat its contents
-
The directory of nfsroot is exported to IP 192.168.0.100 which is our BBB IP
Finally before we boot make sure to restart the NFS server as shown below. If there are any errors then the server will refuse to start and error logs will appear. The /etc/exports file must be revisited and the syntax of the line must be inspected and corrected. Fix the errors and ensure the NFS server restarts before proceeding.
conrad@conrad-HP-Pavilion-dm3-Notebook-PC:~/fe-kernel-training$ sudo service nfs-kernel-server restart
 * Stopping NFS kernel daemon               [ OK ]
 * Unexporting directories for NFS kernel daemon...     [ OK ]
 * Exporting directories for NFS kernel daemon...       [ OK ]
 * Starting NFS kernel daemon                           [ OK ]
conrad@conrad-HP-Pavilion-dm3-Notebook-PC:~/fe-kernel-training$
Boot The System
We will now proceed to boot the system. Make sure the BeagleBone Black is connected to the USB to serial connector correctly as was described in Lab2. Also make sure your etherned cable is connected between the board and your workstation. On powering up the board interrupt the boot sequence so that we have access to the U-Boot console.
Setting The bootargs
We will now change the bootargs environment variable to instruct it to boot the root filesystem from a NFS server and also we will pass the consoled that it is to use. These are standard kernel parameters which can change the way the kernel boots the system.
U-Boot 2013.10 (Nov 28 2013 - 06:36:11)

I2C:   ready
DRAM:  512 MiB
WARNING: Caches not enabled
MMC:   OMAP SD/MMC: 0, OMAP SD/MMC: 1
Net:   cpsw, usb_ether
Hit any key to stop autoboot:  0
U-Boot#
U-Boot# setenv bootargs root=/dev/nfs rw ip=192.168.0.100 console=ttyO0 nfsroot=192.168.0.1:/home/conrad/fe-kernel-training/linux-kernel-labs/modules/nfsroot
U-Boot# printenv bootargs
bootargs=root=/dev/nfs rw ip=192.168.0.100 console=ttyO0 nfsroot=192.168.0.1:/home/conrad/fe-kernel-training/linux-kernel-labs/modules/nfsroot
U-Boot#
- We use setenv to fix the bootargs.
Explanation Of The Bootargs
- root=/dev/nfs
-
We set the root filesystem device as /dev/nfs to indicate that NFS is to be used. rw::The root filesystem should be mounted with read and write capabilities
- ip=192.168.0.100
-
The IP of the BeagleBone Black board should be 192.168.0.100 before mounting the NFS root filesystem
- console=ttyO0
-
The console to be used is serial port 0. The character before the 0 is 'O' as in "OMAP".
- nfsroot=192.168.0.1:/home/conrad/fe-kernel-training/linux-kernel-labs/modules/nfsroot
-
The NFS root filesystem server IP and path of the directory. This is similar to the workstation settings. The IP is the workstation ethernet static IP and the path is the same as that in the /etc/exports.
Download The Kernel Image And Device Tree Binary
The first step is to download the uImage via tftp. Before downloading it is good to restart the TFTP server on the workstation.
conrad@conrad-HP-Pavilion-dm3-Notebook-PC:~/fe-kernel-training$ sudo service tftpd-hpa restart
tftpd-hpa stop/waiting
tftpd-hpa start/running, process 4204
conrad@conrad-HP-Pavilion-dm3-Notebook-PC:~/fe-kernel-training$
Next on the U-Boot console we can download the uImage as we learnt in the previous lab. We download it to address 0x81000000.
U-Boot# tftp 0x81000000 uImage
link up on port 0, speed 100, full duplex
Using cpsw device
TFTP from server 192.168.0.1; our IP address is 192.168.0.100
Filename 'uImage'.
Load address: 0x81000000
Loading: #################################################################
     #################################################################
     #################################################################
     #################################################################
     #############################
     1.3 MiB/s
done
Bytes transferred = 4229448 (408948 hex)
-
Command to download uImage
-
4229448 bytes successfully transferred.
Next we download the device tree binary for the BeagleBone Black board to address 0x82000000
U-Boot# tftp 0x82000000 am335x-boneblack.dtb
link up on port 0, speed 100, full duplex
Using cpsw device
TFTP from server 192.168.0.1; our IP address is 192.168.0.100
Filename 'am335x-boneblack.dtb'.
Load address: 0x82000000
Loading: ##
     485.4 KiB/s
done
Bytes transferred = 17911 (45f7 hex)
U-Boot#
-
Command to download am335x-boneblack.dtb
-
17911 bytes successfully transferred.
Boot The Kernel
Finally we can boot the kernel from the U-Boot prompt passing the address of the uImage and the address of the device tree binary. The complete log file is available here. The credentials for the login prompt are username as root and no password.
U-Boot# bootm 0x81000000 - 0x82000000
## Booting kernel from Legacy Image at 81000000 ...
   Image Name:   Linux-3.13.11
   Image Type:   ARM Linux Kernel Image (uncompressed)
   Data Size:    4229384 Bytes = 4 MiB
   Load Address: 80008000
   Entry Point:  80008000
   Verifying Checksum ... OK
## Flattened Device Tree blob at 82000000
   Booting using the fdt blob at 0x82000000
   Loading Kernel Image ... OK
   Using Device Tree in place at 82000000, end 820075f6

Starting kernel ...
.
.

[    5.028652] libphy: 4a101000.mdio:00 - Link is Up - 100/Full
[    5.068073] IP-Config: Guessing netmask 255.255.255.0
[    5.073695] IP-Config: Complete:
[    5.077074]      device=eth0, hwaddr=90:59:af:49:c8:ef, ipaddr=192.168.0.100, mask=255.255.255.0, gw=255.255.255.255
[    5.088130]      host=192.168.0.100, domain=, nis-domain=(none)
[    5.094313]      bootserver=255.255.255.255, rootserver=192.168.0.1, rootpath=
[    5.120355] VFS: Mounted root (nfs filesystem) on device 0:13.
[    5.142936] devtmpfs: mounted
[    5.146640] Freeing unused kernel memory: 384K (c0771000 - c07d1000)
Starting logging: OK
Initializing random number generator... [    5.795678] random: dd urandom read with 56 bits of entropy available
done.
Starting network...
ip: RTNETLINK answers: File exists
Starting dropbear sshd: OK

Welcome to Buildroot
buildroot login: root
#
#
#
#
-
Successfully starting the kernel
-
The NFS root filesystem has been successfully mounted giving us access to a root terminal.
If at all the kernel fails to mount the NFS root filesystem take a look at the /var/log/syslog file.
Automating The Boot System
It is cumbersome to repeat the sequence of U-Boot commands at the console everytime we want to boot our system. We can automate the boot process by changing the bootcmd environment variable of U-Boot. Before doing so we can save the older value of bootcmd in another variable of our choice. Reset the board by pressing the "Reset" switch. Interrupt the U-Boot autoprompt sequence to gain access to the U-Boot terminal.
U-Boot# printenv bootcmd
bootcmd=run findfdt; run mmcboot;setenv mmcdev 1; setenv bootpart 1:2; run mmcboot;run nandboot;
U-Boot#
U-Boot# setenv bootcmd_orig 'run findfdt; run mmcboot;setenv mmcdev 1; setenv bootpart 1:2; run mmcboot;run nandboot;'
U-Boot# printenv bootcmd_orig
bootcmd_orig=run findfdt; run mmcboot;setenv mmcdev 1; setenv bootpart 1:2; run mmcboot;run nandboot;
U-Boot#
U-Boot# setenv bootcmd 'tftp 0x81000000 uImage; tftp 0x82000000 am335x-boneblack.dtb; bootm 0x81000000 - 0x82000000'
U-Boot# printenv bootcmd
bootcmd=tftp 0x81000000 uImage; tftp 0x82000000 am335x-boneblack.dtb; bootm 0x81000000 - 0x82000000
U-Boot# saveenv
Saving Environment to MMC...
Writing to MMC(1)... done
-
Checking the value of bootcmd
-
Note the use of single quotes for the value of the command
-
Setting the new value of bootcmd
-
Saving the environment changes
The bootcmd can be changed based on requirements. It can also be changed to boot the uImage from the eMMC flash if it is stored there. As a last step power cycle the board to check if the system boots up as was done previously. If there is an issue in the boot sequence then review the bootcmd carefully.
Halting The Sytem And Disconnecting Picocom
We have to remember that the BeagleBone Black is a development board which may not be as robust as other products. To be on the safer side it is good to shutdown the system correctly. To shutdown the system we can issue the halt command in the terminal.
buildroot login: root
#
#
# halt
The system is going down NOW!
Sent SIGTERM to all processes
Sent SIGKILL to all processes
Requesting system halt
[  202.908940] reboot: System halted
-
On issuing halt wait for the system to shutdown
-
The last log received
Finally picocom can be disengaged carefully by keying the "espace character" which by default is "C-a" and then by hitting "x".
This section covers details about Linux Kernel modules. Some features of the kernel can be loaded as modules after it boots up. We will understand what a module is and when it is used. We will also write, compile and test our very own kernel module.
When Do We Use Kernel Modules
In the Configuring Features As Modules section we learnt about Kernel modules and how we can configure certain features of the kernel source code to be compiled as separate binaries that can be loaded into the kernel after it boots up. These modules can also exist independent of the kernel source code in another source path and can be compiled with the headers of the kernel so long as the API used in the module are compatible with the kernel source code.
We use kernel modules when:
-
We are interested in developing a feature of the kernel independently. This allows us to make changes to the module source code, load and test it without having to reboot the kernel. If the source code were a part of the kernel source code we would have to reboot the kernel everytime we wanted to test the code.
-
We want to minimize the size of the kernel image. In most cases if the system is a general purpose system then the drivers and features required by certain applications do not have to be present in the kernel from boot. They can be loaded on demand. In embedded systems the kernel is sometimes stored on a limited storage device like NAND flash on a partition. The size of the partition of the kernel will depend on the size of the kernel used for the applications of that system.
-
We want to minimize the boot time to improve system responsiveness after a reboot. If features that are not required immediately after boot are part of the kernel then their initialization will be add to the boot time. We can delay their initialization using kernel modules.
Determining Kernel Module Dependencies
Kernel modules cannot be loaded if the modules they depend on have not been loaded into the kernel. To check the module dependencies of a particular module, read the module information using modinfo. Apart from other useful information about the Kernel module modinfo will also give a list of dependencies in the depends field. We will check the module dependency for one of the kernel modules in our workstation as an example.
conrad@conrad-HP-Pavilion-dm3-Notebook-PC:~/fe-kernel-training$ modinfo mac80211
filename:       /lib/modules/3.13.0-45-generic/kernel/net/mac80211/mac80211.ko
license:        GPL
description:    IEEE 802.11 subsystem
srcversion:     385697223F8285F67C93A06
depends:        cfg80211
intree:         Y
vermagic:       3.13.0-45-generic SMP mod_unload modversions 686
signer:         Magrathea: Glacier signing key
sig_key:        36:89:BF:48:AF:50:2C:BA:FE:71:E5:C2:5D:6C:55:34:0B:7F:13:FF
sig_hashalgo:   sha512
parm:           max_nullfunc_tries:Maximum nullfunc tx tries before disconnecting (reason 4). (int)
parm:           max_probe_tries:Maximum probe tries before disconnecting (reason 4). (int)
parm:           beacon_loss_count:Number of beacon intervals before we decide beacon was lost. (int)
parm:           probe_wait_ms:Maximum time(ms) to wait for probe response before disconnecting (reason 4). (int)
parm:           ieee80211_default_rc_algo:Default rate control algorithm for mac80211 to use (charp)
-
We use modinfo to check the information about mac80211
-
We see the dependency is module cfg80211
The utility modinfo can be also given the full path file name of a kernel module if it is not loaded into the system
conrad@conrad-HP-Pavilion-dm3-Notebook-PC:~/fe-kernel-training$ modinfo /lib/modules/3.13.0-45-generic/kernel/net/mac80211/mac80211.ko
filename:       /lib/modules/3.13.0-45-generic/kernel/net/mac80211/mac80211.ko
license:        GPL
description:    IEEE 802.11 subsystem
srcversion:     385697223F8285F67C93A06
depends:        cfg80211
intree:         Y
vermagic:       3.13.0-45-generic SMP mod_unload modversions 686
signer:         Magrathea: Glacier signing key
sig_key:        36:89:BF:48:AF:50:2C:BA:FE:71:E5:C2:5D:6C:55:34:0B:7F:13:FF
sig_hashalgo:   sha512
parm:           max_nullfunc_tries:Maximum nullfunc tx tries before disconnecting (reason 4). (int)
parm:           max_probe_tries:Maximum probe tries before disconnecting (reason 4). (int)
parm:           beacon_loss_count:Number of beacon intervals before we decide beacon was lost. (int)
parm:           probe_wait_ms:Maximum time(ms) to wait for probe response before disconnecting (reason 4). (int)
parm:           ieee80211_default_rc_algo:Default rate control algorithm for mac80211 to use (charp)
conrad@conrad-HP-Pavilion-dm3-Notebook-PC:~/fe-kernel-training$
- We give the full path file name of the kernel module
The kernel module dependencies are described in the /lib/modules/<kernel-version>/modules.dep file which is generated when running the make modules_install command.
Inserting Kernel Modules
To insert a module into the kernel we have to use the insmod command. As a kernel module has the ability to affect the running kernel it requires administrative privileges in order to insert the module. The full path of the kernel module must be given e.g. sudo insmod <module_path>.ko
It may so happen that the kernel module may refuse to load and insmod will exit without giving sufficient details. In such a case we can inspect the kernel logs using dmesg to understand what is failing.
Another method of inserting the module is to use modprobe. With this method all dependent modules are also loaded into the kernel before loading the module required. To do this modprobe determines the dependency tree of the module and loads them in order. The dependent modules are searched in the /lib/modules/<version>/. Based on the module name the corresponding object file name is searched.
To list the modules which are inserted into the kernel we can use the lsmod utility. Another way is to cat the contents of /proc/modules.
Removing Kernel Modules
We can remove a module which has been inserted and is live as part of the kernel if no other process or kernel module is using it. To do this we have to use the rmmod utility with administrator privileges e.g. sudo rmmod <module name>.
Another way of removing the kernel module is with modprobe e.g. modprobe -r <module name>. This will attempt to remove the module and all the dependent modules which are no longer needed after removing the module.
Passing Parameters To Modules
A kernel module can take parameters before loading it so as to change its behavior during execution. The parameters of a kernel module can be determined with the modinfo utility.
conrad@conrad-HP-Pavilion-dm3-Notebook-PC:~/fe-kernel-training$ modinfo mac80211
filename:       /lib/modules/3.13.0-45-generic/kernel/net/mac80211/mac80211.ko
license:        GPL
description:    IEEE 802.11 subsystem
srcversion:     385697223F8285F67C93A06
depends:        cfg80211
intree:         Y
vermagic:       3.13.0-45-generic SMP mod_unload modversions 686
signer:         Magrathea: Glacier signing key
sig_key:        36:89:BF:48:AF:50:2C:BA:FE:71:E5:C2:5D:6C:55:34:0B:7F:13:FF
sig_hashalgo:   sha512
parm:           max_nullfunc_tries:Maximum nullfunc tx tries before disconnecting (reason 4). (int)
parm:           max_probe_tries:Maximum probe tries before disconnecting (reason 4). (int)
parm:           beacon_loss_count:Number of beacon intervals before we decide beacon was lost. (int)
parm:           probe_wait_ms:Maximum time(ms) to wait for probe response before disconnecting (reason 4). (int)
parm:           ieee80211_default_rc_algo:Default rate control algorithm for mac80211 to use (charp)
-
We use modinfo to check the information about mac80211
-
Parameter max_nullfunc_tries indicated with the parm field.
-
Parameter max_probe_tries indicated with the parm field.
-
Parameter beacon_loss_count indicated with the parm field.
-
Parameter probe_wait_ms indicated with the parm field.
-
Parameter ieee80211_default_rc_algo indicated with the parm field.
There are several ways of passing parameters to the kernel module:
-
Through insmod:
sudo insmod ./snd-intel8x0m index=-2 -
Through modprobe by setting parameters in /etc/modprobe.conf or any file in /etc/modprobe.d/ as follows:
options snd-intel8x0m index=-2 -
Through the kernel command line, when the driver is built as part of the kernel:
snd-intel8x0m index=-2a. snd-intel8x0m is the kernel module name
b. index is the parameter
c. -2 is the value
To check the current values of modules already loaded in the kernel check the /sys/module/<name>/parameters directory. Each file in it represents a parameter and its content is the value of that parameter for the running module.
conrad@conrad-HP-Pavilion-dm3-Notebook-PC:~$ ls /sys/module/snd/parameters/
cards_limit  debug  major  slots
conrad@conrad-HP-Pavilion-dm3-Notebook-PC:~$ cat /sys/module/snd/parameters/cards_limit
1
conrad@conrad-HP-Pavilion-dm3-Notebook-PC:~$ cat /sys/module/snd/parameters/debug
1
conrad@conrad-HP-Pavilion-dm3-Notebook-PC:~$ cat /sys/module/snd/parameters/major
116
conrad@conrad-HP-Pavilion-dm3-Notebook-PC:~$ cat /sys/module/snd/parameters/slots
(null),(null),(null),(null),(null),(null),(null),(null),(null),(null),(null),(null),(null),(null),(null),(null),(null),(null),(null),(null),(null),(null),(null),(null),(null),(null),(null),(null),(null),(null),(null),(null)
conrad@conrad-HP-Pavilion-dm3-Notebook-PC:~$
-
Listing the parameters cards_limit, debug, major, slots
-
Checking the values passed to the parameter card_limit
-
Checking the values passed to the parameter debug
-
Checking the values passed to the parameter major
-
Checking the values passed to the parameter slots
Developing Kernel Modules
We will first take a look at a sample source code of a Linux kernel module.
#include <linux/init.h>
#include <linux/module.h>
#include <linux/kernel.h>


static int __init sample_module_init(void)
{
    pr_alert("Wassup!\n");
    return 0;
}

static void __exit sample_module_exit(void)
{
    pr_alert("Cya Later!\n");
}

module_init(sample_module_init);
module_exit(sample_module_exit);

MODULE_LICENSE("GPL");
MODULE_DESCRIPTION("Sample Module");
MODULE_AUTHOR("Newbie");
-
Only headers specific to the Linux kernel, no access to the standard C library
-
Defining an initialization function, returns an int to indicate the status of the initialization when insmod is used to load the module.
-
The macro module_init is used to register the initialization function for the module.
-
Defining a cleanup function for the module.
-
The macro module_exit is used to register the cleanup function for the module.
-
Metadata for the module defining the license type, description and the author.
The source code is in C but it has some special symbols which are not used in user space application programming:\
- __init
-
This indicates that the module initializaiton function sample_module_init can be removed after initialization. The function is called only once when the module starts up and thereafter is not used. This optimizes the memory usage of the kernel.
- __exit
-
This indicates that the function is discarded if the module is compiled statically into the kernel or if module unloading is disabled. Its primary use is for loadable kernel modules.
It should be noted that the name of the initialization and cleanup functions can be anything however the module name is often used to form the functions (<modulename>_init()/<modulename_exit()).
Symbols Exported To Modules
A kernel module can use functions and variables defined in other parts of the Linux kernel source code so long as they are exported. There are two macros that are used to export the symbol names that can be used by other modules:\
- EXPORT_SYMBOL(symbolname)
-
Exports a function or variable to all modules
- EXPORT_SYMBOL_GPL(symbolname)
-
Exports a function or variable to only GPL modules
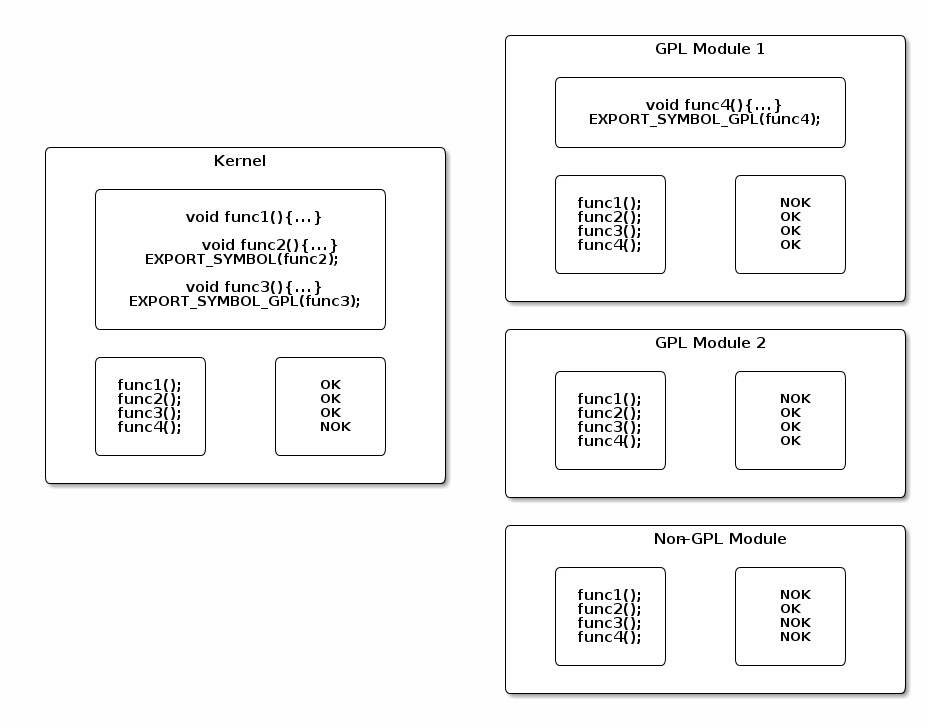
The diagram illustrates the difference between exporting a symbol with EXPORT_SYMBOL versus EXPORT_SYMBOL_GPL. Symbols exported by EXPORT_SYMBOL_GPL(func3, func4) can be used by only GPL modules whereas symbols exported by EXPORT_SYMBOL can be used by both GPL and Non-GPL modules. A module gets it’s license from the MODULE_LICENSE macro added in it’s source code along with the other metadata.
#include <linux/init.h>
#include <linux/module.h>
#include <linux/kernel.h>

static int __init sample_module_init(void)
.
.
.
MODULE_LICENSE("GPL");
MODULE_DESCRIPTION("Sample Module");
MODULE_AUTHOR("Newbie");
- Module license is GPL
The kernel can only use symbols defined in its source code. It cannot use symbols exported by modules even if they are GPL licensed modules. Symbols exported with EXPORT_SYMBOL_GPL can be used only by GPL licensed modules. Symbols exported with EXPORT_SYMBOL can be used by GPL and Non-GPL licensed modules
About Module Licenses
The MODULE_LICENSE macro is used to define the license of the module. It is used to restrict the functions that a module can use if it is not a GPL licensed module. GPL licensed modules have access to all exported symbols whereas Non-GPL licensed modules can only access symbols exported with EXPORT_SYMBOL.
Another use for module licenses is to identify issues comming from proprietary modules. Typically kernel developers do not fix issues coming from proprietary modules or drivers which cause kernel crashes and OOPSes.
#ifndef __LICENSE_H
#define __LICENSE_H

static inline int license_is_gpl_compatible(const char *license)
{
        return (strcmp(license, "GPL") == 0
                || strcmp(license, "GPL v2") == 0
                || strcmp(license, "GPL and additional rights") == 0
                || strcmp(license, "Dual BSD/GPL") == 0
                || strcmp(license, "Dual MIT/GPL") == 0
                || strcmp(license, "Dual MPL/GPL") == 0);
}

#endif
GPL compatible licenses are defined in the include/linux/license.h file as shown above. These include GPL, GPL v2, GPL and additional rights, Dual BSD/GPL, Dual MIT/GPL or Dual MPL/GPL. All other licenses are considered as proprietary.
Compiling Modules Out Of Tree
The source code is maintained separately outside the kernel source code. It is easier to modify the source code, however adapting the module source code to changes in the kernel API means that the maintainer has the onus of keeping it upto date with the changing kernel. One disadvantage is that the module cannot be built statically with the kernel. The following snippet shows the Makefile that can be used to build an out of tree kernel module/driver.
ifneq ($(KERNELRELEASE),)
obj-m := wassup.o
else
KDIR := /path/to/kernel/sources

all:
    $(MAKE) -C $(KDIR) M=$$PWD
endif
- Rule for the target all
When compiled out of tree the Makefile does not have KERNELRELEASE defined and therefore KDIR is set to the path to either:
-
Full kernel directory
-
Kernel Headers Directory
The kernel Makefile gets invoked as KDIR is set and the rule for the target all will change to the KDIR first and call the corresponding Makefile in that path. Additionally $PWD is passed as an argument value in M to the kernel Makefile. The double $$ is required to pass $PWD as the value to M.
The kernel Makefile knows that it has to compile a module and because there is a value for M it can locate where the module Makefile is present. This time the kernel Makefile calls the module Makefile and the value of KERNELRELEASE is defined. The kernel uses the definition of obj-m to identify the module to be compiled which in our case is wassup.o. In this way the module Makefile given above is invoked twice, the first time from the module directory and second time by the kernel Makefile.
The kernel directory pointed to by KDIR in the module makefile must be configured as there will be differences between different configurations of the kernel. The module compiled against a specific version will only load in that version and configuration of the kernel. If there is a mismatch then insmod/modprobe will crib with an output "Invalid module format".
Compiling Modules Inside Of The Kernel Tree
The source code is integrated inside the kernel source code. It can be integrated with the configuration and compilation process of the kernel. The module can be built statically with the kernel source code.
To add a new driver or module to the kernel source tree we have to place the source file in the appropriate source directory. For example we’ll take a look at the USB serial navman driver. The source code for the driver/module should be present in a single file. If the driver is really big then it should have its own directory. The source file for the navman driver is in drivers/usb/serial/navman.c
To configure the kernel to include a module or driver we need to add information in the drivers/usb/serial/Kconfig file in the same directory. The snippet below shows that the navman driver has a kernel option type of tristate which means it can be enabled, disabled or configured as a module.
.
.
config USB_SERIAL_NAVMAN
        tristate "USB Navman GPS device"
        help
          To compile this driver as a module, choose M here: the
          module will be called navman.
.
.
Next we take a look at the drivers/usb/serial/Makefile which has a line based on the drivers/usb/serial/Kconfig setting. The name of the configuration field CONFIG_USB_SERIAL_NAVMAN is derived from the KConfig settings. The value of CONFIG_USB_SERIAL_NAVMAN will be based on the configuration applied upon invoking make menuconfig. After configuring the kernel and enabling th module/driver we can build it by running make.
.
.
obj-$(CONFIG_USB_SERIAL_MOS7840)                += mos7840.o
obj-$(CONFIG_USB_SERIAL_NAVMAN)                 += navman.o
obj-$(CONFIG_USB_SERIAL_OMNINET)                += omninet.o
.
.
Further information about the Kernel build process and incorporating
newer files to the source can be obtained at:
Documentation/kbuild
Adding Parameters To Kernel Modules
Kernel modules can have parameters which can change the runtime behavior of the kernel based on the input arguments. There are two methods which can be used to declare module parameters.
- module_param(name, type, perm)
-
This method declares a single parameter
- module_param_array(name, type, nump, perm)
-
This method is used to declare an array as a parameter.\
-
name : the variable to alter, and exposed parameter name. It becomes the module parameter, or (prefixed by KBUILD_MODNAME and a ".") the kernel commandline parameter.
-
type : the type of the parameter. Standard types are:
a. byte, short, ushort, int, uint, long, ulong
b. charp, a character pointer
c. bool, a bool, values 0/1, y/n, Y/N.
d. invbool, the above, only sense-reversed (N = true).
-
perm : visibility in sysfs.is 0 if the the variable is not to appear in sysfs, or 0444 for world-readable, 0644 for root-writable, etc. Note that if it is writable, you may need to use kparam_block_sysfs_write() around accesses (esp. charp, which can be kfreed when it changes)
-
nump : optional pointer filled in with the number written.
-
#include <linux/init.h>
#include <linux/module.h>
#include <linux/kernel.h>

/* Parameters that control who gets wassup'd and how many times */

static char* yourname = "Anonymous";
module_param(yourname, charp, 0);

static int ntimes = 1;
module_param(ntimes, int, 0);

static int __init sample_module_init(void)
{
    int i = 0;

    for(i = 0 ; i < ntimes ; i++)
        pr_alert("Wassup %s!\n", yourname);
    return 0;
}

static void __exit sample_module_exit(void)
{
    int i = 0;

    for(i = 0 ; i < ntimes ; i++)
        pr_alert("Cya Later %s!\n", yourname);
}

module_init(sample_module_init);
module_exit(sample_module_exit);

MODULE_LICENSE("GPL");
MODULE_DESCRIPTION("Sample Module With Parameters");
MODULE_AUTHOR("Newbie");
LAB 4 : Writing Kernel Modules
Note
Cross-compile and test standalone kernel modules, whose code is not part of the main Linux sources.
Write a kernel module with different capabilities
Access kernel internals from within the kernel module.
Set up the environment to compile it.
Create a kernel patch.
Starting With A Template File
Since we’ve enabled a NFS root filesystem we can compile our kernel module on the development server and test it on out BeagleBone Black target.
We go to the ~/fe-kernel-training/linux-kernel-labs/modules/nfsroot/root/hello directory. A template file hello_version.c is present which we can modify to test the module.
hello_version.c  Makefile
conrad@conrad-HP-Pavilion-dm3-Notebook-PC:~/fe-kernel-training/linux-kernel-labs/modules/nfsroot/root/hello$ cat hello_version.c
#include <linux/init.h>
#include <linux/module.h>
#include <linux/i2c.h>

/* Add your code here */

MODULE_LICENSE("GPL");

conrad@conrad-HP-Pavilion-dm3-Notebook-PC:~/fe-kernel-training/linux-kernel-labs/modules/nfsroot/root/hello$
Adding Code To The Template
Our first objective is to print a message as follows:\
*Hello Master. You are currently using Linux <version>*
To do this we need to find some function which will spit out the version of the kernel running. Here’s where we have to search the kernel sources or use any other means to locate a suitable function to get the kernel version.
Searching For A Version Function/MACRO
First we try searching for files in the kernel sources which have version in them.
conrad@conrad-HP-Pavilion-dm3-Notebook-PC:~/Git/linux$ find . -name '*version*'
./arch/x86/boot/version.c
./arch/x86/math-emu/version.h
.
.
.
./init/version.o
./init/.version.o.cmd
./init/version.c
./Documentation/isdn/README.diversion
./Documentation/misc-devices/mei/mei-amt-version.c
./fs/proc/version.o
./fs/proc/.version.o.cmd
./fs/proc/version.c
./fs/reiserfs/tail_conversion.c
./.tmp_versions
./.version
./sound/pci/asihpi/hpi_version.h
./tools/power/cpupower/utils/version-gen.sh
./tools/perf/config/feature-checks/test-libpython-version.c
conrad@conrad-HP-Pavilion-dm3-Notebook-PC:~/Git/linux$
- A possible candidate
Opening the file version.c we see that it does print some sort of version information using a MACRO UTS_RELEASE.
#include <generated/compile.h>
#include <linux/module.h>
#include <linux/uts.h>
#include <linux/utsname.h>
#include <generated/utsrelease.h>
#include <linux/version.h>
#include <linux/proc_ns.h>

#ifndef CONFIG_KALLSYMS
#define version(a) Version_ ## a
#define version_string(a) version(a)

extern int version_string(LINUX_VERSION_CODE);
int version_string(LINUX_VERSION_CODE);
#endif

struct uts_namespace init_uts_ns = {
        .kref = {
                .refcount       = ATOMIC_INIT(2),
        },
        .name = {
                .sysname        = UTS_SYSNAME,
                .nodename       = UTS_NODENAME,
                .release        = UTS_RELEASE,
                .version        = UTS_VERSION,
                .machine        = UTS_MACHINE,
                .domainname     = UTS_DOMAINNAME,
        },
        .user_ns = &init_user_ns,
        .proc_inum = PROC_UTS_INIT_INO,
};
EXPORT_SYMBOL_GPL(init_uts_ns);

/* FIXED STRINGS! Don't touch! */
const char linux_banner[] =
        "Linux version " UTS_RELEASE " (" LINUX_COMPILE_BY "@"
        LINUX_COMPILE_HOST ") (" LINUX_COMPILER ") " UTS_VERSION "\n";

const char linux_proc_banner[] =
        "%s version %s"
        " (" LINUX_COMPILE_BY "@" LINUX_COMPILE_HOST ")"
        " (" LINUX_COMPILER ") %s\n";
-
Header file with definitions
-
Header file with generated release name
-
Macro used to pring version of compiled kernel
We take a look at the header files and see that <generated/utsrelease.h> defines the MACRO UTS_RELEASE which is the version of the kernel.
However if we take a careful look at <linux/utsname.h> we see there is a function utsname. This function returns the current kernel information in the form a structure struct new_utsname.
#ifndef _LINUX_UTSNAME_H
#define _LINUX_UTSNAME_H
#include <linux/sched.h>
#include <linux/kref.h>
#include <linux/nsproxy.h>
#include <linux/err.h>
#include <uapi/linux/utsname.h>
.
.
.
.
static inline struct new_utsname *utsname(void)
{
return ¤t->nsproxy->uts_ns->name;
}
.
.
- Header file with definition of struct new_utsname
The structure is in the header file <uapi/linux/utsname.h>. Opening the file we see which member we need to print the current kernel version.
#ifndef _UAPI_LINUX_UTSNAME_H
#define _UAPI_LINUX_UTSNAME_H

#define __OLD_UTS_LEN 8

struct oldold_utsname {
        char sysname[9];
        char nodename[9];
        char release[9];
        char version[9];
        char machine[9];
};

#define __NEW_UTS_LEN 64

struct old_utsname {
        char sysname[65];
        char nodename[65];
        char release[65];
        char version[65];
        char machine[65];
};

struct new_utsname {
        char sysname[__NEW_UTS_LEN + 1];
        char nodename[__NEW_UTS_LEN + 1];
        char release[__NEW_UTS_LEN + 1];
        char version[__NEW_UTS_LEN + 1];
        char machine[__NEW_UTS_LEN + 1];
        char domainname[__NEW_UTS_LEN + 1];
};


#endif /* _UAPI_LINUX_UTSNAME_H */
- The character string with the kernel version.
Implementing The Version Function/MACRO Into The Module
We can now write our C code to print the kernel information. We add the code in the initialization code of the kernel module.
#include <linux/init.h>
#include <linux/module.h>
#include <linux/kernel.h>
#include <linux/utsname.h>
#include <generated/utsrelease.h>

static int __init version_init(void)
{
        printk(KERN_INFO "Hello Master you are currently using kernel version %s\n", utsname()->release);
        printk(KERN_INFO "Your kernel module is compiled with version %s\n", UTS_RELEASE);
        return 0;
}

static void __exit version_exit(void)
{
        printk(KERN_INFO "Over and out!\n");
}

module_init(version_init);
module_exit(version_exit);

MODULE_LICENSE("GPL");
MODULE_AUTHOR("zeuzoix");
MODULE_DESCRIPTION("Kernel Module Version Example Module");

MODULE_LICENSE("GPL");
-
Printing the run time version
-
Printing the compile time version
To compile the kernel module we use the Makefile present in the same directory
conrad@conrad-HP-Pavilion-dm3-Notebook-PC:~/fe-kernel-training/linux-kernel-labs/modules/nfsroot/root/hello$ cat Makefile
ifneq ($(KERNELRELEASE),)
obj-m := hello_version.o
else
KDIR := $(HOME)/linux-kernel-labs/src/linux
all:
        $(MAKE) -C $(KDIR) M=$$PWD
endif
We can pass the KDIR variable to the make command to use our kernel source.
conrad@conrad-HP-Pavilion-dm3-Notebook-PC:~/fe-kernel-training/linux-kernel-labs/modules/nfsroot/root/hello$ make KDIR=/home/conrad/Git/linux
make -C /home/conrad/Git/linux M=$PWD
make[1]: Entering directory `/home/conrad/Git/linux'
  CC [M]  /home/conrad/fe-kernel-training/linux-kernel-labs/modules/nfsroot/root/hello/hello_version.o
  Building modules, stage 2.
  MODPOST 1 modules
  CC      /home/conrad/fe-kernel-training/linux-kernel-labs/modules/nfsroot/root/hello/hello_version.mod.o
  LD [M]  /home/conrad/fe-kernel-training/linux-kernel-labs/modules/nfsroot/root/hello/hello_version.ko
make[1]: Leaving directory `/home/conrad/Git/linux'
conrad@conrad-HP-Pavilion-dm3-Notebook-PC:~/fe-kernel-training/linux-kernel-labs/modules/nfsroot/root/hello$
Testing The Kernel Module
After compiling the kernel module we can immediately test it on the target by going to the folder and inserting the compiled ko file.
Welcome to Buildroot
buildroot login: root
# cd /root/hello/
# ls
Makefile             hello_version.c      hello_version.mod.o
Module.symvers       hello_version.ko     hello_version.o
built-in.o           hello_version.mod.c  modules.order
# insmod hello_version.ko
[12261.297192] Hello Master you are currently using kernel version 3.13.11
[12261.304310] Your kernel module is compiled with version 3.13.11
#
- Insert the compiled kernel module
Great, now that the module works we take a look at seeing which modules are inserted in the running kernel. There are two ways to do it as shown below.
# lsmod
Module                  Size  Used by    Tainted: G
hello_version            824  0
#
# cat /proc/modules
hello_version 824 0 - Live 0xbf000000 (O)
#
-
Using lsmod
-
Reading /proc/modules
Finally if we need to unload the kernel moduel we can use rmmod.
# rmmod hello_version
[12557.539564] Over and out!
#
- rmmod removes the kernel module.
Adding A Parameter To The Module
We’ll now try to add a parameter to the module. Let’s try to change Master based on a parameter passed. In order to define a new parameter we define a static gobal string and use module_param to indicate that it is a module parameter.
Additionally we use MODULE_PARM_DESC to give description about the new module parameter.
#include <linux/init.h>
#include <linux/module.h>
#include <linux/kernel.h>
#include <linux/utsname.h>
#include <generated/utsrelease.h>

static char *who = "Master";
module_param(who, charp, 0);

static int __init version_init(void)
{
        printk(KERN_INFO "Hello %s you are currently using kernel version %s\n", who, utsname()->release);
        printk(KERN_INFO "Your kernel module is compiled with version %s\n", UTS_RELEASE);
        return 0;
}

static void __exit version_exit(void)
{
        printk(KERN_INFO "Over and out!\n");
}

module_init(version_init);
module_exit(version_exit);

MODULE_LICENSE("GPL");
MODULE_AUTHOR("zeuzoix");
MODULE_DESCRIPTION("Kernel Module Version Example Module");
MODULE_PARM_DESC(who, "Name of the user");

MODULE_LICENSE("GPL");
-
Definition static global string, who
-
Declaring who as a module parameter
-
Using who in the statement
-
Adding a module parameter description with MODULE_PARM_DESC
On testing the module we must pass the value of who in the arguments with insmod. If we don’t pass any value the default value of "Master" is used.
# insmod hello_version.ko
[ 9790.064102] Hello Master you are currently using kernel version 3.13.11
[ 9790.071216] Your kernel module is compiled with version 3.13.11
# rmmod hello_version
[ 9796.676646] Over and out!
# insmod hello_version.ko who="Anonymous"
[ 9814.183983] Hello Master you are currently using kernel version 3.13.11
[ 9814.191080] Your kernel module is compiled with version 3.13.11
#
# rmmod hello_version
[ 9822.334179] Over and out!
#
# insmod hello_version.ko who="Anonymous"
[ 9869.352553] Hello Anonymous you are currently using kernel version 3.13.11
[ 9869.359930] Your kernel module is compiled with version 3.13.11
# rmmod hello_version
[ 9874.813462] Over and out!
-
Without arguments
-
With argument as Anonymous
Following Linux Coding Standards
Coding style is a matter of personal taste but it is crucial for every software project to adhere to a coding standard. This helps in maintaining consistency in the style of code being generated for the project. It makes the code easier to read and also easier to maintain.
The Linux kernel also has its own coding style and also provides a utility to check for source code violations. The utility is checkpatch.pl
conrad@conrad-HP-Pavilion-dm3-Notebook-PC:~/Git/linux$ scripts/checkpatch.pl -h
Usage: checkpatch.pl [OPTION]... [FILE]...
Version: 0.32

Options:
  -q, --quiet                quiet
  --no-tree                  run without a kernel tree
  --no-signoff               do not check for 'Signed-off-by' line
  --patch                    treat FILE as patchfile (default)
  --emacs                    emacs compile window format
  --terse                    one line per report
  -f, --file                 treat FILE as regular source file
  --subjective, --strict     enable more subjective tests
  --types TYPE(,TYPE2...)    show only these comma separated message types
  --ignore TYPE(,TYPE2...)   ignore various comma separated message types
  --max-line-length=n        set the maximum line length, if exceeded, warn
  --show-types               show the message "types" in the output
  --root=PATH                PATH to the kernel tree root
  --no-summary               suppress the per-file summary
  --mailback                 only produce a report in case of warnings/errors
  --summary-file             include the filename in summary
  --debug KEY=[0|1]          turn on/off debugging of KEY, where KEY is one of
                             'values', 'possible', 'type', and 'attr' (default
                             is all off)
  --test-only=WORD           report only warnings/errors containing WORD
                             literally
  --fix                      EXPERIMENTAL - may create horrible results
                             If correctable single-line errors exist, create
                             "<inputfile>.EXPERIMENTAL-checkpatch-fixes"
                             with potential errors corrected to the preferred
                             checkpatch style
  --ignore-perl-version      override checking of perl version.  expect
                             runtime errors.
  -h, --help, --version      display this help and exit

When FILE is - read standard input.
conrad@conrad-HP-Pavilion-dm3-Notebook-PC:~/Git/linux$
We run the checkpatch.pl utility on our hello_version.c kernel module.
conrad@conrad-HP-Pavilion-dm3-Notebook-PC:~/fe-kernel-training/linux-kernel-labs/modules/nfsroot/root/hello$ ~/Git/linux/scripts/checkpatch.pl --file --no-tree hello_version.c
WARNING: line over 80 characters
#20: FILE: hello_version.c:20:
+        printk(KERN_INFO "Hello %s you are currently using kernel version %s\n", who, utsname()->release);

ERROR: code indent should use tabs where possible
#20: FILE: hello_version.c:20:
+        printk(KERN_INFO "Hello %s you are currently using kernel version %s\n", who, utsname()->release);$

WARNING: please, no spaces at the start of a line
#20: FILE: hello_version.c:20:
+        printk(KERN_INFO "Hello %s you are currently using kernel version %s\n", who, utsname()->release);$

WARNING: Prefer netdev_info(netdev, ... then dev_info(dev, ... then pr_info(...  to printk(KERN_INFO ...
#20: FILE: hello_version.c:20:
+        printk(KERN_INFO "Hello %s you are currently using kernel version %s\n", who, utsname()->release);

WARNING: line over 80 characters
#21: FILE: hello_version.c:21:
+        printk(KERN_INFO "Your kernel module is compiled with version %s\n", UTS_RELEASE);

ERROR: code indent should use tabs where possible
#21: FILE: hello_version.c:21:
+        printk(KERN_INFO "Your kernel module is compiled with version %s\n", UTS_RELEASE);$

WARNING: please, no spaces at the start of a line
#21: FILE: hello_version.c:21:
+        printk(KERN_INFO "Your kernel module is compiled with version %s\n", UTS_RELEASE);$

WARNING: Prefer netdev_info(netdev, ... then dev_info(dev, ... then pr_info(...  to printk(KERN_INFO ...
#21: FILE: hello_version.c:21:
+        printk(KERN_INFO "Your kernel module is compiled with version %s\n", UTS_RELEASE);

ERROR: code indent should use tabs where possible
#22: FILE: hello_version.c:22:
+        return 0;$

WARNING: please, no spaces at the start of a line
#22: FILE: hello_version.c:22:
+        return 0;$

ERROR: code indent should use tabs where possible
#34: FILE: hello_version.c:34:
+        printk(KERN_INFO "Over and out!\n");$

WARNING: please, no spaces at the start of a line
#34: FILE: hello_version.c:34:
+        printk(KERN_INFO "Over and out!\n");$

WARNING: Prefer netdev_info(netdev, ... then dev_info(dev, ... then pr_info(...  to printk(KERN_INFO ...
#34: FILE: hello_version.c:34:
+        printk(KERN_INFO "Over and out!\n");

ERROR: code indent should use tabs where possible
#35: FILE: hello_version.c:35:
+        printk(KERN_INFO "Time lapsed is %u s\n", do_div(n_secs,NSEC_PER_SEC));$

WARNING: please, no spaces at the start of a line
#35: FILE: hello_version.c:35:
+        printk(KERN_INFO "Time lapsed is %u s\n", do_div(n_secs,NSEC_PER_SEC));$

WARNING: Prefer netdev_info(netdev, ... then dev_info(dev, ... then pr_info(...  to printk(KERN_INFO ...
#35: FILE: hello_version.c:35:
+        printk(KERN_INFO "Time lapsed is %u s\n", do_div(n_secs,NSEC_PER_SEC));

ERROR: space required after that ',' (ctx:VxV)
#35: FILE: hello_version.c:35:
+        printk(KERN_INFO "Time lapsed is %u s\n", do_div(n_secs,NSEC_PER_SEC));
                                                                ^

total: 6 errors, 11 warnings, 46 lines checked

NOTE: whitespace errors detected, you may wish to use scripts/cleanpatch or
      scripts/cleanfile

hello_version.c has style problems, please review.

If any of these errors are false positives, please report
them to the maintainer, see CHECKPATCH in MAINTAINERS.
conrad@conrad-HP-Pavilion-dm3-Notebook-PC:~/fe-kernel-training/linux-kernel-labs/modules/nfsroot/root/hello$
-
Spaces used instead of tabs
-
Line over 80 characters long
-
Space detected at the start of the line
-
pr_info to be used instead of printk
After correcting the warnings we get the following output:
conrad@conrad-HP-Pavilion-dm3-Notebook-PC:~/fe-kernel-training/linux-kernel-labs/modules/nfsroot/root/hello$ ~/Git/linux/scripts/checkpatch.pl --file --no-tree hello_version.c
total: 0 errors, 0 warnings, 48 lines checked

hello_version.c has no obvious style problems and is ready for submission.
- Source code has 0 errors and 0 warnings
We’ve followed the guidelines as mentioned in Documentation/CodingStyle. The source code after corrections looks like this:
#include <linux/init.h>
#include <linux/module.h>
#include <linux/kernel.h>
#include <linux/utsname.h>
#include <generated/utsrelease.h>
#include <linux/time.h>
#include <asm/div64.h>


static char *who = "Master";
module_param(who, charp, 0);

/* Note starting time of kernel module */
static struct timeval start;

static int __init version_init(void)
{

        do_gettimeofday(&start);
        pr_info("Hello %s you are currently using kernel version %s\n",
                who, utsname()->release);
        pr_info("Your kernel module is compiled with version %s\n",
                UTS_RELEASE);
        return 0;
}

static void __exit version_exit(void)
{
        struct timeval now;
        s64 n_secs;

        do_gettimeofday(&now);

        n_secs = timeval_to_ns(&now) - timeval_to_ns(&start);

        pr_info("Over and out!\n");
        pr_info("Time lapsed is %u s\n", do_div(n_secs, NSEC_PER_SEC));
}

module_init(version_init);
module_exit(version_exit);

MODULE_LICENSE("GPL");
MODULE_AUTHOR("zeuzoix");
MODULE_DESCRIPTION("Kernel Module Version Example Module");
MODULE_PARM_DESC(who, "Name of the user");

MODULE_LICENSE("GPL");
Adding hello_version To The Kernel Sources
Its time to add our tested kernel module to the kernel sources. We create a special branch for our changes and then attempt to add the module sources to the drivers/misc directory:
conrad@conrad-HP-Pavilion-dm3-Notebook-PC:~/fe-kernel-training/linux-kernel-labs/modules/nfsroot/root/hello$ cd ~/Git/linux
conrad@conrad-HP-Pavilion-dm3-Notebook-PC:~/Git/linux$ git checkout 3.13.y
Already on '3.13.y'
Your branch is up-to-date with 'stable/linux-3.13.y'.
conrad@conrad-HP-Pavilion-dm3-Notebook-PC:~/Git/linux$ git branch
* 3.13.y
  fix_unioxx5
  master
  tutorialv2
  tutorialv3
  tutorialv4
  tutorialv5
conrad@conrad-HP-Pavilion-dm3-Notebook-PC:~/Git/linux$ git checkout -b hello_version
Switched to a new branch 'hello_version'
conrad@conrad-HP-Pavilion-dm3-Notebook-PC:~/Git/linux$ git branch
  3.13.y
  fix_unioxx5
* hello_version
  master
  tutorialv2
  tutorialv3
  tutorialv4
  tutorialv5
conrad@conrad-HP-Pavilion-dm3-Notebook-PC:~/Git/linux$ cp ~/fe-kernel-training/linux-kernel-labs/modules/nfsroot/root/hello/hello_version.c ~/Git/linux/drivers/misc/.
We modify the files drivers/misc/Kconfig and drivers/misc/Makefile to include the hello_version.c file as part of the Linux kernel build. The changes done to the files are as shown below:
conrad@conrad-HP-Pavilion-dm3-Notebook-PC:~/Git/linux$ git diff drivers/misc/Makefile
diff --git a/drivers/misc/Makefile b/drivers/misc/Makefile
index f45473e..8fae713 100644
--- a/drivers/misc/Makefile
+++ b/drivers/misc/Makefile
@@ -53,3 +53,4 @@ obj-$(CONFIG_VMWARE_VMCI)     += vmw_vmci/
 obj-$(CONFIG_LATTICE_ECP3_CONFIG)      += lattice-ecp3-config.o
 obj-$(CONFIG_SRAM)             += sram.o
 obj-y                          += mic/
+obj-$(CONFIG_HELLO_VERSION)    += hello_version.o
conrad@conrad-HP-Pavilion-dm3-Notebook-PC:~/Git/linux$ git diff drivers/misc/Kconfig
diff --git a/drivers/misc/Kconfig b/drivers/misc/Kconfig
index a3e291d..1c055e4 100644
--- a/drivers/misc/Kconfig
+++ b/drivers/misc/Kconfig
@@ -515,6 +515,12 @@ config SRAM
          the genalloc API. It is supposed to be used for small on-chip SRAM
          areas found on many SoCs.

+config HELLO_VERSION
+       tristate "Sample module to print version information"
+       help
+         To compile this driver as a module, choose M here: the module will
+         be called kernel_version.
+
 source "drivers/misc/c2port/Kconfig"
 source "drivers/misc/eeprom/Kconfig"
 source "drivers/misc/cb710/Kconfig"
-
Modifications done to the Makefile
-
Modifications done to the Kconfig
We then configure the kernel and enable the kernel_verion module in the configuration before issuing the build.
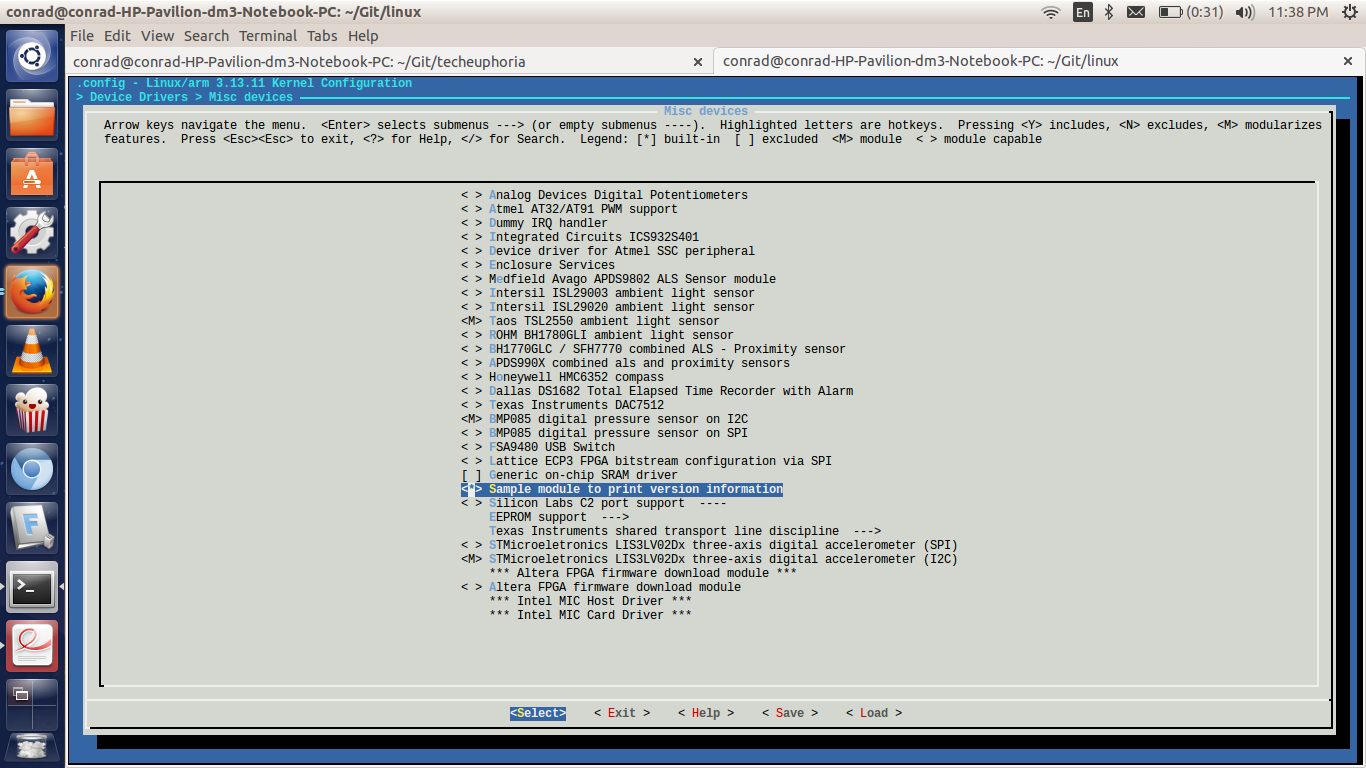
conrad@conrad-HP-Pavilion-dm3-Notebook-PC:~/Git/linux$ make ARCH=arm CROSS_COMPILE=arm-linux-gnueabi- omap2plus_defconfig
  HOSTCC  scripts/basic/fixdep
  HOSTCC  scripts/kconfig/conf.o
  HOSTCC  scripts/kconfig/zconf.tab.o
  HOSTLD  scripts/kconfig/conf
#
# configuration written to .config
#
conrad@conrad-HP-Pavilion-dm3-Notebook-PC:~/Git/linux$ make ARCH=arm CROSS_COMPILE=arm-linux-gnueabi- menuconfig
  HOSTCC  scripts/kconfig/lxdialog/checklist.o
  HOSTCC  scripts/kconfig/lxdialog/inputbox.o
  HOSTCC  scripts/kconfig/lxdialog/menubox.o
  HOSTCC  scripts/kconfig/lxdialog/textbox.o
  HOSTCC  scripts/kconfig/lxdialog/util.o
  HOSTCC  scripts/kconfig/lxdialog/yesno.o
  HOSTCC  scripts/kconfig/mconf.o
  HOSTLD  scripts/kconfig/mconf
scripts/kconfig/mconf Kconfig
configuration written to .config

*** End of the configuration.
*** Execute 'make' to start the build or try 'make help'.

conrad@conrad-HP-Pavilion-dm3-Notebook-PC:~/Git/linux$ make ARCH=arm CROSS_COMPILE=arm-linux-gnueabi- clean
  CLEAN   .
  CLEAN   arch/arm/kernel
  CLEAN   drivers/tty/vt
  CLEAN   drivers/video/logo
  CLEAN   kernel
  CLEAN   lib
  CLEAN   usr
  CLEAN   arch/arm/boot/compressed
  CLEAN   arch/arm/boot/dts
  CLEAN   arch/arm/boot
  CLEAN   .tmp_versions
conrad@conrad-HP-Pavilion-dm3-Notebook-PC:~/Git/linux$ make ARCH=arm CROSS_COMPILE=arm-linux-gnueabi-
  CHK     include/config/kernel.release
  CHK     include/generated/uapi/linux/version.h
  CHK     include/generated/utsrelease.h
make[1]: `include/generated/mach-types.h' is up to date.
  CALL    scripts/checksyscalls.sh
  CHK     include/generated/compile.h
.
.
.
Once the compilation goes through we can check in the changes in our branch.
conrad@conrad-HP-Pavilion-dm3-Notebook-PC:~/Git/linux$ git status
On branch hello_version
Changes not staged for commit:
  (use "git add <file>..." to update what will be committed)
  (use "git checkout -- <file>..." to discard changes in working directory)

    modified:   drivers/misc/Kconfig
    modified:   drivers/misc/Makefile

Untracked files:
  (use "git add <file>..." to include in what will be committed)

    defconfig
    drivers/Module.symvers
    drivers/misc/Module.symvers
    drivers/misc/hello_version.c
    drivers/staging/Module.symvers
    drivers/staging/comedi/Module.symvers
    drivers/staging/comedi/drivers/Module.symvers

no changes added to commit (use "git add" and/or "git commit -a")
conrad@conrad-HP-Pavilion-dm3-Notebook-PC:~/Git/linux$ git add drivers/misc/hello_version.c
conrad@conrad-HP-Pavilion-dm3-Notebook-PC:~/Git/linux$ git add drivers/misc/Kconfig
conrad@conrad-HP-Pavilion-dm3-Notebook-PC:~/Git/linux$ git add drivers/misc/Makefile
conrad@conrad-HP-Pavilion-dm3-Notebook-PC:~/Git/linux$ git commit -s
-
Check the status of the branch first
-
Add the hello_version.c file to staging
-
Add the Kconfig file to staging
-
Add the Makefile file to staging
-
Commit the staged changes. The -s adds a Signed-off-by line to the commit message.
We can verify the commit message using git log
conrad@conrad-HP-Pavilion-dm3-Notebook-PC:~/Git/linux$ git log
commit 56e2688434d7fd5ff8f3c35849e9d4b0ac0d2721
Author: Conrad Gomes <conrad.s.j.gomes@gmail.com>
Date:   Sat Dec 19 09:05:25 2015 +0530

    hello_version: Adding a miscellaneous module

    Adding a miscellaneous kernel module the source code.
    Changed the Kconfig and Makefile to include the module as part of
    the configuration.

    Signed-off-by: Conrad Gomes <conrad.s.j.gomes@gmail.com>
Create A Kernel Patch
Finally to share the code we would need to submit a patch to the Linux community. Creating a patch is easy with git. Since our changes are isolated on a separate branch we can create the patch between the local branch and the source branch which is 3.13.y.
conrad@conrad-HP-Pavilion-dm3-Notebook-PC:~/Git/linux$ git format-patch 3.13.y
0001-hello_version-Adding-a-miscellaneous-module.patch
The patch name is taken from the commit message added during the commit.
This section covers details about the Linux Kernel device and driver model. We will understand why we need an architecture to describe a device and its driver. We’ll see how the kernel recognises a device in the system and also understand how it associates a driver to the device.
The Purpose Behind Having A Device Model
The Linux kernel runs on a wide variety of architectures and platforms. There are platforms which may have the same type of device for which the same driver may be used. To fascilitate this architecture a device model is required so that the driver for a device can be independent of the platform on which it is implemented.
There are several layers of abstraction in which the Linux kernel separates the device description from the device drivers. Additionally the bus drivers are separated from the device drivers.
Interfaces To A Kernel Driver
-
In Linux the driver is designed to first interface between a framework which groups the functionality of the device to the application in a generic way. e.g. input devices like keyboards and the mouse are represented as an input event framework.
-
Secondly the driver has to interface with a bus infrastructure in order to access the device. The bus interface can be anything ranging from UART, USB to SPI.
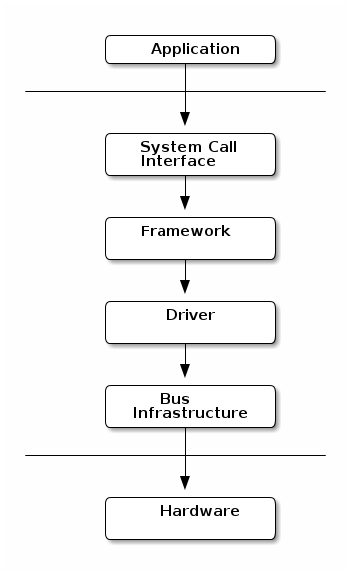
Device Model Data Structures
The main data structures in the device driver model are:
-
The struct bus_type structure represents a bus system viz. USB, SPI, I2C, etc..
-
The struct device_driver structure represents one driver capable of handling devices on a certain bus.
-
The struct device represents a device connected to a bus.
Inheritance is used in the device driver model in order to create specialized versions of struct device driver and struct device for specific bus systems.
Bus Drivers
Typically to interface the processor to any external device we would need a bus. The bus defines an interface to communicate with other devices through a protocol. The Linux kernel abstracts the bus as a bus driver thereby allowing reuse of the same driver across many platforms.
There is one bus driver for each type of bus e.g. PCI, USB, SPI, I2C, etc.. So what are the functions of the bus driver?
-
Regisitering the bus type i.e. struct bus_type.
-
Registering adapter drivers which can detect devices and communicate with them on the bus.
-
Register device drivers which are to support devices connected on the bus.
-
Pair devices connected on the bus with registered device drivers.
USB Bus As An Example Of A Bus Driver

The diagram illustrates the various kernel components that enable the USB architecture to support multiple platforms, controllers and devices. It is essentially divided into three parts:
- Core Infrastructure
-
This is the main source code responsible for declaring the bus type and registering it.
-
The code is defined in drivers/usb/core
-
struct bus_type is defined in drivers/usb/core/driver.c and registered in drivers/usb/core/usb.c
-
- Adapter Drivers
-
This is the driver code which implement the host controllers the software which is able to communicate with the device drivers. There are several versions of the host controller which are implemented on different platforms
-
The code is defined in drivers/usb/host
-
OHCI, UHCI, EHCI, XHCI are different host controller interfaces implemented for different platforms.
-
UHCI (Universal Host Controller Interface) is an intel defined controller for USB 1.x.
-
OHCI (Open Host Controller Interface) is used on systems which do not have x86 USB1.1 controllers.
-
EHCI (Enhanced Host Controller Interface) was defined as a standard for USB 2.0
-
XHCI (Extensible Host Controller Interface) is the latest standard which supports all USB versions upto USB 3.1
-
- Device Drivers
-
The device drivers are spread across the kernel source code. Based on the device classification the device driver will be present in its appropriate framework.
Example Of A USB Device Driver
We’ll take a look at a USB network card. As it is a network device we’ll be able to find it in the network framework of the kernel source code. Since it interfaces with the USB bus it will be a USB device driver. The driver is located at drivers/net/usb/rtl8150.c.
Device Identification
Typically each device driver may support multiple devices. So a driver should describe the list of devices which it supports. This is defined by a device table.
.
.
/* table of devices that work with this driver */
static struct usb_device_id rtl8150_table[] = {
        {USB_DEVICE(VENDOR_ID_REALTEK, PRODUCT_ID_RTL8150)},
        {USB_DEVICE(VENDOR_ID_MELCO, PRODUCT_ID_LUAKTX)},
        {USB_DEVICE(VENDOR_ID_MICRONET, PRODUCT_ID_SP128AR)},
        {USB_DEVICE(VENDOR_ID_LONGSHINE, PRODUCT_ID_LCS8138TX)},
        {USB_DEVICE(VENDOR_ID_OQO, PRODUCT_ID_RTL8150)},
        {USB_DEVICE(VENDOR_ID_ZYXEL, PRODUCT_ID_PRESTIGE)},
        {}
};

MODULE_DEVICE_TABLE(usb, rtl8150_table);
.
The device table serves two purposes. Once the driver is loaded the USB core knows which devices it can work with so when a device is attached to the USB bus and the core will match the driver to that device. Another use is to extract the map between device identifier and driver so that a dynamic loading ability is present. The depmod utility can extract the module device table information which can be used by udev in userspace whenever the kernel sends a notification of a new device connected.
Information about the mapping is normally present in the path /lib/modules/$(uname -r)/modules.alias or /lib/modules/$(uname -r)/modules.usbmap.
Driver Instantiation
To instantiate a USB device driver the core provides an API with which an appropriate structure can be registered. This is present at the end of the file:
.
.
static struct usb_driver rtl8150_driver = {
        .name           = driver_name,
        .probe          = rtl8150_probe,
        .disconnect     = rtl8150_disconnect,
        .id_table       = rtl8150_table,
        .suspend        = rtl8150_suspend,
        .resume         = rtl8150_resume,
        .disable_hub_initiated_lpm = 1,
};

module_usb_driver(rtl8150_driver);
.
As mentioned before the kernel is filled with inheritance and in this case the struct usb_driver inherits a struct device_driver in its definition.
Driver Registration And Unregistration
Now comes the part where the driver registers itself with the USB core system. This is done in the module initialisation and exit functions. This is abstracted through the API module_usb_driver.
.
module_usb_driver(rtl8150_driver);
.
So if we see the definition of module_usb_driver in include/linux/usb.h it turns out that it uses the generic driver registration function module_driver.
.
/**
 * module_usb_driver() - Helper macro for registering a USB driver
 * @__usb_driver: usb_driver struct
 *
 * Helper macro for USB drivers which do not do anything special in module
 * init/exit. This eliminates a lot of boilerplate. Each module may only
 * use this macro once, and calling it replaces module_init() and module_exit()
 */
#define module_usb_driver(__usb_driver) \
        module_driver(__usb_driver, usb_register, \
                       usb_deregister)
.
The definition of module_driver is in include/linux/device.h
.
/**
 * module_driver() - Helper macro for drivers that don't do anything
 * special in module init/exit. This eliminates a lot of boilerplate.
 * Each module may only use this macro once, and calling it replaces
 * module_init() and module_exit().
 *
 * @__driver: driver name
 * @__register: register function for this driver type
 * @__unregister: unregister function for this driver type
 * @...: Additional arguments to be passed to __register and __unregister.
 *
 * Use this macro to construct bus specific macros for registering
 * drivers, and do not use it on its own.
 */
#define module_driver(__driver, __register, __unregister, ...) \
static int __init __driver##_init(void) \
{ \
        return __register(&(__driver) , ##__VA_ARGS__); \
} \
module_init(__driver##_init); \
static void __exit __driver##_exit(void) \
{ \
        __unregister(&(__driver) , ##__VA_ARGS__); \
} \
module_exit(__driver##_exit);
.
In a similar fashion the adapter driver also registers itself with the USB core using usb_add_hcd()
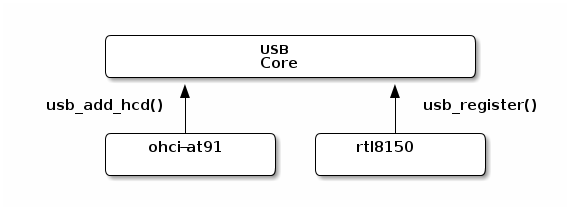
Device Detection
The USB adapter driver registers itself with the USB core using the usb_add_hcd() function. The adapter driver is responsible to detect a new device connected. It communicates the device id of the device to the USB core. Thereafter the USB core matches the device id with a list of known device id to driver mapping. If there is a match the probe function of the driver is called.

Probing The Driver
On invoking the probe function of the driver a structure is passed which is specific to the bus interface. On invocation the driver can:
-
Map I/O memory,
-
Register interrupts
-
Initialise private driver data structures
-
Register the driver with the appropriate framework.
static int rtl8150_probe(struct usb_interface *intf,
                         const struct usb_device_id *id)
{
        struct usb_device *udev = interface_to_usbdev(intf);
        rtl8150_t *dev;
        struct net_device *netdev;

        netdev = alloc_etherdev(sizeof(rtl8150_t));
        if (!netdev)
                return -ENOMEM;

        dev = netdev_priv(netdev);

        dev->intr_buff = kmalloc(INTBUFSIZE, GFP_KERNEL);
        if (!dev->intr_buff) {
                free_netdev(netdev);
                return -ENOMEM;
        }

        tasklet_init(&dev->tl, rx_fixup, (unsigned long)dev);
        spin_lock_init(&dev->rx_pool_lock);

        dev->udev = udev;
        dev->netdev = netdev;
        netdev->netdev_ops = &rtl8150_netdev_ops;
        netdev->watchdog_timeo = RTL8150_TX_TIMEOUT;
        SET_ETHTOOL_OPS(netdev, &ops);
        dev->intr_interval = 100;       /* 100ms */

        if (!alloc_all_urbs(dev)) {
                dev_err(&intf->dev, "out of memory\n");
                goto out;
        }
        if (!rtl8150_reset(dev)) {
                dev_err(&intf->dev, "couldn't reset the device\n");
                goto out1;
        }
        fill_skb_pool(dev);
        set_ethernet_addr(dev);

        usb_set_intfdata(intf, dev);
        SET_NETDEV_DEV(netdev, &intf->dev);
        if (register_netdev(netdev) != 0) {
                dev_err(&intf->dev, "couldn't register the device\n");
                goto out2;
        }

        dev_info(&intf->dev, "%s: rtl8150 is detected\n", netdev->name);

        return 0;

out2:
        usb_set_intfdata(intf, NULL);
        free_skb_pool(dev);
out1:
        free_all_urbs(dev);
out:
        kfree(dev->intr_buff);
        free_netdev(netdev);
        return -EIO;
}
-
Allocate etherdev structure
-
Initialise tasklet
-
Register with net framework
Platform Drivers
Not all buses have the ability to dynamically detect new devices. Some buses such as SPI and I2C do not support enumeration or hotplugging. And in the case of SOCs there are devices like the UART which are directly part of the chip. These devices are described to the kernel through either source code or a Device Tree file format.
To support such devices in the device driver model of the Linux kernel a platform bus is created which handles platform drivers and platform devices. The platform bus works like any other bus except that the devices are not discovered but rather defined using either source code in the kernel or using the Device Tree file mechanism.
Serial i.MX As An Example Of A Platform Driver
Let’s take a look at the serial driver for the i.MX platform from Freescale.
conrad@conrad-HP-Pavilion-dm3-Notebook-PC:~/Git/linux$ find . -name 'imx.c'
./drivers/tty/serial/imx.c
conrad@conrad-HP-Pavilion-dm3-Notebook-PC:~/Git/linux$
The structure which defines the serial platform driver is:
.
.
static struct platform_driver serial_imx_driver = {
        .probe          = serial_imx_probe,
        .remove         = serial_imx_remove,

        .suspend        = serial_imx_suspend,
        .resume         = serial_imx_resume,
        .id_table       = imx_uart_devtype,
        .driver         = {
                .name   = "imx-uart",
                .owner  = THIS_MODULE,
                .of_match_table = imx_uart_dt_ids,
        },
};
.
.
The registration and deregistration of this platform driver takes place in the initialisation and exit functions of the driver.
.
.
static int __init imx_serial_init(void)
{
        int ret;

        pr_info("Serial: IMX driver\n");

        ret = uart_register_driver(&imx_reg);
        if (ret)
                return ret;

        ret = platform_driver_register(&serial_imx_driver);
        if (ret != 0)
                uart_unregister_driver(&imx_reg);

        return ret;
}

static void __exit imx_serial_exit(void)
{
        platform_driver_unregister(&serial_imx_driver);
        uart_unregister_driver(&imx_reg);
}

module_init(imx_serial_init);
module_exit(imx_serial_exit);
.
.
-
Platform driver registration
-
Platform driver deregistration
Declaring Platform Devices In Source Code
The platform device is declared in source code. To locate where the device is declared we have to probe a bit into the source code. Typically the platform device if declared in this manner will be present in the machine specific section of the kernel. We first take a look at arch/arm/mach-imx/devices/platform-imx-uart.c. The main function is _
.
.
struct platform_device *__init imx_add_imx_uart_3irq(
                const struct imx_imx_uart_3irq_data *data,
                const struct imxuart_platform_data *pdata)
{
        struct resource res[] = {
                {
                        .start = data->iobase,
                        .end = data->iobase + data->iosize - 1,
                        .flags = IORESOURCE_MEM,
                }, {
                        .start = data->irqrx,
                        .end = data->irqrx,
                        .flags = IORESOURCE_IRQ,
                }, {
                        .start = data->irqtx,
                        .end = data->irqtx,
                        .flags = IORESOURCE_IRQ,
                }, {
                        .start = data->irqrts,
                        .end = data->irqrx,
                        .flags = IORESOURCE_IRQ,
                },
        };

        return imx_add_platform_device("imx1-uart", data->id, res,
                        ARRAY_SIZE(res), pdata, sizeof(*pdata));
}
.
.
- The device is created by this imx_add_platform_device.
If we search for the definition of imx_add_platform_device we can locate it in arch/arm/mach-imx/devices/devices-common.h
.
.
static inline struct platform_device *imx_add_platform_device_dmamask(
                const char *name, int id,
                const struct resource *res, unsigned int num_resources,
                const void *data, size_t size_data, u64 dmamask)
{
        struct platform_device_info pdevinfo = {
                .name = name,
                .id = id,
                .res = res,
                .num_res = num_resources,
                .data = data,
                .size_data = size_data,
                .dma_mask = dmamask,
        };
        return platform_device_register_full(&pdevinfo);
}

static inline struct platform_device *imx_add_platform_device(
                const char *name, int id,
                const struct resource *res, unsigned int num_resources,
                const void *data, size_t size_data)
{
        return imx_add_platform_device_dmamask(
                        name, id, res, num_resources, data, size_data, 0);
}
.
.
-
The definition of imx_add_platform_device
-
Another function is called which instantiates the device
-
The definition of _imx_add_platform_device_dmamask
-
The device structure values
The device is instantiated in the arch/arm/mach-imx/mach-mx1ads.c file.
.
.
static void __init mx1ads_init(void)
{
        imx1_soc_init();

        mxc_gpio_setup_multiple_pins(mx1ads_pins,
                ARRAY_SIZE(mx1ads_pins), "mx1ads");

        /* UART */
        imx1_add_imx_uart0(&uart0_pdata);
        imx1_add_imx_uart1(&uart1_pdata);

        /* Physmap flash */
        platform_device_register_resndata(NULL, "physmap-flash", 0,
                        &flash_resource, 1,
                        &mx1ads_flash_data, sizeof(mx1ads_flash_data));

        /* I2C */
        i2c_register_board_info(0, mx1ads_i2c_devices,
                                ARRAY_SIZE(mx1ads_i2c_devices));

        imx1_add_imx_i2c(&mx1ads_i2c_data);
}
.
.
MACHINE_START(MX1ADS, "Freescale MX1ADS")
        /* Maintainer: Sascha Hauer, Pengutronix */
        .atag_offset = 0x100,
        .map_io = mx1_map_io,
        .init_early = imx1_init_early,
        .init_irq = mx1_init_irq,
        .handle_irq = imx1_handle_irq,
        .init_time      = mx1ads_timer_init,
        .init_machine = mx1ads_init,
        .restart        = mxc_restart,
MACHINE_END
.
.
-
UART 0 is added
-
UART 1 is added
The definition of imx1_add_imx_uart0 is in arch/arm/mach-imx/devices-imx1.h
.
.
extern const struct imx_imx_uart_3irq_data imx1_imx_uart_data[];
#define imx1_add_imx_uart(id, pdata)    \
        imx_add_imx_uart_3irq(&imx1_imx_uart_data[id], pdata)
#define imx1_add_imx_uart0(pdata)       imx1_add_imx_uart(0, pdata)
#define imx1_add_imx_uart1(pdata)       imx1_add_imx_uart(1, pdata)
.
.
Accessing Resources
Resources to a device can be IRQ lines, DMA channels, I/O registers' addresses and so forth. All devices will require access to different resources. If we look at the device instantiating function above we see the resources assigned in imx_add_imx_uart_3irq. The resources are defined with the struct resource structure definition. So in the function an array of resources is associated with the device during instantiation. This again allows a driver to work with multiple platform devices using different resources.
.
.
struct platform_device *__init imx_add_imx_uart_3irq(
                const struct imx_imx_uart_3irq_data *data,
                const struct imxuart_platform_data *pdata)
{
        struct resource res[] = {
                {
                        .start = data->iobase,
                        .end = data->iobase + data->iosize - 1,
                        .flags = IORESOURCE_MEM,
                }, {
                        .start = data->irqrx,
                        .end = data->irqrx,
                        .flags = IORESOURCE_IRQ,
                }, {
                        .start = data->irqtx,
                        .end = data->irqtx,
                        .flags = IORESOURCE_IRQ,
                }, {
                        .start = data->irqrts,
                        .end = data->irqrx,
                        .flags = IORESOURCE_IRQ,
                },
        };

        return imx_add_platform_device("imx1-uart", data->id, res,
                        ARRAY_SIZE(res), pdata, sizeof(*pdata));
}
.
.
-
Array of resources defined
-
Resources are associated with the device
Accessing Platform Data
Many drivers will require platform specific data for each device. This is also passed during platform instantiation. Basically since the struct platform_data inherits the struct device the platform data can be passed through the platform_data field of struct device. The field is defined as a void * data type so any data type can be passed through it. Typically the platform driver will define the data structure to pass information through platform_data.
.
.
struct platform_device *__init imx_add_imx_uart_3irq(
                const struct imx_imx_uart_3irq_data *data,
                const struct imxuart_platform_data *pdata)
{
        struct resource res[] = {
                {
                        .start = data->iobase,
                        .end = data->iobase + data->iosize - 1,
                        .flags = IORESOURCE_MEM,
                }, {
                        .start = data->irqrx,
                        .end = data->irqrx,
                        .flags = IORESOURCE_IRQ,
                }, {
                        .start = data->irqtx,
                        .end = data->irqtx,
                        .flags = IORESOURCE_IRQ,
                }, {
                        .start = data->irqrts,
                        .end = data->irqrx,
                        .flags = IORESOURCE_IRQ,
                },
        };

        return imx_add_platform_device("imx1-uart", data->id, res,
                        ARRAY_SIZE(res), pdata, sizeof(*pdata));
}
.
.
-
Platform data is defined as struct imxuart_platform_data
-
The platform data is passed to the device during instantiation
The definition of the struct imxuart_platform_data is located in include/linux/platform_data/serial-imx.h
.
.
struct imxuart_platform_data {
        int (*init)(struct platform_device *pdev);
        void (*exit)(struct platform_device *pdev);
        unsigned int flags;
        void (*irda_enable)(int enable);
        unsigned int irda_inv_rx:1;
        unsigned int irda_inv_tx:1;
        unsigned short transceiver_delay;
};
.
.
The board code in arch/arm/mach-imx/mach-mx1ads.c initiates the structure as &uart0_pdata.
.
.
static const struct imxuart_platform_data uart0_pdata __initconst = {
        .flags = IMXUART_HAVE_RTSCTS,
};
.
.
The platform driver can then access this data in its probe function where the platform device is passed to it:
.
.
static void serial_imx_probe_pdata(struct imx_port *sport,
                struct platform_device *pdev)
{
        struct imxuart_platform_data *pdata = dev_get_platdata(&pdev->dev);
.
.
.
        if (pdata->flags & IMXUART_HAVE_RTSCTS)
                sport->have_rtscts = 1;
.
.

}

static int serial_imx_probe(struct platform_device *pdev)
{
        struct imx_port *sport;
        struct imxuart_platform_data *pdata;
.
.
.
        ret = serial_imx_probe_dt(sport, pdev);
        if (ret > 0)
                serial_imx_probe_pdata(sport, pdev);
        else if (ret < 0)
                return ret;
.
.
}
-
The serial_imx_probe function calls the serial_imx_probe_pdata
-
The serial_imx_probe_pdata calls accesses the platform data.
Device Tree
The older approach of writing code to instantiate devices is not easily maintainable. An alternative approach is to use the Device Tree to describe the platform devices.
A Device Tree is a tree of nodes that describes the network of devices in a system. It can describe devices inside the processor as well as devices on the board. Each node has different properties which can be attached to the device such as addresses, interrupts, clocks, gpios, etc..
The device tree is compiled into a binary file which is recognised by the kernel. During boot up the device tree blob is passed to the kernel which describes the platform devices in the system. This allows the same kernel image to work with different systems.
An Example Of Device Tree
The device tree source files are stored in the architecture specific path of the Linux kernel source code. For example for ARM devices the files are located at arch/arm/boot/dts/. We can take a look at arch/arm/boot/dts/omap3.dtsi
.
.
                uart1: serial@4806a000 {
                        compatible = "ti,omap3-uart";
                        reg = <0x4806a000 0x2000>;
                        interrupts = <72>;
                        dmas = <&sdma 49 &sdma 50>;
                        dma-names = "tx", "rx";
                        ti,hwmods = "uart1";
                        clock-frequency = <48000000>;
                };
.
.
In the node above serial@4806a000 is the name of the node. The notation uart1 is the alias which can be refer to the node as &uart1 in other sections of the device tree source. The remaining lines are properties of the node which are used by the platform driver.
The file arch/arm/boot/dts/omap3.dtsi is a common file which can be included by other hardware platforms. Thus device trees support inheritance whereby common similarities between different platforms can be defined in a common file.
The file which includes the common file overrides the properties as well as defining its own properties. The compatible property associated with the uart1 node defines the driver mapping for the device. The platform driver will also have the same string in the of_match_table of the struct device_driver.
conrad@conrad-HP-Pavilion-dm3-Notebook-PC:~/Git/linux$ egrep -ri "ti,omap3-uart" drivers/tty/
Binary file drivers/tty/serial/built-in.o matches
Binary file drivers/tty/serial/omap-serial.o matches
drivers/tty/serial/omap-serial.c:   { .compatible = "ti,omap3-uart" },
Binary file drivers/tty/built-in.o matches
- Location of the platform driver
When we open the platform driver source code we see the mapping:
.
.

#if defined(CONFIG_OF)
static const struct of_device_id omap_serial_of_match[] = {
        { .compatible = "ti,omap2-uart" },
        { .compatible = "ti,omap3-uart" },
        { .compatible = "ti,omap4-uart" },
        {},
};
MODULE_DEVICE_TABLE(of, omap_serial_of_match);
#endif

static struct platform_driver serial_omap_driver = {
        .probe          = serial_omap_probe,
        .remove         = serial_omap_remove,
        .driver         = {
                .name   = DRIVER_NAME,
                .pm     = &serial_omap_dev_pm_ops,
                .of_match_table = of_match_ptr(omap_serial_of_match),
        },
};
.
-
The compatible property presetn in the struct of_device_id table omap_serial_of_match
-
The of_match_table of the struct device_driver
The CONFIG_OF macro stands for configuration of open firmware. This is associated with the device tree implementation in the kernel. With the device tree method the resources such as interrupt numbers, physical addresses, etc.. are picked up from the properties of the device node.
The resources list is built up at boot time by the kernel when it reads the Device Tree Blob. The driver will not have to make any lookups to the DT but will get access to the node through the struct platform_device structure. Any other properties are specific to the class of the device or the driver it belongs to.
Device Tree Bindings
The compatible string and the associated properties define the device tree binding. These are documented in the Documentation/devicetree/bindings/
conrad@conrad-HP-Pavilion-dm3-Notebook-PC:~/Git/linux$ ls -l Documentation/devicetree/bindings/
total 284
drwxrwxr-x  2 conrad conrad  4096 Nov 20  2013 arc
drwxrwxr-x 15 conrad conrad  4096 Nov 12  2014 arm
drwxrwxr-x  2 conrad conrad  4096 Nov 12  2014 ata
drwxrwxr-x  2 conrad conrad  4096 Nov 12  2014 bus
.
.
.
drwxrwxr-x  3 conrad conrad  4096 Nov 12  2014 video
drwxrwxr-x  2 conrad conrad  4096 Oct 19  2013 virtio
drwxrwxr-x  2 conrad conrad  4096 Oct 19  2013 w1
drwxrwxr-x  2 conrad conrad  4096 Nov 12  2014 watchdog
drwxrwxr-x  2 conrad conrad  4096 Oct 19  2013 x86
-rw-rw-r--  1 conrad conrad 10748 Oct 19  2013 xilinx.txt
conrad@conrad-HP-Pavilion-dm3-Notebook-PC:~/Git/linux$
The Device Tree is part of the ABI and a new kernel should work with an older Device Tree. The design of the bindings is carefully reviewed on the devicetree@vger.kernel.org mailing list. The device tree should only describe the properties of the hardware. Anything related to the configuration of the device should be avoided for instance whether DMA should be used or not.
sysfs
The sysfs offers a mechanism to access the information related to the bus, drivers, devices, etc to the userspace. This information can be used to support features such as : . dynamic loading of drivers . dynamic loading of firmware . automatic creation of device file
The sysfs is usually mounted in /sys/. It is organised into different sections of information. For instance:
-
/sys/block contains information of different block devices
-
/sys/class contains information about devices by class e.g. net, graphics, block, input, etc..
-
/sys/devices contains the list of devices
-
/sys/bus contains the list of buses
While writing a kernel module or driver we can export properties to userspace through the sysfs interface.
The I2C Subsystem
The I2C bus is a low speed bus which is found on many SOCs today. It is a simple bus with two wires, SDA for the data and SCL for the clock. The SOC normally has the I2C controller and therefore is the master on the bus controlling the slave devices.
Each slave has a unique address on the bus and each transaction on the bus includes the address of the device with which communication is required from the controller.
Only the master can initiate transactions on the bus with the addressed slave device responding. In some systems it may be possible for one bus to have two masters but there would be some level of arbitration mechanism implemented in order to have only one master controlling the bus at any time.
Since I2C is a very common protocol we find many devices have it as an interface. I2C is found in a wide variety of chips which can be used in the overall system design of the platform. Some use cases are:
-
Touchscreen controller
-
GPIO expander
-
Audio codec
-
Real Time clock
The I2C subsystem is a platform bus system. It provides API to:
-
Implement I2C controller drivers
-
Implement I2C device drivers, in kernel space
-
Implement I2C device drivers, in user space
The core of the I2C subsystem resides in drivers/i2c. The I2C controller drivers are present in drivers/i2c/busses/. And the device drivers are present in drivers based on the classification of the device e.g. drivers/gpio for gpio expanders.
Registering An I2C Driver
-
The I2C subsystem defines a struct i2c_driver which inherits the struct device_driver. This is instantiated and registered by each I2C device driver.
a. Similarly this structure will have a probe() and a remove() function.
b. It also contains an id_table which enumerates the list of devices that can be used with the driver. This table is normally used for non-DT based drivers.
-
The i2c_add_driver() and i2c_del_driver() functions are used to add the device driver and remove it from the I2C subsystem.
-
If the driver doesn’t require anything else to be done in the initialisation and exit sequence then the module_i2c_driver macro can be used.
We can take a look at an I2C device driver in drivers/gpio/gpio-pcf857x.c.
.
.
static const struct i2c_device_id pcf857x_id[] = {
        { "pcf8574", 8 },
        { "pcf8574a", 8 },
        { "pca8574", 8 },
        { "pca9670", 8 },
        { "pca9672", 8 },
        { "pca9674", 8 },
        { "pcf8575", 16 },
        { "pca8575", 16 },
        { "pca9671", 16 },
        { "pca9673", 16 },
        { "pca9675", 16 },
        { "max7328", 8 },
        { "max7329", 8 },
        { "tca9554", 8 },
        { }
};
MODULE_DEVICE_TABLE(i2c, pcf857x_id);

#ifdef CONFIG_OF
static const struct of_device_id pcf857x_of_table[] = {
        { .compatible = "nxp,pcf8574" },
        { .compatible = "nxp,pcf8574a" },
        { .compatible = "nxp,pca8574" },
        { .compatible = "nxp,pca9670" },
        { .compatible = "nxp,pca9672" },
        { .compatible = "nxp,pca9674" },
        { .compatible = "nxp,pcf8575" },
        { .compatible = "nxp,pca8575" },
        { .compatible = "nxp,pca9671" },
        { .compatible = "nxp,pca9673" },
        { .compatible = "nxp,pca9675" },
        { .compatible = "maxim,max7328" },
        { .compatible = "maxim,max7329" },
        { .compatible = "ti,tca9554" },
        { }
};
MODULE_DEVICE_TABLE(of, pcf857x_of_table);
#endif
.
.
static struct i2c_driver pcf857x_driver = {
        .driver = {
                .name   = "pcf857x",
                .owner  = THIS_MODULE,
                .of_match_table = of_match_ptr(pcf857x_of_table),
        },
        .probe  = pcf857x_probe,
        .remove = pcf857x_remove,
        .id_table = pcf857x_id,
};

static int __init pcf857x_init(void)
{
        return i2c_add_driver(&pcf857x_driver);
}
/* register after i2c postcore initcall and before
 * subsys initcalls that may rely on these GPIOs
 */
subsys_initcall(pcf857x_init);

static void __exit pcf857x_exit(void)
{
        i2c_del_driver(&pcf857x_driver);
}
module_exit(pcf857x_exit);

.
.
-
pcf857x_id is the device id table
-
The device id table is registered with the I2C subsystem
-
pcf857x_driver is the struct i2c_driver
-
i2c_add_driver registers the device driver
-
i2c_del_driver deletes the device driver
Registering An I2C Device, non-DT Approach
On non-DT platforms the struct i2c_board_info structure describes how the I2C device is connected on the board. The I2C_BOARD_INFO macro takes the device name and slave address of the device on the bus. If we take a look at the arch/arm/mach-imx/mach-mx1ads.c file we can see its usage.
.
.
static struct pcf857x_platform_data pcf857x_data[] = {
        {
                .gpio_base = 4 * 32,
        }, {
                .gpio_base = 4 * 32 + 16,
        }
};

static const struct imxi2c_platform_data mx1ads_i2c_data __initconst = {
        .bitrate = 100000,
};

static struct i2c_board_info mx1ads_i2c_devices[] = {
        {
                I2C_BOARD_INFO("pcf8575", 0x22),
                .platform_data = &pcf857x_data[0],
        }, {
                I2C_BOARD_INFO("pcf8575", 0x24),
                .platform_data = &pcf857x_data[1],
        },
};

/*
 * Board init
 */
static void __init mx1ads_init(void)
{
.
.
.
        /* I2C */
        i2c_register_board_info(0, mx1ads_i2c_devices,
                                ARRAY_SIZE(mx1ads_i2c_devices));

        imx1_add_imx_i2c(&mx1ads_i2c_data);
}
.
.
-
The array of devices is defined as mx1ads_i2c_devices
-
The I2C_BOARD_INFO macro defines an I2C device
-
The i2c_register_board_info API registers the devices
Registering An I2C Device, DT Approach
In the Device Tree approach the I2C controller is specified in the .dtsi file that describes the processor. The controller is normally defined with status = "disabled".
At the board/platform level, in the .dts file: . the I2C controller device is enabled i.e. status = "ok" . the I2C bus controller frequency is defined i.e. clock-frequency = <100000>" . the I2C devices on the bus are described as children nodes and the _reg property gives their address.
As an example take a look at the arch/arm/boot/dts/tegra30.dtsi file. Here we see the I2C controller defined and disabled.
.
.
        i2c@7000d000 {
                compatible = "nvidia,tegra30-i2c", "nvidia,tegra20-i2c";
                reg = <0x7000d000 0x100>;
                interrupts = <GIC_SPI 53 IRQ_TYPE_LEVEL_HIGH>;
                #address-cells = <1>;
                #size-cells = <0>;
                clocks = <&tegra_car TEGRA30_CLK_I2C5>,
                         <&tegra_car TEGRA30_CLK_PLL_P_OUT3>;
                clock-names = "div-clk", "fast-clk";
                status = "disabled";
        };
.
.
-
Controller i2c@7000d000
-
The controller is disabled
If we take a look at a board file which includes the .dtsi file.
.
.
        i2c@7000d000 {
                status = "okay";
                clock-frequency = <100000>;

                rt5640: rt5640 {
                        compatible = "realtek,rt5640";
                        reg = <0x1c>;
                        interrupt-parent = <&gpio>;
                        interrupts = <TEGRA_GPIO(X, 3) GPIO_ACTIVE_HIGH>;
                        realtek,ldo1-en-gpios =
                                <&gpio TEGRA_GPIO(X, 2) GPIO_ACTIVE_HIGH>;
                };

                tps62361 {
                        compatible = "ti,tps62361";
                        reg = <0x60>;

                        regulator-name = "tps62361-vout";
                        regulator-min-microvolt = <500000>;
                        regulator-max-microvolt = <1500000>;
                        regulator-boot-on;
                        regulator-always-on;
                        ti,vsel0-state-high;
                        ti,vsel1-state-high;
                };
.
.
    };
.
.
-
status is set to "okay"
-
clock-frequency is set to 100KHz
-
rt5640 is an I2C device on the bus with address 0x1C
-
tps62361 is an I2C device on the bus with address 0x60
I2C Device Driver (Un)Registration
From the above example of I2C device approach using a device tree we can identify a device driver for the device using the compatible string.
conrad@conrad-HP-Pavilion-dm3-Notebook-PC:~/Git/linux$ grep -ri "tps62361" drivers/*
drivers/regulator/tps62360-regulator.c: * Driver for processor core supply tps62360, tps62361B, tps62362 and tps62363.
drivers/regulator/tps62360-regulator.c:enum chips {TPS62360, TPS62361, TPS62362, TPS62363};
drivers/regulator/tps62360-regulator.c:#define TPS62361_BASE_VOLTAGE    500000
drivers/regulator/tps62360-regulator.c:#define TPS62361_N_VOLTAGES  128
drivers/regulator/tps62360-regulator.c:  { .compatible = "ti,tps62361", .data = (void *)TPS62361},
drivers/regulator/tps62360-regulator.c: case TPS62361:
drivers/regulator/tps62360-regulator.c:     tps->desc.min_uV = TPS62361_BASE_VOLTAGE;
drivers/regulator/tps62360-regulator.c:     tps->desc.n_voltages = TPS62361_N_VOLTAGES;
drivers/regulator/tps62360-regulator.c: {.name = "tps62361", .driver_data = TPS62361},
- Searching for the string "tps62361" we find it mentioned in the tps62360-regulator.c file
If we open up the drivers/regulator/tps62360-regulator.c file we can see the struct of_device_id table tps62360_of_match defined.
.
.
#if defined(CONFIG_OF)
static const struct of_device_id tps62360_of_match[] = {
         { .compatible = "ti,tps62360", .data = (void *)TPS62360},
         { .compatible = "ti,tps62361", .data = (void *)TPS62361},
         { .compatible = "ti,tps62362", .data = (void *)TPS62362},
         { .compatible = "ti,tps62363", .data = (void *)TPS62363},
        {},
};
MODULE_DEVICE_TABLE(of, tps62360_of_match);
#endif
.
.
- The string "ti,tps62360" as part of the struct of_device_id
The struct i2c_driver is defined as tps62360_i2c_driver. The tps62360_probe and tps62360_shutdown functions define the entry and exit points for the driver.
.
.
static struct i2c_driver tps62360_i2c_driver = {
        .driver = {
                .name = "tps62360",
                .owner = THIS_MODULE,
                .of_match_table = of_match_ptr(tps62360_of_match),
        },
        .probe = tps62360_probe,
        .shutdown = tps62360_shutdown,
        .id_table = tps62360_id,
};

static int __init tps62360_init(void)
{
        return i2c_add_driver(&tps62360_i2c_driver);
}
subsys_initcall(tps62360_init);

static void __exit tps62360_cleanup(void)
{
        i2c_del_driver(&tps62360_i2c_driver);
}
module_exit(tps62360_cleanup);
.
.
The tps62360_probe function initializes the device and registers it with the appropriate kernel framework which happens to be the regulator framework. It receives the struct i2c_client pointer which represents the I2C device. This device inherits from struct device. The probe function also receives the struct i2c_device_id pointer which points to the device ID entry that matched the device.
The tps62360 driver does not have a remove function but if present it receives the struct i2c_client pointer that was passed to it in the probe function. The remove function should unregister the device from the kernel framework and shut it down.
LAB 5 : Linux Device Model For An I2C Device
Note
Add an I2C device to a device tree.
Develop a basic driver with a probe/remove function that gets invoked by the device model of the Linux kernel.
Explore sysfs for the I2C device and driver.
Creating A New Branch
We first check out the 3.13.y branch which will be the base source code used for our lab5 experiments. We then checkout a new branch called nunchuck which will hold our changes.
conrad@conrad-HP-Pavilion-dm3-Notebook-PC:~/Git/linux$ git branch
  3.13.y
  fix_unioxx5
* hello_version
  master
  tutorialv2
  tutorialv3
  tutorialv4
  tutorialv5
conrad@conrad-HP-Pavilion-dm3-Notebook-PC:~/Git/linux$ git checkout 3.13.y
Switched to branch '3.13.y'
Your branch is up-to-date with 'stable/linux-3.13.y'.
conrad@conrad-HP-Pavilion-dm3-Notebook-PC:~/Git/linux$
conrad@conrad-HP-Pavilion-dm3-Notebook-PC:~/Git/linux$ git checkout -b nunchuck
Switched to a new branch 'nunchuck'
conrad@conrad-HP-Pavilion-dm3-Notebook-PC:~/Git/linux$ git branch
  3.13.y
  fix_unioxx5
  hello_version
  master
* nunchuck
  tutorialv2
  tutorialv3
  tutorialv4
  tutorialv5

conrad@conrad-HP-Pavilion-dm3-Notebook-PC:~/Git/linux$
-
Checkout branch 3.13.y
-
Checkout new branch nunchuck
About The Nunchuck
We’re going to connect a Nunchuck device to our Beagle Bone Black board. The Wii Nunchuck is an attachment for Nintendo’s Wii Remote. It comes with an analog stick, trigger buttons and an inbuilt accelerometer for motion-sensing and tilting.

The device can be purchased online. I personally got mine from PayTM using Google to search for the cheapest available option.
Apart from the nunchuck we will also need some sort of breakout board to expose the connetions on the nunchuck so that we can interface it to our i2c1 bus on our board. For this I’m using an arduino type of breakout board for the Wii Nunchuck as shown below.
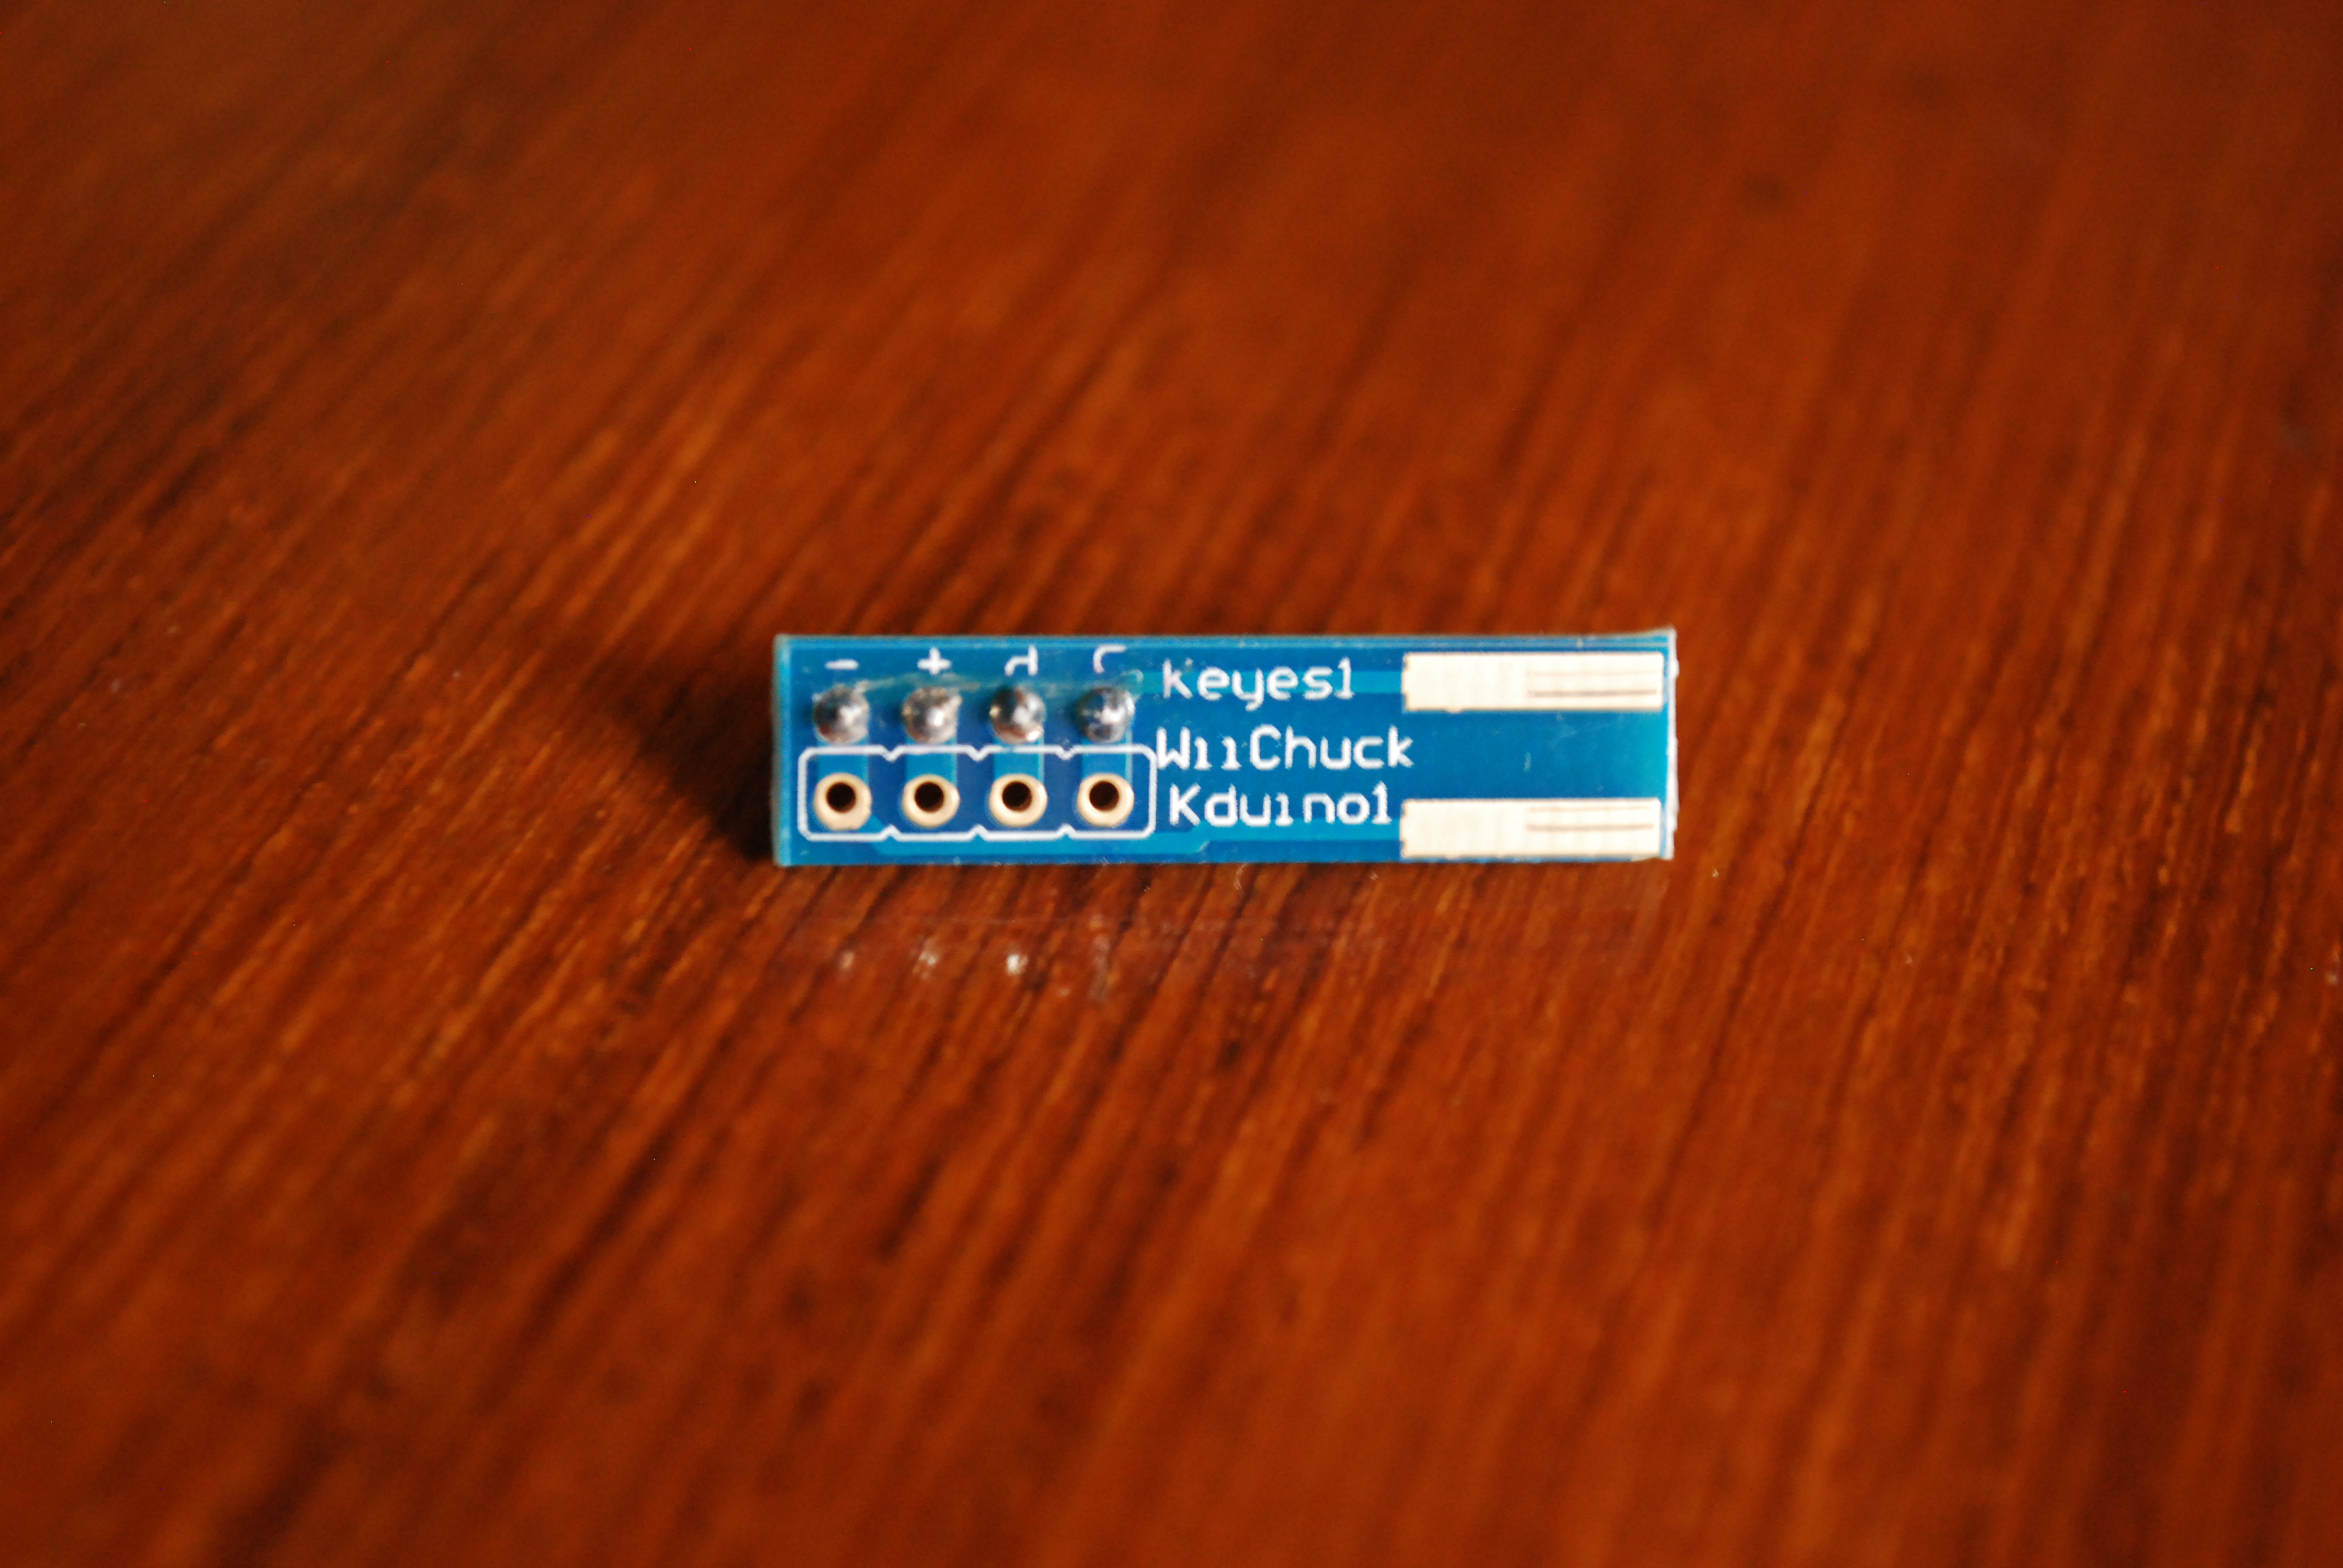
The breakout board has three contacts on one side and two contacts on the other. If we look at the Nunchuck connector it becomes clear as to how to pair the two.
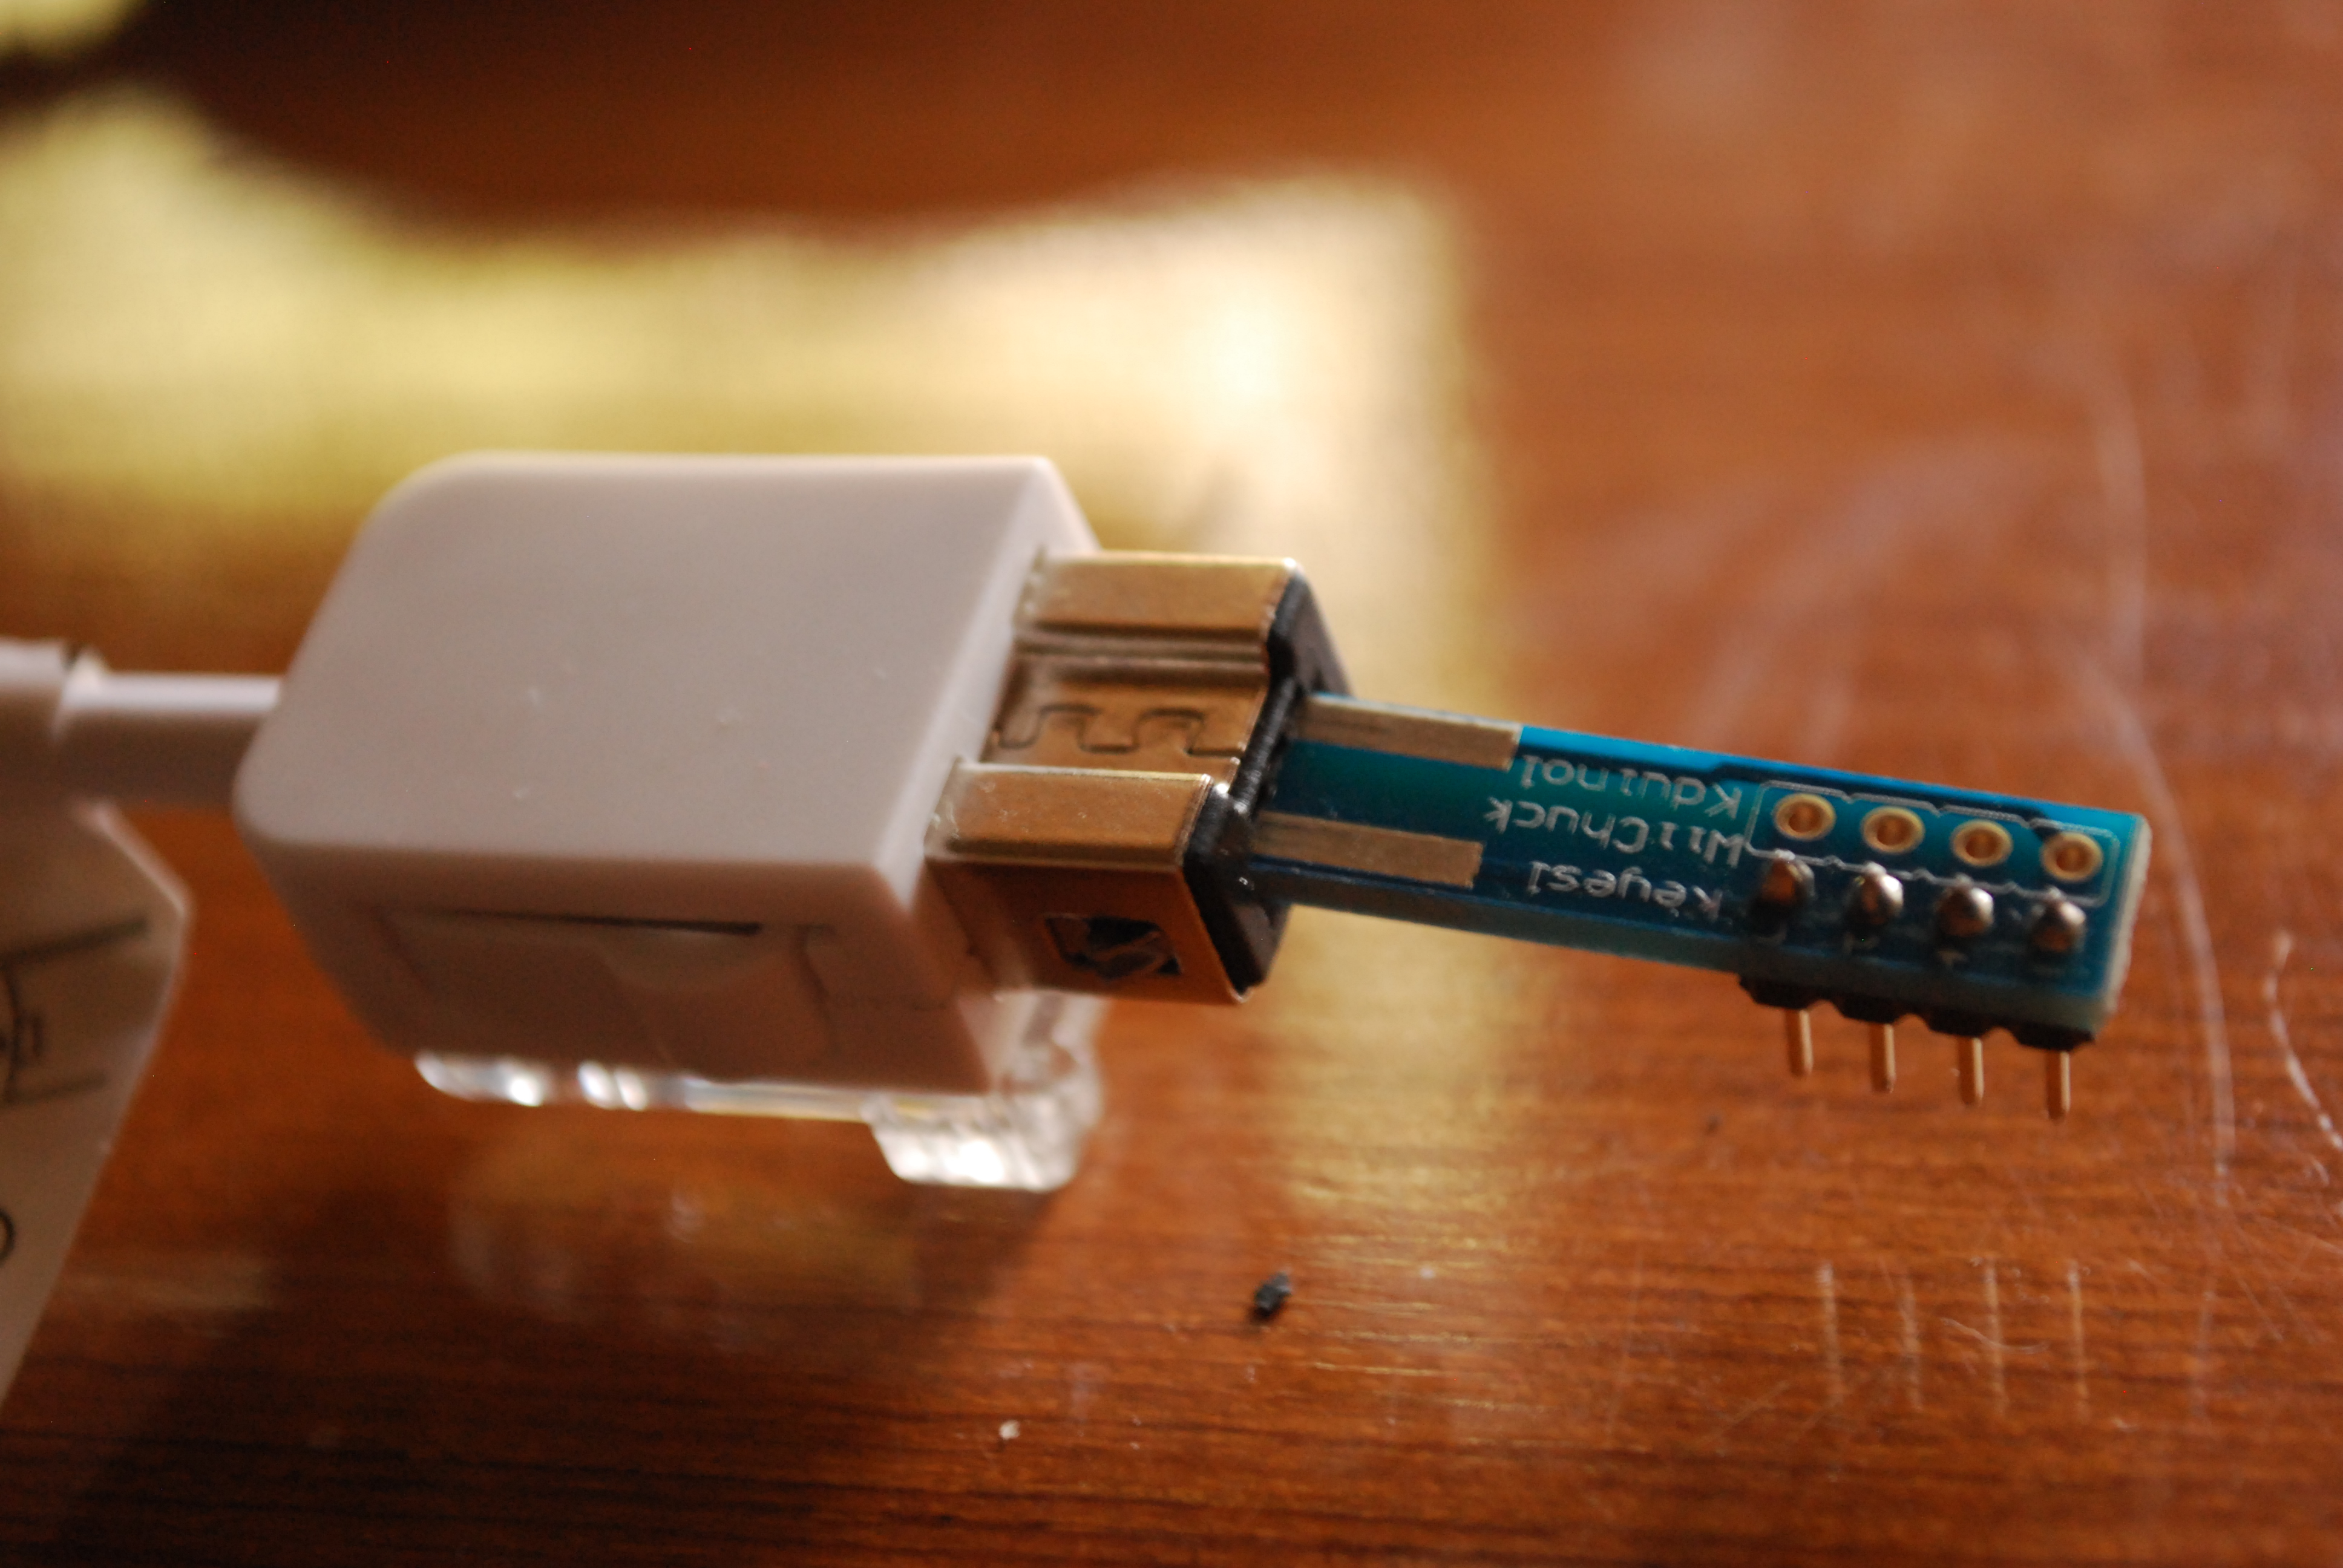
Finally we connect the breakout board to a breadboard to make it easier to make the connections to our Beagle Bone Black board.
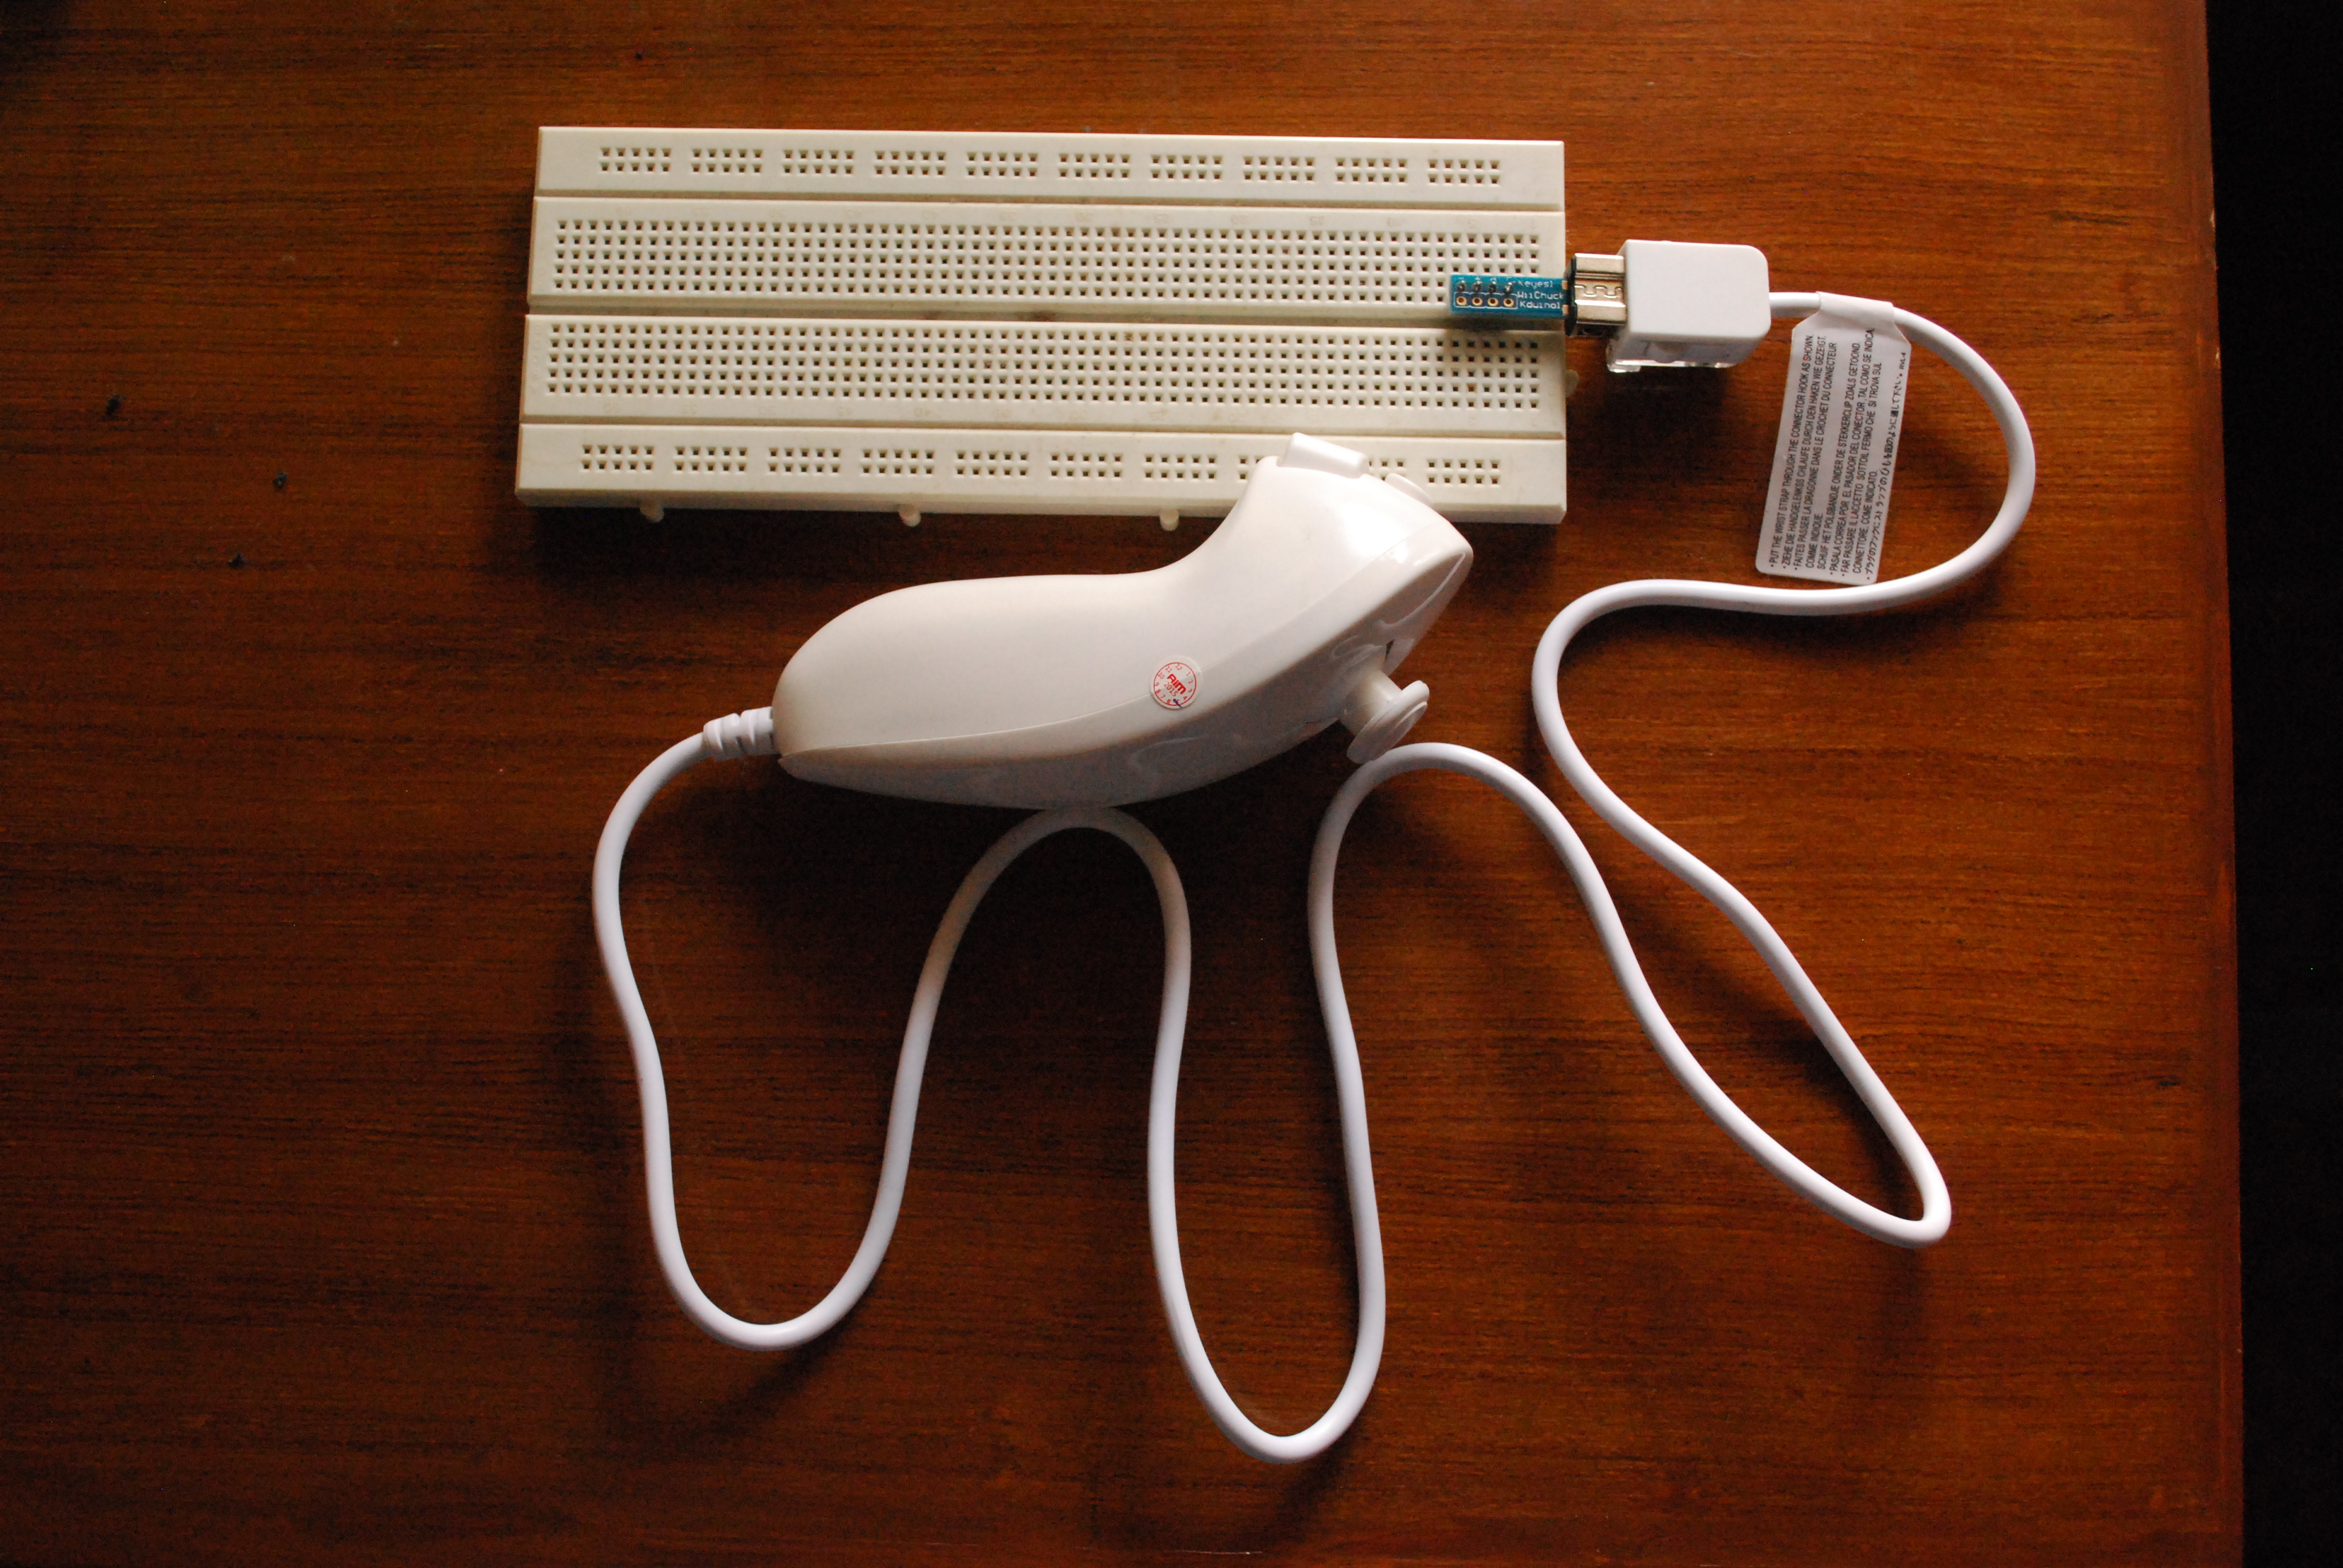
Update The Board Device Tree
We will need to specify the device as part of the platform. We do this using the device tree approach and modify the board device tree. We will have to define a second I2C bus i2c1 and then add a child node to this bus which will correspond to the Nunchuck device.
Declaring A Second I2C Bus
First we try to locate the DTS file with the first I2C bus i2c0 is defined. Using fubd we can search in the arch/arm/boot/dts/ directory for files which have references to "bone".
conrad@conrad-HP-Pavilion-dm3-Notebook-PC:~/Git/linux$ find arch/arm/boot/dts/ -name '*bone*.dts'
arch/arm/boot/dts/am335x-boneblack.dts
arch/arm/boot/dts/am335x-bone.dts
If we open the file we can see that it includes two files which may have the i2c0 bus definition.
.
.
#include "am33xx.dtsi"
#include "am335x-bone-common.dtsi"

&ldo3_reg {
        regulator-min-microvolt = <1800000>;
        regulator-max-microvolt = <1800000>;
        regulator-always-on;
};

.
.
-
Include of am33xx.dtsi which is the SOC base file
-
Include of am335x-bone-common.dtsi which is the bone platform base file
We take a look at the am33xx.dtsi
.
.
                i2c0: i2c@44e0b000 {
                        compatible = "ti,omap4-i2c";
                        #address-cells = <1>;
                        #size-cells = <0>;
                        ti,hwmods = "i2c1";
                        reg = <0x44e0b000 0x1000>;
                        interrupts = <70>;
                        status = "disabled";
                };

                i2c1: i2c@4802a000 {
                        compatible = "ti,omap4-i2c";
                        #address-cells = <1>;
                        #size-cells = <0>;
                        ti,hwmods = "i2c2";
                        reg = <0x4802a000 0x1000>;
                        interrupts = <71>;
                        status = "disabled";
                };

                i2c2: i2c@4819c000 {
                        compatible = "ti,omap4-i2c";
                        #address-cells = <1>;
                        #size-cells = <0>;
                        ti,hwmods = "i2c3";
                        reg = <0x4819c000 0x1000>;
                        interrupts = <30>;
                        status = "disabled";
                };
.
.
-
The base address of the registers for i2c0
-
The status of the bus is disabled
We take a look at the am335x-bone-common.dtsi file and search for the i2c0 bus. A node is defined but it is not complete.
.
.
&i2c0 {
        pinctrl-names = "default";
        pinctrl-0 = <&i2c0_pins>;

        status = "okay";
        clock-frequency = <400000>;

        tps: tps@24 {
                reg = <0x24>;
        };

};
.
.
-
The i2c0 bus is defined in the am335x-bone-common.dtsi file
-
There is one device defined as part of the i2c0 bus i.e. tps
We locate the address of the i2c1 bus i.e. 0x4802a000 in the processor data sheet. To search for the address we have to search for the string as 4802_a000. It is located in the Table 2-3. L4_PER Peripheral Memory Map.
We simply copy the i2c0 node defined in the am335x-bone-common.dtsi file and modify the am335x-boneblack.dts file to enable the i2c1 bus. The pinctrl- properties are left out for now and the frequency is set to 100KHz.
.
.
/ {
        hdmi {
                compatible = "ti,tilcdc,slave";
                i2c = <&i2c0>;
                pinctrl-names = "default", "off";
                pinctrl-0 = <&nxp_hdmi_bonelt_pins>;
                pinctrl-1 = <&nxp_hdmi_bonelt_off_pins>;
                status = "okay";
        };
};

&i2c1 {
        status = "okay";
        clock-frequency = <100000>;

};
.
.
- i2c1 bus is defined
Declaring The Nunchuck Device
If we go through the nunchuck pdf we see that the I2C address of the nunchuck is 0x52. We add this device to the i2c1 bus in the device tree.
.
.
&i2c1 {
        status = "okay";
        clock-frequency = <100000>;

        nunchuck: {
                compatible = "nintendo,nunchuck"
                reg = <0x52>
        };

};
.
.
-
New nunchuck device added to i2c1 bus
-
The driver compatible with this device
-
The address of the I2C device is 0x52
After making the modifications we recompile the device tree blob and copy it to /var/lib/tftpboot/ in order to download it to the Beagle Bone Black board during boot.
conrad@conrad-HP-Pavilion-dm3-Notebook-PC:~/Git/linux$ make dtbs
  DTC     arch/arm/boot/dts/am335x-boneblack.dtb
conrad@conrad-HP-Pavilion-dm3-Notebook-PC:~/Git/linux$ cp -a arch/arm/boot/dts/am335x-boneblack.dtb /var/lib/tftpboot/
Once the kernel and device tree blob is loaded on the board we can inspect the /proc/device-tree folder to see if our changes are present
# find /proc/device-tree/ -name "*nunchuck*"
/proc/device-tree/ocp/i2c@4802a000/nunchuck@52
#
# ls /proc/device-tree/ocp/i2c@4802a000/nunchuck@52/
compatible  name        reg
# cat /proc/device-tree/ocp/i2c@4802a000/nunchuck@52/compatible
nintendo,nunchuck
#
#
# cat /proc/device-tree/ocp/i2c@4802a000/nunchuck@52/name
nunchuck
#
#
#
# cat /proc/device-tree/ocp/i2c@4802a000/nunchuck@52/reg
R
-
Search for any file with nunchuck in its name
-
Display the value of the compatible property
-
Display the value of the name property
-
Display the value of the reg property
To see the device tree blob we use the dtc utility.
# dtc -I fs /proc/device-tree/
/dts-v1/;

/ {
        model = "TI AM335x BeagleBone";
        interrupt-parent = <0x1>;
        compatible = "ti,am335x-bone", "ti,am33xx";
        #size-cells = <0x1>;
        #address-cells = <0x1>;

        hdmi {
                status = "okay";
                pinctrl-1 = <0x18>;
                pinctrl-0 = <0x17>;
                pinctrl-names = "default", "off";
                i2c = <0x16>;
                compatible = "ti,tilcdc,slave";
        };

        fixedregulator@0 {
                phandle = <0x9>;
                linux,phandle = <0x9>;
                regulator-max-microvolt = <0x325aa0>;
                regulator-min-microvolt = <0x325aa0>;
                regulator-name = "vmmcsd_fixed";
                compatible = "regulator-fixed";
        };
.
.
.

                i2c@4802a000 {
                        clock-frequency = <0x186a0>;
                        status = "okay";
                        interrupts = <0x47>;
                        reg = <0x4802a000 0x1000>;
                        ti,hwmods = "i2c2";
                        #size-cells = <0x0>;
                        #address-cells = <0x1>;
                        compatible = "ti,omap4-i2c";

                        nunchuck@52 {
                                reg = <0x52>;
                                compatible = "nintendo,nunchuck";
                        };
                };
.
.
.
        aliases {
                ethernet1 = "/ocp/ethernet@4a100000/slave@4a100300";
                ethernet0 = "/ocp/ethernet@4a100000/slave@4a100200";
                phy1 = "/ocp/usb@47400000/usb-phy@47401b00";
                phy0 = "/ocp/usb@47400000/usb-phy@47401300";
                usb1 = "/ocp/usb@47400000/usb@47401800";
                usb0 = "/ocp/usb@47400000/usb@47401000";
                d_can1 = "/ocp/d_can@481d0000";
                d_can0 = "/ocp/d_can@481cc000";
                serial5 = "/ocp/serial@481aa000";
                serial4 = "/ocp/serial@481a8000";
                serial3 = "/ocp/serial@481a6000";
                serial2 = "/ocp/serial@48024000";
                serial1 = "/ocp/serial@48022000";
                serial0 = "/ocp/serial@44e09000";
                i2c2 = "/ocp/i2c@4819c000";
                i2c1 = "/ocp/i2c@4802a000";
                i2c0 = "/ocp/i2c@44e0b000";
        };

        chosen {
                bootargs = "root=/dev/nfs rw ip=192.168.0.100 console=ttyO0 nfsroot=192.168.0.1:/home/conrad/fe-kernel-training/linux-kernel-labs/modules/nfsroot";
        };
};
-
The I2C1 device
-
The nunchuck device in the device tree blob
Implement A Basic I2C Driver For The Nunchuck
We now take the basic nunchuck.c file present in the ~/fe-kernel-training/linux-kernel-labs/modules/nfsroot/root/nunchuk/_ directory and modify it to implement our basic I2C driver. The file present in the Free Electrons lab data NFS root folder looks like this before modification:
#include <linux/init.h>
#include <linux/module.h>
#include <linux/i2c.h>

/* Add your code here */

MODULE_LICENSE("GPL");
We make the following changes to the driver code: . Instantiate an object of type struct i2c_device_id . Instantiate an object of type struct of_device_id . Define the probe and remove functions . Instantiate an object of type struct i2c_driver . Instantiate the I2C driver using module_i2c_driver
#include <linux/init.h>
#include <linux/module.h>
#include <linux/i2c.h>

/* Add your code here */
static const struct i2c_device_id nunchuck_id[] = {
        { "nunchuck", 0 },
        { }
};
MODULE_DEVICE_TABLE(i2c, nunchuck_id);

#ifdef CONFIG_OF
static const struct of_device_id nunchuck_dt_ids[] = {
        {.compatible = "nintendo,nunchuck",},
        { }
};
MODULE_DEVICE_TABLE(of, nunchuck_dt_ids);
#endif

static int nunchuck_probe(struct i2c_client *client,
                        const struct i2c_device_id *id)
{
        /* initialize device */
        /* register to a kernel framework */

        return 0;
}

static int nunchuck_remove(struct i2c_client *client)
{
        return 0;
}

static struct i2c_driver nunchuck_driver = {
        .probe = nunchuck_probe,
        .remove = nunchuck_remove,
        .id_table = nunchuck_id,
        .driver = {
                .name = "nunchuck",
                .owner = THIS_MODULE,
                .of_match_table = of_match_ptr(nunchuck_dt_ids),
        },
};

module_i2c_driver(nunchuck_driver);

MODULE_LICENSE("GPL");
-
Instantiate an object of type struct i2c_device_id nunchuck_id
-
Instantiate an object of type struct of_device_id nunchuck_dt_ids
-
The probe function
-
The remove function
-
Instantiate an object of type struct i2c_driver
-
Instantiate the I2C driver using module_i2c_driver
Compiling The nunchuck Driver
We’ve gone through the compilation of a kernel module in the previous lab session. So passing the ARCH, CROSS_COMPILE and KDIR we are able to build the kernel module driver nunchuck.ko.
conrad@conrad-HP-Pavilion-dm3-Notebook-PC:~/fe-kernel-training/linux-kernel-labs/modules/nfsroot/root/nunchuk$ make ARCH=arm CROSS_COMPILE=arm-linux-gnueabi- KDIR=/home/conrad/Git/linux/
make -C /home/conrad/Git/linux/ M=$PWD
make[1]: Entering directory `/home/conrad/Git/linux'
  CC [M]  /home/conrad/fe-kernel-training/linux-kernel-labs/modules/nfsroot/root/nunchuk/nunchuk.o
  Building modules, stage 2.
  MODPOST 1 modules
  CC      /home/conrad/fe-kernel-training/linux-kernel-labs/modules/nfsroot/root/nunchuk/nunchuk.mod.o
  LD [M]  /home/conrad/fe-kernel-training/linux-kernel-labs/modules/nfsroot/root/nunchuk/nunchuk.ko
make[1]: Leaving directory `/home/conrad/Git/linux'
Testing The nunchuck Driver
So now that we have our kernel driver nunchuck.ko we can easily load it on the board as we’re using a NFS root filesystem.
# cd /root/nunchuk/
# ls
Makefile        built-in.o      modules.order   nunchuk.ko      nunchuk.mod.o
Module.symvers  dtc.txt         nunchuk.c       nunchuk.mod.c   nunchuk.o
# insmod nunchuk.ko
#
#
#
# lsmod
Module                  Size  Used by    Tainted: G
nunchuk                 1569  0
#
-
Change the directory to /root/nunchuck/
-
Insert the nunchuck.ko kernel module driver
-
List the loaded kernel modules
We explore the sysfs and see what files get created.
# find /sys/ -name '*nunchuck*'
/sys/bus/i2c/drivers/nunchuck
/sys/module/nunchuk/drivers/i2c:nunchuck
#
# ls -l /sys/bus/i2c/drivers/nunchuck/
total 0
lrwxrwxrwx    1 root     root             0 Jan  1 00:05 1-0052 -> ../../../../devices/ocp.3/4802a000.i2c/i2c-1/1-0052
--w-------    1 root     root          4096 Jan  1 00:05 bind
lrwxrwxrwx    1 root     root             0 Jan  1 00:05 module -> ../../../../module/nunchuk
--w-------    1 root     root          4096 Jan  1 00:05 uevent
--w-------    1 root     root          4096 Jan  1 00:05 unbind
# cat /sys/bus/i2c/drivers/nunchuck/1-0052/name
nunchuck
# ls -l /sys/module/nunchuk/drivers/i2c\:nunchuck/
total 0
lrwxrwxrwx    1 root     root             0 Jan  1 00:05 1-0052 -> ../../../../devices/ocp.3/4802a000.i2c/i2c-1/1-0052
--w-------    1 root     root          4096 Jan  1 00:05 bind
lrwxrwxrwx    1 root     root             0 Jan  1 00:05 module -> ../../../../module/nunchuk
--w-------    1 root     root          4096 Jan  1 00:05 uevent
--w-------    1 root     root          4096 Jan  1 00:05 unbind
# cat /sys/module/nunchuk/drivers/i2c:nunchuck/1-0052/name
nunchuck
# cat /sys/module/nunchuk/drivers/i2c:nunchuck/1-0052/modalias
i2c:nunchuck
-
Search for files with name nunchuck in sysfs
-
List contents of /sys/bus/i2c/drivers/nunchuck/
-
Display contents in /sys/bus/i2c/drivers/nunchuck/1-0052/name
-
List contents of /sys/module/nunchuk/drivers/i2c:nunchuck/
-
Display contents in /sys/module/nunchuk/drivers/i2c:nunchuck/1-0052/name
-
Display contents in /sys/module/nunchuk/drivers/i2c:nunchuck/1-0052/modalias
Communicating With The I2C Device
There are several ways present through which we can communicate with the I2C device. We’ll go through each of the methods available.
Raw API
We have the basic API available which allow us to either send or receive data from the I2C device. These are defined in the drivers/i2c/i2c-core.c. The APIs are i2c_master_send to send data to the client and i2c_master_recv to receive data from the client.
.
.
/**
 * i2c_master_send - issue a single I2C message in master transmit mode
 * @client: Handle to slave device
 * @buf: Data that will be written to the slave
 * @count: How many bytes to write, must be less than 64k since msg.len is u16
 *
 * Returns negative errno, or else the number of bytes written.
 */
int i2c_master_send(const struct i2c_client *client, const char *buf, int count)
{
        int ret;
        struct i2c_adapter *adap = client->adapter;
        struct i2c_msg msg;

        msg.addr = client->addr;
        msg.flags = client->flags & I2C_M_TEN;
        msg.len = count;
        msg.buf = (char *)buf;

        ret = i2c_transfer(adap, &msg, 1);

        /*
         * If everything went ok (i.e. 1 msg transmitted), return #bytes
         * transmitted, else error code.
         */
        return (ret == 1) ? count : ret;
}
EXPORT_SYMBOL(i2c_master_send);

/**
 * i2c_master_recv - issue a single I2C message in master receive mode
 * @client: Handle to slave device
 * @buf: Where to store data read from slave
 * @count: How many bytes to read, must be less than 64k since msg.len is u16
 *
 * Returns negative errno, or else the number of bytes read.
 */
int i2c_master_recv(const struct i2c_client *client, char *buf, int count)
{
        struct i2c_adapter *adap = client->adapter;
        struct i2c_msg msg;
        int ret;

        msg.addr = client->addr;
        msg.flags = client->flags & I2C_M_TEN;
        msg.flags |= I2C_M_RD;
        msg.len = count;
        msg.buf = buf;

        ret = i2c_transfer(adap, &msg, 1);

        /*
         * If everything went ok (i.e. 1 msg received), return #bytes received,
         * else error code.
         */
        return (ret == 1) ? count : ret;
}
EXPORT_SYMBOL(i2c_master_recv);
.
.
-
Sends the content of buf and of size count to the client
-
Receives count bytes in buf from the client
Message Transfer API
The raw api make use of another API which is used to describe a transfer of several messages. A collection of messages can be sent at one time using the i2c_transfer API which is also defined in the drivers/i2c/i2c-core.c file.
.
.
/**
 * i2c_transfer - execute a single or combined I2C message
 * @adap: Handle to I2C bus
 * @msgs: One or more messages to execute before STOP is issued to
 *      terminate the operation; each message begins with a START.
 * @num: Number of messages to be executed.
 *
 * Returns negative errno, else the number of messages executed.
 *
 * Note that there is no requirement that each message be sent to
 * the same slave address, although that is the most common model.
 */
int i2c_transfer(struct i2c_adapter *adap, struct i2c_msg *msgs, int num)
{
.
.
.
}
EXPORT_SYMBOL(i2c_transfer);
.
.
SMBus Calls
The SMBus is a subset of the I2C protocol. SMBus defines a standard set of transactions for example to read or write a register of a device. If possible the SMBus API should be used instead of the raw API to simplify the implementation with standard transaction APIs. One such API is i2c_smbus_read_byte_data() function which allows a read of one byte of data from a device register.
-
The following sequence of operations are carried out: _S Addr Wr [A] Comm [A] S Addr Rd [A] [Data] NA P)
-
The above sequence means write one byte data command i.e. Comm and then read back the data i.e. [Data]
-
Further details are elaborated in Documentation/i2c/smbus-protocol
List Of SMBus API
-
Read/write one byte
a. s32 i2c_smbus_read_byte(const struct i2c_client *client);
b. s32 i2c_smbus_write_byte(const struct i2c_client *client, u8 value);
-
Write a command byte, and read or write one byte
a. s32 i2c_smbus_read_byte_data(const struct i2c_client *client, u8 command);
b. s32 i2c_smbus_write_byte_data(const struct i2c_client *client, u8 command, u8 value);
-
Write a command byte, and read or write one word
a. s32 i2c_smbus_read_word_data(const struct i2c_client *client, u8 command);
b. s32 i2c_smbus_write_word_data(const struct i2c_client *client, u8 command, u16 value);
-
Write a command byte, and read or write a block of data (max 32 bytes)
a. s32 i2c_smbus_read_block_data(const struct i2c_client *client, u8 command, u8 *values);
b. s32 i2c_smbus_write_block_data(const struct i2c_client *client, u8 command, u8 length, const u8 *values);
-
Write a command byte, and read or write a block of data (no limit)
a. s32 i2c_smbus_read_i2c_block_data(const struct i2c_client *client, u8 command, u8 length, u8 *values);
b. s32 i2c_smbus_write_i2c_block_data(const struct i2c_client *client, u8 command, u8 length, const u8 *values);
I2C Functionality
I2C controllers may not support all functionalities. A device driver must check to see which functionalities are supported by the controller. The controller tells the core which functionalities it supports. The API i2c_check_functionality() is to be used to find out the functionalities. For example I2C_FUNC_I2C is required in order to use the raw API functions discussed above whereas I2C_FUNC_SMBUS_BYTE_DATA is required for SMBus commands.
- Additional details can be seen in include/uapi/linux/i2c.h
.
.
.
#define I2C_FUNC_I2C                    0x00000001
#define I2C_FUNC_10BIT_ADDR             0x00000002
#define I2C_FUNC_PROTOCOL_MANGLING      0x00000004 /* I2C_M_IGNORE_NAK etc. */
#define I2C_FUNC_SMBUS_PEC              0x00000008
#define I2C_FUNC_NOSTART                0x00000010 /* I2C_M_NOSTART */
#define I2C_FUNC_SMBUS_BLOCK_PROC_CALL  0x00008000 /* SMBus 2.0 */
#define I2C_FUNC_SMBUS_QUICK            0x00010000
#define I2C_FUNC_SMBUS_READ_BYTE        0x00020000
#define I2C_FUNC_SMBUS_WRITE_BYTE       0x00040000
#define I2C_FUNC_SMBUS_READ_BYTE_DATA   0x00080000
#define I2C_FUNC_SMBUS_WRITE_BYTE_DATA  0x00100000
#define I2C_FUNC_SMBUS_READ_WORD_DATA   0x00200000
#define I2C_FUNC_SMBUS_WRITE_WORD_DATA  0x00400000
#define I2C_FUNC_SMBUS_PROC_CALL        0x00800000
#define I2C_FUNC_SMBUS_READ_BLOCK_DATA  0x01000000
#define I2C_FUNC_SMBUS_WRITE_BLOCK_DATA 0x02000000
#define I2C_FUNC_SMBUS_READ_I2C_BLOCK   0x04000000 /* I2C-like block xfer  */
#define I2C_FUNC_SMBUS_WRITE_I2C_BLOCK  0x08000000 /* w/ 1-byte reg. addr. */

#define I2C_FUNC_SMBUS_BYTE             (I2C_FUNC_SMBUS_READ_BYTE | \
                                         I2C_FUNC_SMBUS_WRITE_BYTE)
#define I2C_FUNC_SMBUS_BYTE_DATA        (I2C_FUNC_SMBUS_READ_BYTE_DATA | \
                                         I2C_FUNC_SMBUS_WRITE_BYTE_DATA)
#define I2C_FUNC_SMBUS_WORD_DATA        (I2C_FUNC_SMBUS_READ_WORD_DATA | \
                                         I2C_FUNC_SMBUS_WRITE_WORD_DATA)
#define I2C_FUNC_SMBUS_BLOCK_DATA       (I2C_FUNC_SMBUS_READ_BLOCK_DATA | \
                                         I2C_FUNC_SMBUS_WRITE_BLOCK_DATA)
#define I2C_FUNC_SMBUS_I2C_BLOCK        (I2C_FUNC_SMBUS_READ_I2C_BLOCK | \
                                         I2C_FUNC_SMBUS_WRITE_I2C_BLOCK)

#define I2C_FUNC_SMBUS_EMUL             (I2C_FUNC_SMBUS_QUICK | \
                                         I2C_FUNC_SMBUS_BYTE | \
                                         I2C_FUNC_SMBUS_BYTE_DATA | \
                                         I2C_FUNC_SMBUS_WORD_DATA | \
                                         I2C_FUNC_SMBUS_PROC_CALL | \
                                         I2C_FUNC_SMBUS_WRITE_BLOCK_DATA | \
                                         I2C_FUNC_SMBUS_I2C_BLOCK | \
                                         I2C_FUNC_SMBUS_PEC)
.
.
.
Pin Muxing
Modern SOCs include a large number of hardware blocks but only a certain combination of blocks can be enabled at any point in time as there are a limited number of pins present on the SOC. In order to fascilitate the access of hardware blocks on the SOC there needs to be some sort of mechanism by which the system designer can select which blocks have to be activated for the application. This is done through a software mechanism known as pin muxing.
Since version 3.2 of the Linux kernel there has been a new subsystem called pinctrl which is added to handle the pinmuxing. This is present in the drivers/pinctrl section of the source code. This subsystem provides:
-
A pin muxing consumer interface for device drivers
-
A pin muxing driver interface to implement the system on chip specific drivers that configure the muxing.
Most pinctrl drivers provide a Device Tree binding which must be described in the Device Tree. The binding will differ from driver to driver but it should be documented in Documentation/devicetree/bindings/pinctrl.
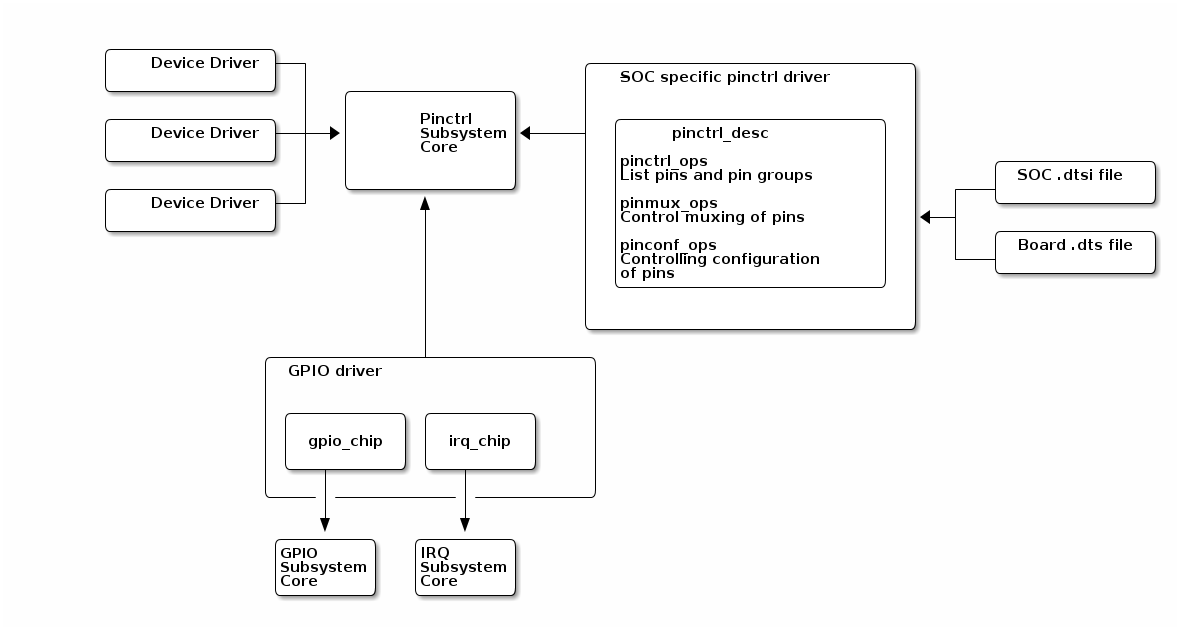
Device Tree Binding For Consumer Devices
The devices that require certains pins to be muxed will use the pinctrl-<x> and pinctrl-names Device Tree properties. The pinctrl-0, pinctrl-1, pinctrl-<x>_ properties link to a pin configuration for a given state of the device.
Pinctrl Client Devices
Out of the following only the first is required whereas the remaining are optional:
- pinctrl-0
-
List of phandles, each pointing at a pin configuration node. These referenced pin configuration nodes must be child nodes of the pin controller that they configure. Multiple entries may exist in this list so that multiple pin controllers may be configured, or so that a state may be built from multiple nodes for a single pin controller, each contributing part of the overall configuration. See the next section of this document for details of the format of these pin configuration nodes.
- pinctrl-1
-
List of phandles, each pointing at a pin configuration node within a pin controller.
- pinctrl-n
-
List of phandles, each pointing at a pin configuration node within a pin controller.
- pinctrl-names
-
The list of names to assign states. List entry 0 defines the name for integer state ID 0, list entry 1 for state ID 1, and so on.
Taking the example given in Documentation/devicetree/bindings/pinctrl/pinctrl-bindings.txt under the section "Pinctrl client devices".
        /* For a client device requiring named states */
        device {
                pinctrl-names = "active", "idle";
                pinctrl-0 = <&state_0_node_a>;
                pinctrl-1 = <&state_1_node_a &state_1_node_b>;
        };

        /* For the same device if using state IDs */
        device {
                pinctrl-0 = <&state_0_node_a>;
                pinctrl-1 = <&state_1_node_a &state_1_node_b>;
        };

        /*
         * For an IP block whose binding supports pin configuration,
         * but in use on an SoC that doesn't have any pin control hardware
         */
        device {
                pinctrl-names = "active", "idle";
                pinctrl-0 = <>;
                pinctrl-1 = <>;
        };
Pin Controller Devices
Pin controller devices should contain the pin configuration nodes that client devices reference.
For example:

        pincontroller {
                ... /* Standard DT properties for the device itself elided */

                state_0_node_a {
                        ...
                };
                state_1_node_a {
                        ...
                };
                state_1_node_b {
                        ...
                };
        }
The contents of each of those pin configuration child nodes is defined entirely by the binding for the individual pin controller device. There exists no common standard for this content.
The pin configuration nodes need not be direct children of the pin controller device; they may be grandchildren, for example. Whether this is legal, and whether there is any interaction between the child and intermediate parent nodes, is again defined entirely by the binding for the individual pin controller device.
Example On OMAP / AM33xx
The base dtsi file for our Beagle Bone Black is in the arch/arm/boot/dts/am33xx.dtsi file. If we look at pinctrl device we see that it is compatible with the pinctrl-single driver. This is common between related SOCs and allows to configure pins by writing a value to a register.
.
.
        am33xx_pinmux: pinmux@44e10800 {
                compatible = "pinctrl-single";
                reg = <0x44e10800 0x0238>;
                #address-cells = <1>;
                #size-cells = <0>;
                pinctrl-single,register-width = <32>;
                pinctrl-single,function-mask = <0x7f>;
        };
.
.
- The compatible pinctrl-single driver
The base dtsi doesn’t mention any pinctrl configurations. We can find these pinctrl configurations defined as child nodes of the main pinctrl device in the board specific dts file. If we search for board files that include the base dtsi file we get the following:
conrad@conrad-HP-Pavilion-dm3-Notebook-PC:~/Git/linux$ egrep -ri "am33xx.dtsi" arch/arm/boot/dts/*
arch/arm/boot/dts/am335x-boneblack.dts:#include "am33xx.dtsi"
arch/arm/boot/dts/am335x-bone.dts:#include "am33xx.dtsi"
arch/arm/boot/dts/am335x-evm.dts:#include "am33xx.dtsi"
arch/arm/boot/dts/am335x-evmsk.dts:#include "am33xx.dtsi"
arch/arm/boot/dts/am335x-igep0033.dtsi:#include "am33xx.dtsi"
arch/arm/boot/dts/am335x-nano.dts:#include "am33xx.dtsi"
conrad@conrad-HP-Pavilion-dm3-Notebook-PC:~/Git/linux$
Opening arch/arm/boot/dts/am335x-evmsk.dts we see several configurations defined:
&am33xx_pinmux {
pinctrl-names = "default";
pinctrl-0 = <&gpio_keys_s0 &clkout2_pin>;
user_leds_s0: user_leds_s0 {
pinctrl-single,pins = <
0x10 (PIN_OUTPUT_PULLDOWN | MUX_MODE7) /* gpmc_ad4.gpio1_4 */
0x14 (PIN_OUTPUT_PULLDOWN | MUX_MODE7) /* gpmc_ad5.gpio1_5 */
0x18 (PIN_OUTPUT_PULLDOWN | MUX_MODE7) /* gpmc_ad6.gpio1_6 */
0x1c (PIN_OUTPUT_PULLDOWN | MUX_MODE7) /* gpmc_ad7.gpio1_7 */
>;
};
gpio_keys_s0: gpio_keys_s0 {
pinctrl-single,pins = <
0x94 (PIN_INPUT_PULLDOWN | MUX_MODE7) /* gpmc_oen_ren.gpio2_3 */
0x90 (PIN_INPUT_PULLDOWN | MUX_MODE7) /* gpmc_advn_ale.gpio2_2 */
0x70 (PIN_INPUT_PULLDOWN | MUX_MODE7) /* gpmc_wait0.gpio0_30 */
0x9c (PIN_INPUT_PULLDOWN | MUX_MODE7) /* gpmc_ben0_cle.gpio2_5 */
>;
};
i2c0_pins: pinmux_i2c0_pins {
pinctrl-single,pins = <
0x188 (PIN_INPUT_PULLUP | MUX_MODE0) /* i2c0_sda.i2c0_sda */
0x18c (PIN_INPUT_PULLUP | MUX_MODE0) /* i2c0_scl.i2c0_scl */
>;
};
.
.
.
};
.
.
.
&i2c0 {
pinctrl-names = "default";
pinctrl-0 = <&i2c0_pins>
.
.
};
-
i2c0_pins defined pinctrl configuration
-
pinctrl-0 references i2c0_pins
LAB 6 : Communicating With The Nunchuck
Note
Hooking up the nunchuck to the board.
Configuring the pinmuxing for the I2C bus used.
Validate I2C communication works with user space tools.
Extend the I2C driver from the previous lab to communicate with the Nunchuck.
Connecting The Nunchuck
We will now hook up the nunchuck to the Beagle Bone Black board. The diagram below gives the names of the different pins on the connector.
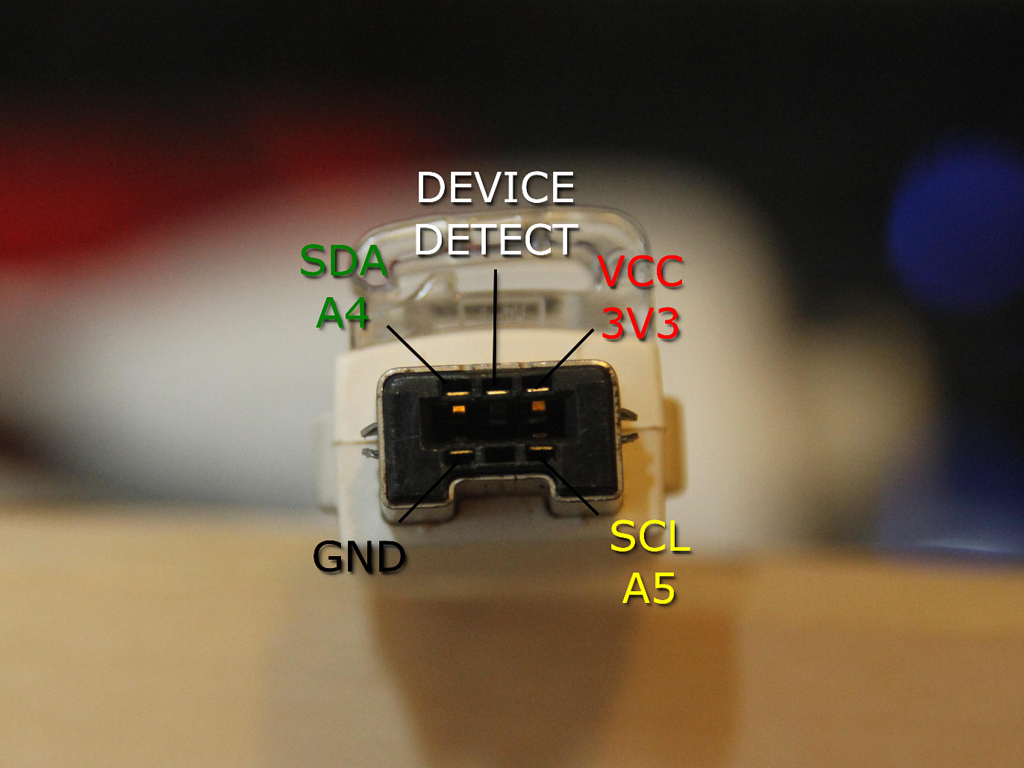
Now we open up the BBB system reference manual and search for "connector P9". Under this section we see the "Expansion Header P9 Pinout" table which describes the signals for the different peripherals on the SOC. So we need to make sure our connections from the Nunchuck are: . The GND pin to P9 pins 1 or 2 (GND) . The PWR pin to P9 pins 3 or 4 (DC_3.3V) . The CLK pin to P9 pin 17 (I2C1_SCL) . The DATA pin to P9 pin 18 (I2C1_SDA)
On hooking up the breakout board we need to understand which pins correspond to which signals. The + & - signs correspond to VCC(3.3V) and GND. The P & C correspond to SDA and SCL of I2C. We make the connections on the P9 connector using a breadboard and some wiring. Our hooked up connection is shown below.
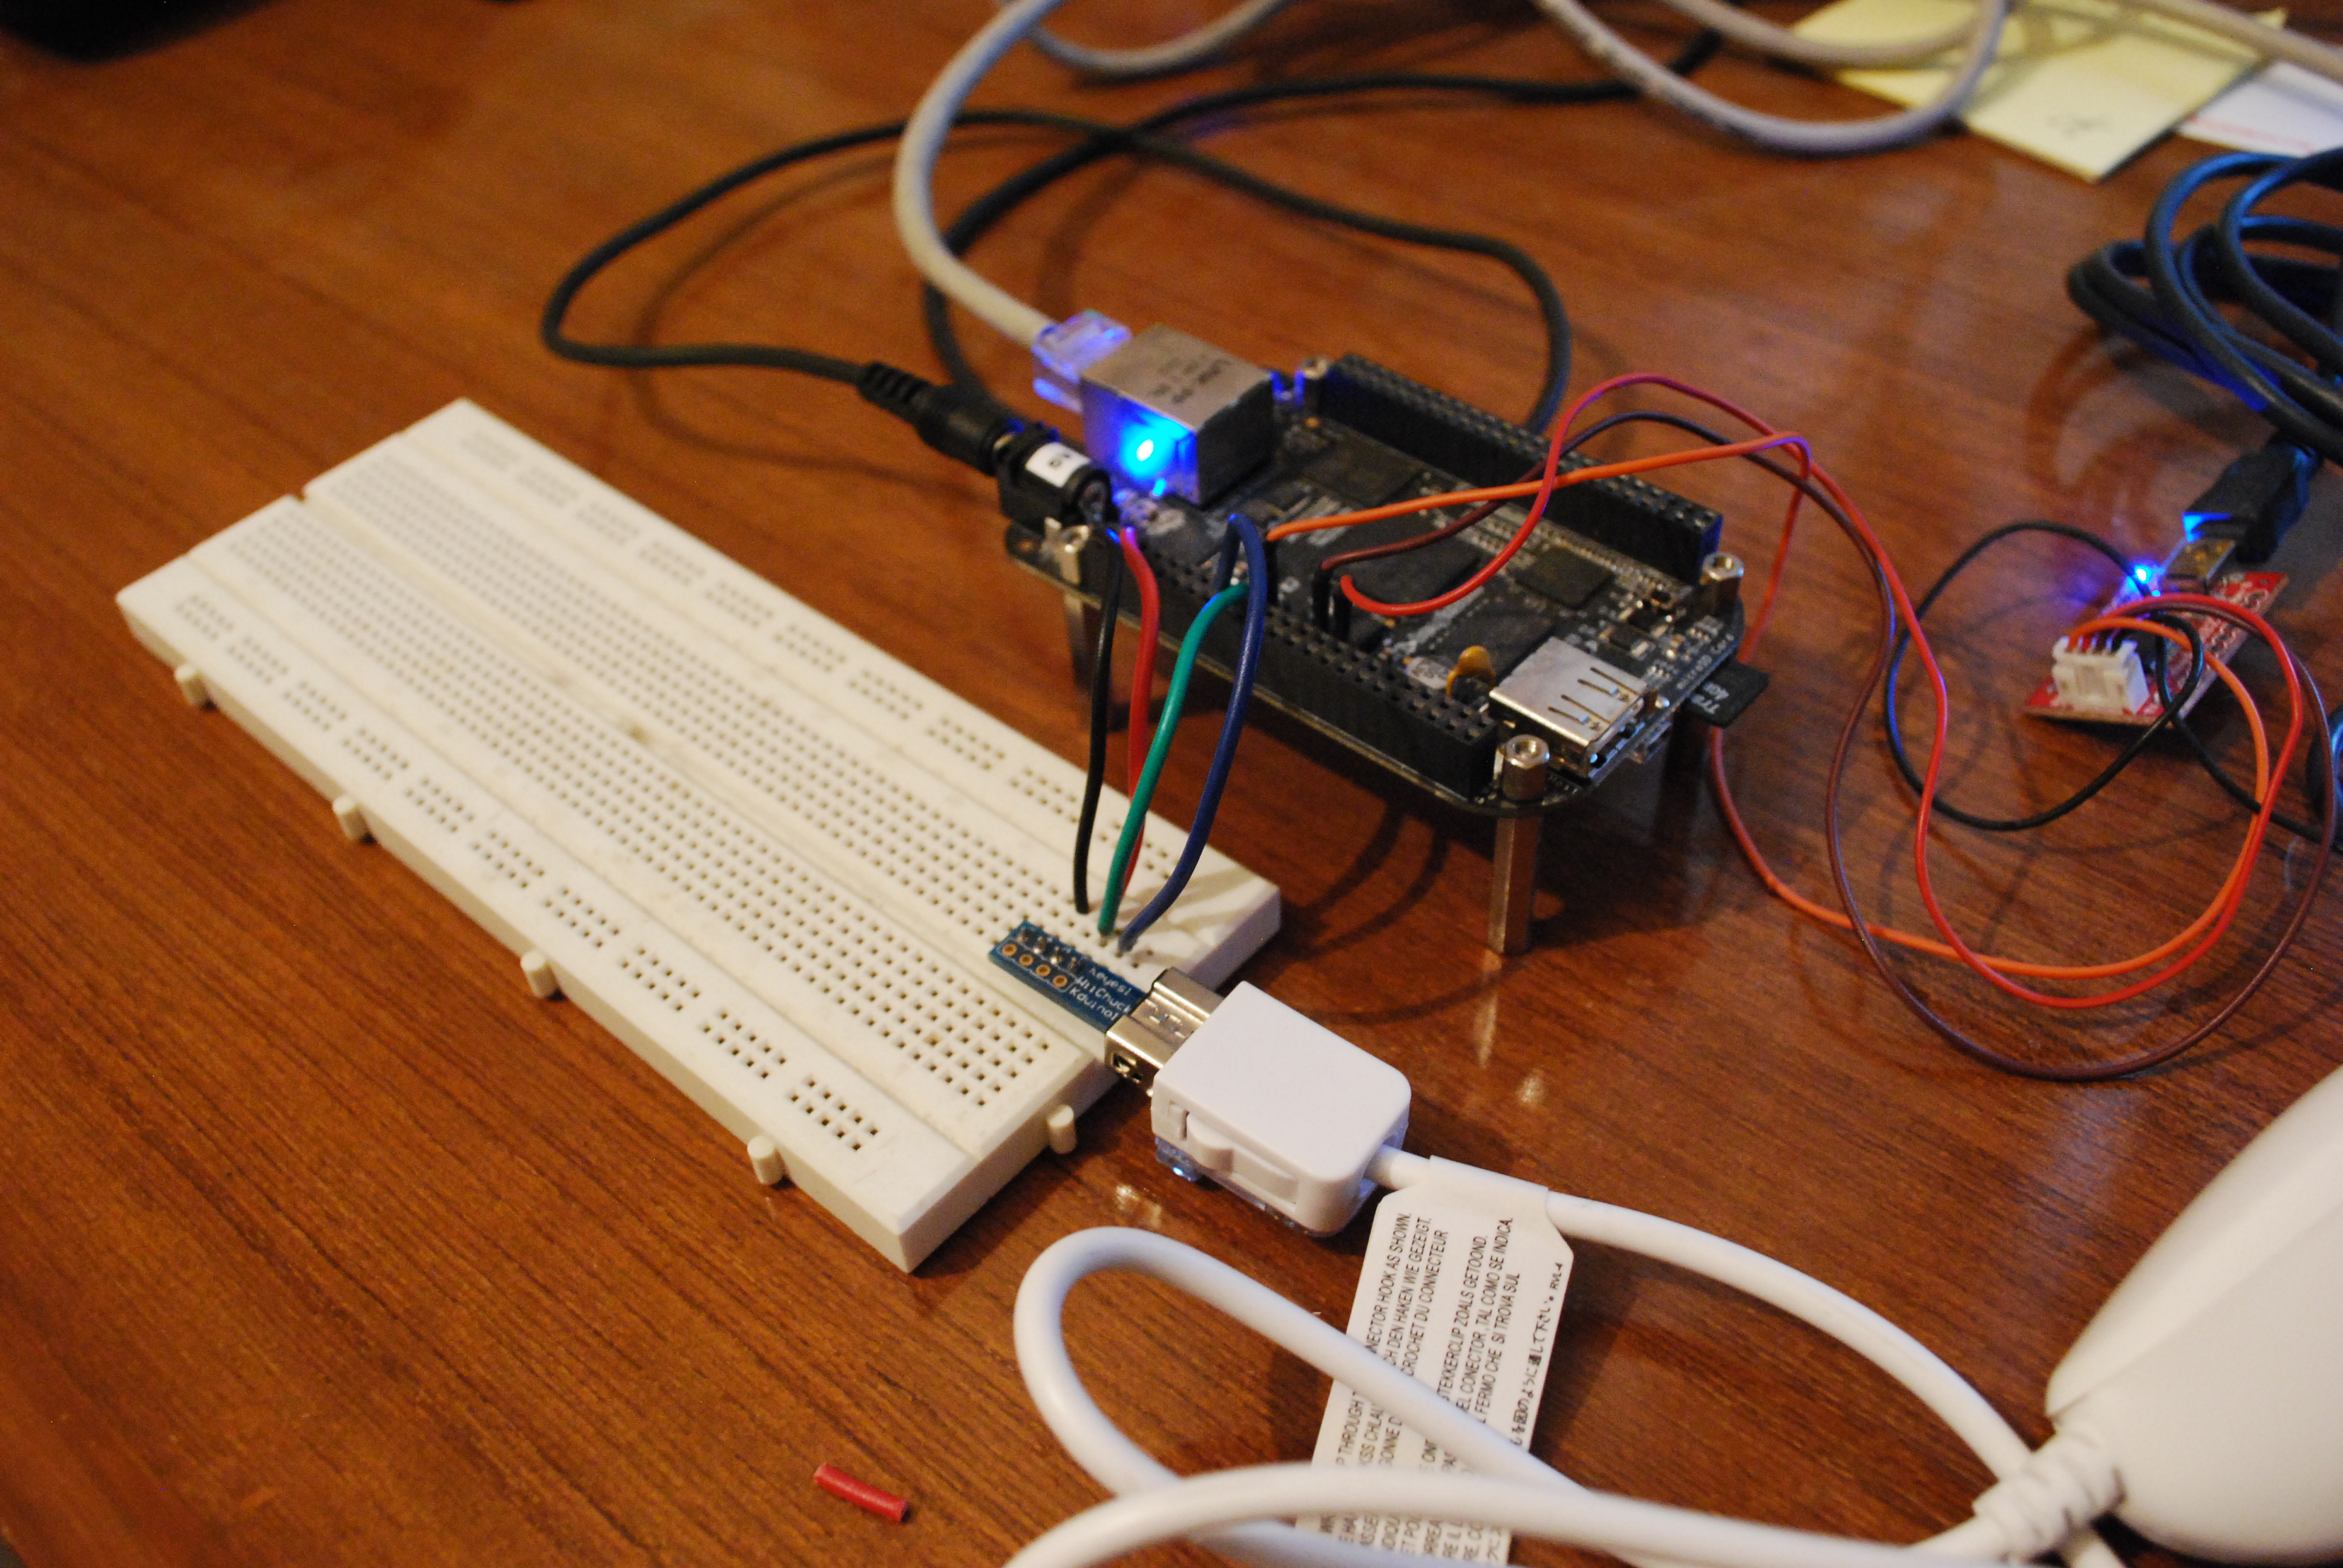
Configuring Pin Muxing Configuration For I2C1
Configuring the pin mux settings for our I2C1 bus on the SOC is going to involve going through several documents. If we go through the "Expansion Header P9 Pinout" table in the BBB system reference manual we can also see the pins of the AM335 SOC associated with the signals I2C1_SCL and I2C1_SDA which happen to be A16 and B16 respectively. We also see the different "MODES" that these pins can be muxed as and for I2C1 we need them to be in MODE2.
Our next step is to inspect the CPU datasheet. We go through the Pin Assignment section. You will find that the processor is available through two types of packages: ZCE and ZCZ. Our CPU has ZCZ written on its lower right corner. In the ZCZ pin assignment section we can see hyperlinks associated with each pin of the SOC. If we click on the A16 pin which is named as SPI_CS0 we see that to set it as I2C1_SCL we need to use MODE2. The pin is named as SPI_CS0 because that is the function of the pin in MODE0. We also see that B16 is named SPI0_D1 because of its association in MODE0 and to get it to I2C1_SDA we need to set it to MODE2. The default names of the pins will be useful going forward.
Finally we need to change the pin mux settings somehow. We open the AM3358 technical reference document and look for registers that can help us do this. Specifically look for the "Control Module" section.
The control module includes status and control logic not addressed within the peripherals or the rest of the device infrastructure. This module provides interface to control the following areas of the device: . Functional I/O multiplexing . Emulation controls . Device control and status . DDR PHY control and IO control registers . EDMA event multiplexing control registers
We search for the "Control Module Registers" and find its address in the L4 WKUP Peripheral Memory Map table with start address 0x44E1_0000 and end address 0x44E1_1FFF. If we click on the Control Module hyperlink in the L4 WKUP Peripheral Memory Map table we can see the offsets of the registers controlling the SPI0_CS0 and SPI0_D1 pins as conf_spi0_d1 (0x958) and conf_spi0_cs0 (0x95C). Clicking on the hyperlinks associated with the offsets takes us to the register descriptions.
Add pinctrl Properties To The Device Tree
Armed with the knowledge of register settings we shall try to add the pinctrl configuration for the I2C1 bus on the SOC. We can refer to another platforms file to get a sense of how to use the register. For this we take a look at the arch/arm/boot/dts/am335x-evm.dts file.
.
.

        i2c1_pins: pinmux_i2c1_pins {
                pinctrl-single,pins = <
                        0x158 (PIN_INPUT_PULLUP | MUX_MODE2)    /* spi0_d1.i2c1_sda */
                        0x15c (PIN_INPUT_PULLUP | MUX_MODE2)    /* spi0_cs0.i2c1_scl */
                >;
        };

.
.
-
Configuring the conf_spi0_d1
-
Configuring the conf_spi0_cs0
We have 0x158 instead of 0x958 and 0x15C instead of 0x95C. The difference is because of the offset present in the way the base address for the control module register is defined in the base dtsi file. Let’s take a look:
.
.
am33xx_pinmux: pinmux@44e10800 {
compatible = "pinctrl-single";
reg = <0x44e10800 0x0238>
#address-cells = <1>;
#size-cells = <0>;
pinctrl-single,register-width = <32>;
pinctrl-single,function-mask = <0x7f>;
};
.
.
- The base address is set as 0x44e10800 instead of 0x44e10000
The base address is set to 0x44e10800 because the registers below the 0x800 offset are not related to the pinctrl functionality. Therefore, starting at offset 0x800 is probably a way to make sure that using the pinctrl-single driver, users can only access real pin muxing registers and do not mess with lower registers by mistake.
The values of the configuration registers are set to: . MUX_MODE2 corresponding to muxing mode 2, as explained in the datasheet . PIN_INPUT_PULLUP puts the pin in the pull up mode. This is for I2C bus signalling.
We make modifications to arch/arm/boot/dts/am335x-boneblack.dts and add the pinctrl configuration for I2C1. Additionally we need to define the pinctrl settings in our i2c1 node from the previous lab.
&am33xx_pinmux {
.
.
.
nxp_hdmi_bonelt_off_pins: nxp_hdmi_bonelt_off_pins {
pinctrl-single,pins = <
0x1b0 0x03 /* xdma_event_intr0, OMAP_MUX_MODE3 | AM33XX_PIN_OUTPUT */
>;
};
i2c1_pins: pinmux_i2c1_pins {
pinctrl-single,pins = <
0x158 (PIN_INPUT_PULLUP | MUX_MODE2) /* spi0_d1.i2c1_sda */
0x15c (PIN_INPUT_PULLUP | MUX_MODE2) /* spi0_cs0.i2c1_scl */
>;
};
};
.
.
.
i2c1 {
pinctrl-names = "default";
pinctrl-0 = <&i2c1_pins>
status = "okay";
clock-frequency = <100000>;
nunchuck: nunchuck@52 {
compatible = "nintendo,nunchuck";
reg = <0x52>;
};
};
-
Defined the pinctrl configuration for i2c1
-
Defined the named state for the i2c1 bus
We now rebuild the DTB and reboot the board.
I2C Bus Tests
We can run the i2cdetect utility to check if we’ve configured the i2c1 bus correctly.
Welcome to Buildroot
buildroot login: root
# i2cdetect -l
i2c-0   i2c         OMAP I2C adapter                    I2C adapter
i2c-1   i2c         OMAP I2C adapter                    I2C adapter
# i2cdetect -F 1
Functionalities implemented by /dev/i2c-1:
I2C                              yes
SMBus Quick Command              no
SMBus Send Byte                  yes
SMBus Receive Byte               yes
SMBus Write Byte                 yes
SMBus Read Byte                  yes
SMBus Write Word                 yes
SMBus Read Word                  yes
SMBus Process Call               yes
SMBus Block Write                yes
SMBus Block Read                 no
SMBus Block Process Call         no
SMBus PEC                        yes
I2C Block Write                  yes
I2C Block Read                   yes
#
-
List the I2C adapters available
-
List the functionalities associated with the i2c1 bus
To see if everything works fine we use the i2cdetect -r 1 command.
Warning
According to the man page, this command uses the SMBus "read byte" commands for probing. It uses a command which will be safest for each address. Since we’re following the Free Electrons lab we use it but otherwise it’s better to read up before using it for an unknown I2C device.
# i2cdetect -r 1
WARNING! This program can confuse your I2C bus, cause data loss and worse!
I will probe file /dev/i2c-1 using read byte commands.
I will probe address range 0x03-0x77.
Continue? [Y/n]
     0  1  2  3  4  5  6  7  8  9  a  b  c  d  e  f
00:          -- -- -- -- -- -- -- -- -- -- -- -- --
10: -- -- -- -- -- -- -- -- -- -- -- -- -- -- -- --
20: -- -- -- -- -- -- -- -- -- -- -- -- -- -- -- --
30: -- -- -- -- -- -- -- -- -- -- -- -- -- -- -- --
40: -- -- -- -- -- -- -- -- -- -- -- -- -- -- -- --
50: -- -- 52 -- -- -- -- -- -- -- -- -- -- -- -- --
60: -- -- -- -- -- -- -- -- -- -- -- -- -- -- -- --
70: -- -- -- -- -- -- -- --
# [  445.878808] random: nonblocking pool is initialized
Now we go ahead and commit our changes using git.
conrad@conrad-HP-Pavilion-dm3-Notebook-PC:~/Git/linux$ git status
On branch nunchuck
Changes not staged for commit:
  (use "git add <file>..." to update what will be committed)
  (use "git checkout -- <file>..." to discard changes in working directory)

    modified:   arch/arm/boot/dts/am335x-boneblack.dts

Untracked files:
  (use "git add <file>..." to include in what will be committed)

    defconfig
    drivers/Module.symvers
    drivers/misc/Module.symvers
    drivers/staging/Module.symvers
    drivers/staging/comedi/Module.symvers
    drivers/staging/comedi/drivers/Module.symvers

no changes added to commit (use "git add" and/or "git commit -a")
conrad@conrad-HP-Pavilion-dm3-Notebook-PC:~/Git/linux$ git diff arch/arm/boot/dts/am335x-boneblack.dts
diff --git a/arch/arm/boot/dts/am335x-boneblack.dts b/arch/arm/boot/dts/am335x-boneblack.dts
index 049049a..fe7422d 100644
--- a/arch/arm/boot/dts/am335x-boneblack.dts
+++ b/arch/arm/boot/dts/am335x-boneblack.dts
@@ -60,6 +60,12 @@
                        0x1b0 0x03      /* xdma_event_intr0, OMAP_MUX_MODE3 | AM33XX_PIN_OUTPUT */
                >;
        };
+       i2c1_pins: pinmux_i2c1_pins {
+               pinctrl-single,pins = <
+                       0x158 (PIN_INPUT_PULLUP | MUX_MODE2)    /* spi0_d1.i2c1_sda */
+                       0x15c (PIN_INPUT_PULLUP | MUX_MODE2)    /* spi0_cs0.i2c1_scl */
+               >;
+       };
 };

 &lcdc {
@@ -78,6 +84,9 @@
 };

 &i2c1 {
+       pinctrl-names = "default";
+       pinctrl-0 = <&i2c1_pins>;
+
        status = "okay";
        clock-frequency = <100000>;

conrad@conrad-HP-Pavilion-dm3-Notebook-PC:~/Git/linux$ git add arch/arm/boot/dts/am335x-boneblack.dts
conrad@conrad-HP-Pavilion-dm3-Notebook-PC:~/Git/linux$ git commit -s -m "am335x-boneblack.dts: Enable pinmux settings for i2c1 bus"
[nunchuck de7b0fb] am335x-boneblack.dts: Enable pinmux settings for i2c1 bus
 1 file changed, 9 insertions(+)
conrad@conrad-HP-Pavilion-dm3-Notebook-PC:~/Git/linux$
-
Check the status of the repository
-
Check the differences in the arch/arm/boot/dts/am335x-boneblack.dts file
-
Add The file to the index
-
Commit the change with an appropriate message using -m and signing off using -s
Nunchuck Device Initialization
We will need to read the registers of the Nunchuck to find out whether the buttons are pressed or not. But before that we will need to initiate the Nunchuck. To communicate with the Nunchuck, we must send a handshake signal. If you are using a black Wii Nunchuck, send 2 bytes 0xF0, 0x55 to initalize the first register and 0xFB, 0x00 to initialize the second register of the Nunchuck. On a white send 0x40, 0x00 followed by 0x00. We get this information from the nunchuck pdf.
To initialize the device we will modify our probe routine in our platform driver and use the I2C raw API. The modifications to our driver code are shown below. We take extra care to check the return value of i2c_master_send to check for communication issues.
#include <linux/init.h>
#include <linux/module.h>
#include <linux/i2c.h>
#include <linux/delay.h>

/* Add your code here */
static const struct i2c_device_id nunchuck_id[] = {
        { "nunchuck", 0 },
        { }
};
MODULE_DEVICE_TABLE(i2c, nunchuck_id);

#ifdef CONFIG_OF
static const struct of_device_id nunchuck_dt_ids[] = {
        {.compatible = "nintendo,nunchuck",},
        { }
};
MODULE_DEVICE_TABLE(of, nunchuck_dt_ids);
#endif

static int nunchuck_probe(struct i2c_client *client,
                        const struct i2c_device_id *id)
{
        char init1[2] = {0xF0, 0x55};
        char init2[2] = {0xFB, 0x00};
        int count1 = sizeof(init1)/sizeof(init1[0]);
        int count2 = sizeof(init2)/sizeof(init2[0]);
        int ret;

        dev_info(&client->dev, "%s invoked", __func__);

        /* initialize device */
        ret = i2c_master_send(client, init1, count1);
        if (ret != count1) {
                dev_err(&client->dev, "%s: err=%d", __func__, ret);
                return -EIO;
        }

        udelay(1000);

        ret = i2c_master_send(client, init2, count2);
        if (ret != count2) {
                dev_err(&client->dev, "%s: err=%d", __func__, ret);
                return -EIO;
        }
        /* register to a kernel framework */

        return 0;
}

static int nunchuck_remove(struct i2c_client *client)
{
        dev_info(&client->dev, "%s invoked", __func__);
        return 0;
}

static struct i2c_driver nunchuck_driver = {
        .probe = nunchuck_probe,
        .remove = nunchuck_remove,
        .id_table = nunchuck_id,
        .driver = {
                .name = "nunchuck",
                .owner = THIS_MODULE,
                .of_match_table = of_match_ptr(nunchuck_dt_ids),
        },
};

module_i2c_driver(nunchuck_driver);

MODULE_LICENSE("GPL");
-
We include the linux/delay.h file to use udelay in our code
-
Using i2c_master_send we send the 0xF0 and 0x55 bytes to the client
-
A delay of 1ms is inserted between the two I2C transactions
-
Using i2c_master_send we send the 0xFB and 0x00 bytes to the client
Again we compile our kernel driver module with the new changes passing the ARCH, CROSS_COMPILE and KDIR options as before.
conrad@conrad-HP-Pavilion-dm3-Notebook-PC:~/fe-kernel-training/linux-kernel-labs/modules/nfsroot/root/nunchuk$ make ARCH=arm CROSS_COMPILE=arm-linux-gnueabi- KDIR=/home/conrad/Git/linux/
make -C /home/conrad/Git/linux/ M=$PWD
make[1]: Entering directory `/home/conrad/Git/linux'
  CC [M]  /home/conrad/fe-kernel-training/linux-kernel-labs/modules/nfsroot/root/nunchuk/nunchuk.o
  Building modules, stage 2.
  MODPOST 1 modules
  CC      /home/conrad/fe-kernel-training/linux-kernel-labs/modules/nfsroot/root/nunchuk/nunchuk.mod.o
  LD [M]  /home/conrad/fe-kernel-training/linux-kernel-labs/modules/nfsroot/root/nunchuk/nunchuk.ko
make[1]: Leaving directory `/home/conrad/Git/linux'
conrad@conrad-HP-Pavilion-dm3-Notebook-PC:~/fe-kernel-training/linux-kernel-labs/modules/nfsroot/root/nunchuk$
Finally we test the kernel module to check if there are any communication issues.
# lsmod
Module                  Size  Used by    Tainted: G
#
#
#
# insmod nunchuk.ko
[  840.223615] nunchuck 1-0052: nunchuck_probe invoked
#
#
#
#
# rmmod nunchuk
[  850.012196] nunchuck 1-0052: nunchuck_remove invoked
#
#
#
#
# dmesg |tail
[    5.107285]      device=eth0, hwaddr=90:59:af:49:c8:ef, ipaddr=192.168.0.100, mask=255.255.255.0, gw=255.255.255.255
[    5.118343]      host=192.168.0.100, domain=, nis-domain=(none)
[    5.124525]      bootserver=255.255.255.255, rootserver=192.168.0.1, rootpath=
[    5.772441] VFS: Mounted root (nfs filesystem) on device 0:13.
[    5.780080] devtmpfs: mounted
[    5.783776] Freeing unused kernel memory: 384K (c0771000 - c07d1000)
[    7.029211] random: dd urandom read with 56 bits of entropy available
[  303.383631] random: nonblocking pool is initialized
[  840.223615] nunchuck 1-0052: nunchuck_probe invoked
[  850.012196] nunchuck 1-0052: nunchuck_remove invoked
#
#
-
Using lsmod we see that there are not inserted kernel modules
-
Insert our nunchuck.ko driver
-
Remove our nunchuck driver
-
Print the last kernel logs and inspect for any errors
At this point we assume the device is initialized in the probe routine.
Read Nunchuck Registers
The nunchuk has 6 registers with which it relays information as given in the pdf.
- Byte 0x00
-
X-axis data of the joystick
- Byte 0x01
-
Y-axis data of the joystick
- Byte 0x02
-
X-axis data of the accellerometer sensor
- Byte 0x03
-
Y-axis data of the accellerometer sensor
- Byte 0x04
-
Z-axis data of the accellerometer sensor
- Byte 0x05
-
bit 0 as Z button status - 0 = pressed and 1 = release; bit 1 as C button status - 0 = pressed and 1 = release; bit 2 and 3 as 2 lower bit of X-axis data of the accellerometer sensor; bit 4 and 5 as 2 lower bit of Y-axis data of the accellerometer sensor; bit 6 and 7 as 2 lower bit of Z-axis data of the accellerometer sensor;
The nunchuck updates the registers only once they have been read so we have to read the registers twice. We create a function nunchuck_read_registers to simplify the impelementation.
.
.
static int nunchuck_read_registers(struct i2c_client *client,
                        char *reg_data, int count)
{
        char addr = 0x00;
        int ret = -1;

        if ((NULL == client) || (NULL== reg_data) || (0 == count))
                return -EFAULT;

        dev_info(&client->dev, "%s invoked", __func__);

        /* Add 10ms delay before next read of registers */
        mdelay(10);

        /* Write 0x00 to nunchuck which is the base address for registers */
        ret = i2c_master_send(client, &addr, sizeof(addr));
        if (ret != sizeof(addr)) {
                dev_err(&client->dev, "%s: err=%d", __func__, ret);
                ret = -EIO;
                goto END;
        }

        /* Add 10ms delay before i2c_master_read */
        mdelay(10);

        ret = i2c_master_recv(client, reg_data, count);
        if (ret != count) {
                dev_err(&client->dev, "%s: err=%d", __func__, ret);
                ret = -EIO;
                goto END;
        }

        ret = 0;

END:
        return ret;
}
.
.
-
Start by putting a 10 ms delay by calling the mdelay() routine. That’s needed to add time between the previous i2c operation and the next one.
-
Write 0x00 to the bus. That will allow us to read the device registers.
-
Add another 10 ms delay.
-
Read 6 bytes from the device, still using the I2C raw API. Check the return value as usua
We use the nunchuck_read_registers function in our probe routine invoking it twice. The first read value is discarded and the latest value is used in order to determine the status of the Z and C buttons. Our implementation looks like this:
.
.
.
static int nunchuck_probe(struct i2c_client *client,
                        const struct i2c_device_id *id)
{
        char init1[2] = {0xF0, 0x55};
        char init2[2] = {0xFB, 0x00};
        char data[6] = {0};
        int count1 = sizeof(init1)/sizeof(init1[0]);
        int count2 = sizeof(init2)/sizeof(init2[0]);
        int ret;
        int zpressed = 0;
        int cpressed = 0;

        dev_info(&client->dev, "%s invoked", __func__);

        /* initialize device */
        ret = i2c_master_send(client, init1, count1);
        if (ret != count1) {
                dev_err(&client->dev, "%s: err=%d", __func__, ret);
                return -EIO;
        }

        udelay(1000);

        ret = i2c_master_send(client, init2, count2);
        if (ret != count2) {
                dev_err(&client->dev, "%s: err=%d", __func__, ret);
                return -EIO;
        }
        /* register to a kernel framework */

        /* read nunchuck registers */
        ret = nunchuck_read_registers(client, data, sizeof(data));
        if (ret) {
                dev_err(&client->dev, "%s: err=%d", __func__, ret);
                return -EIO;
        }

        /* read nunchuck registers */
        ret = nunchuck_read_registers(client, data, sizeof(data));
        if (ret) {
                dev_err(&client->dev, "%s: err=%d", __func__, ret);
                return -EIO;
        }

        /* Bit 0 indicates if Z button is pressed */
        zpressed = (data[5] & BIT(0)? 0 : 1);
        /* Bit 1 indicates if Z button is pressed */
        cpressed = (data[5] & BIT(1)? 0 : 1);

        dev_info(&client->dev, "%s:zpressed : %d cpressed : %d",
                        __func__, zpressed, cpressed);

        return 0;
}
.
.
.
-
Data array to read the 6 registers
-
zpressed, cpressed variables to store the status of the Z and C buttons
-
First read of the nunchuck registers
-
Second read of the nunchuck registers
-
We use BIT macro to extract the bit status of the 6th element(index 5)
After cross-compiling the kernel module driver again we test it out with the nunchuck. Each time we load the module using insmod and unload it using rmmod. We see that we’re successfully able to read the status of the buttons through I2C.
#
#
# insmod nunchuk.ko
[  791.810820] nunchuck 1-0052: nunchuck_probe invoked
[  791.817778] nunchuck 1-0052: nunchuck_read_registers invoked
[  791.846620] nunchuck 1-0052: nunchuck_read_registers invoked
[  791.873956] nunchuck 1-0052: nunchuck_probe:zpressed : 0 cpressed : 0
# rmmod nunchuk
#
#
[  796.906688] nunchuck 1-0052: nunchuck_remove invoked
# insmod nunchuk.ko
[  801.625983] nunchuck 1-0052: nunchuck_probe invoked
[  801.633607] nunchuck 1-0052: nunchuck_read_registers invoked
[  801.660876] nunchuck 1-0052: nunchuck_read_registers invoked
[  801.687922] nunchuck 1-0052: nunchuck_probe:zpressed : 0 cpressed : 1
# rmmod nunchuk
#
#
[  804.590286] nunchuck 1-0052: nunchuck_remove invoked
# insmod nunchuk.ko
[  807.392982] nunchuck 1-0052: nunchuck_probe invoked
[  807.400573] nunchuck 1-0052: nunchuck_read_registers invoked
[  807.427810] nunchuck 1-0052: nunchuck_read_registers invoked
[  807.454934] nunchuck 1-0052: nunchuck_probe:zpressed : 0 cpressed : 0
# rmmod nunchuk
#
#
[  809.332638] nunchuck 1-0052: nunchuck_remove invoked
# insmod nunchuk.ko
[  812.202315] nunchuck 1-0052: nunchuck_probe invoked
[  812.209840] nunchuck 1-0052: nunchuck_read_registers invoked
[  812.237097] nunchuck 1-0052: nunchuck_read_registers invoked
[  812.264222] nunchuck 1-0052: nunchuck_probe:zpressed : 1 cpressed : 0
# rmmod nunchuk
#
#
[  815.116691] nunchuck 1-0052: nunchuck_remove invoked
# insmod nunchuk.ko
[  819.487739] nunchuck 1-0052: nunchuck_probe invoked
[  819.495379] nunchuck 1-0052: nunchuck_read_registers invoked
[  819.522628] nunchuck 1-0052: nunchuck_read_registers invoked
[  819.549747] nunchuck 1-0052: nunchuck_probe:zpressed : 0 cpressed : 0
#
#
# rmmod nunchuk
[ 1746.370837] nunchuck 1-0052: nunchuck_remove invoked
# insmod nunchuk.ko
[ 1751.173512] nunchuck 1-0052: nunchuck_probe invoked
[ 1751.181127] nunchuck 1-0052: nunchuck_read_registers invoked
[ 1751.208413] nunchuck 1-0052: nunchuck_read_registers invoked
[ 1751.235496] nunchuck 1-0052: nunchuck_probe:zpressed : 1 cpressed : 1
#
#
-
No buttons pressed
-
C button is pressed
-
No buttons pressed
-
Z button is pressed
-
No buttons pressed
-
Both C and Z are pressed
In this lab we were able to successfully communicate with the Wii Nintendo nunchuck over the I2C bus. This is a basic platform driver which gives us an understanding of how to initialise the device and access its registers. To be really useful we’ll have to plug it into some sort of framework such as input so as to make it available to the user.
The Linux kernel is designed so that a kernel driver can interface with a framework which exposes services to the userspace. The driver interfaces with the bus infrastructure of the device depending on how it is connected in the platform and also interfaces with a specific framework which classifies the functionality of the device. This allows different devices to support the same userspace interface. This section will focus on the kernel frameworks.
User Space Inteface To Devices
In Linux, there are three types of devices:
- Network devices
-
They are the network interfaces which are visible using tools like ifconfig for ethernet interfaces, iwconfig for wlan interfaces, etc…
- Block devices
-
They are the devices which represent physical storage in the system. The easiest example is the hard disk drive. Access to such type of devices is through blocks of data. They are visible through files present in /dev.
- Character devices
-
All other types of devices are represented as character devices. They include devices such as input devices like the mouse, keyboard to devices such as the graphics card and sound card. They are also visible through files present in /dev. Bulk of the devices that are present are represented as character devices.
Major & Minor Numbers
The kernel denotes devices with a major and minor number where the major number represents the class that the device falls into and the minor number is just an identifier for the device in that class.
Userspace applications need to access devices across different platforms and for this reason the major and minor numbers are statically allocated and identical across different systems. Checkout Documentation/devices.txt
Devices Are Files
One of the highlights of Unix design is that devices are also treated as files. In this way a userspace application can manipulate all devices in the same way it accesses a file on the system using the API open, close, write, read, etc..
This is possible because of a special type of file called the device file. This file associates the type, major and minor of a device with a specific file name. Typically all device files are stored in /dev.
# ls -l /dev/
total 0
crw-------    1 root     root        5,   1 Jan  1  1970 console
crw-------    1 root     root       10,  63 Jan  1  1970 cpu_dma_latency
crw-rw-rw-    1 root     root        1,   7 Jan  1  1970 full
crw-------    1 root     root       10, 183 Jan  1  1970 hwrng
crw-------    1 root     root       89,   0 Jan  1  1970 i2c-0
crw-------    1 root     root       89,   1 Jan  1  1970 i2c-1
drwxr-xr-x    2 root     root            60 Jan  1  1970 input
.
.
.
crw-------    1 root     root        7, 129 Jan  1  1970 vcsa1
crw-------    1 root     root       10, 130 Jan  1  1970 watchdog
crw-------    1 root     root      253,   0 Jan  1  1970 watchdog0
crw-rw-rw-    1 root     root        1,   5 Jan  1  1970 zero
#
#
Creating Device Files
Since device files are special they have to be created using a special command mknod.
-
mknod /dev/<device_file_name> [c/b] major minor
-
mknod requires special root access
-
The association between type, major and minor of the file and the device needs to be respected in the system and is the responsibility of the system designer.
Some systems automate the creation of these device files by the use of daemons which run and monitor the /sys/ filesystem.
-
devtmpfs virtual filesystem
-
udev daemon popular on desktops and server systems
-
mdev lightweight solution popular on embedded devices
Character Drivers
As mentioned in the previous section character devices are treated as files so the device driver for character devices must implement the routines open, close, read, write, etc.
The character driver does this through the callback functions defined in the struct file_operations structure.
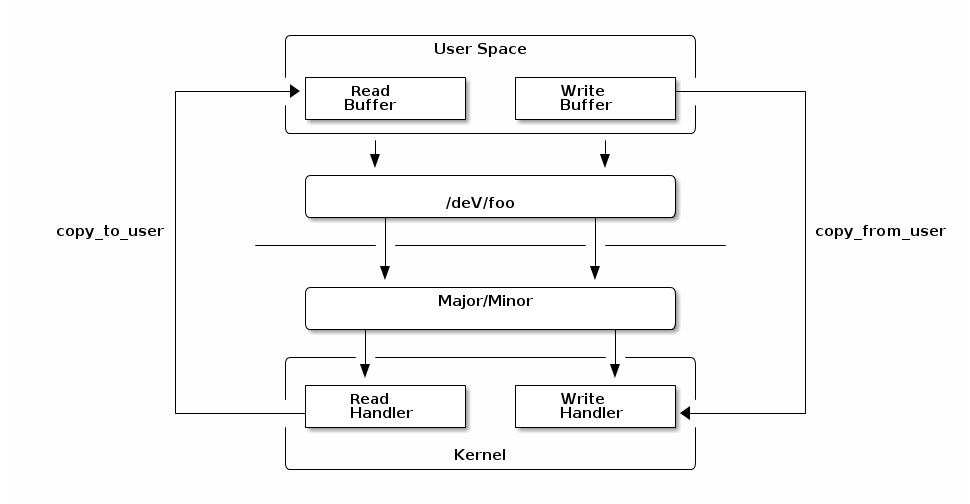
File Operations
We will take a look at the file operations for a character driver. It is not necessary to implement either of them. These are found in include/linux/fs.h. The structure below shows all operations for a file but we’ve enumerated the ones which are relevant to character drivers.
struct file_operations {
        struct module *owner;
        loff_t (*llseek) (struct file *, loff_t, int);
        ssize_t (*read) (struct file *, char __user *, size_t, loff_t *);
        ssize_t (*write) (struct file *, const char __user *, size_t, loff_t *);
        ssize_t (*aio_read) (struct kiocb *, const struct iovec *, unsigned long, loff_t);
        ssize_t (*aio_write) (struct kiocb *, const struct iovec *, unsigned long, loff_t);
        int (*iterate) (struct file *, struct dir_context *);
        unsigned int (*poll) (struct file *, struct poll_table_struct *);
        long (*unlocked_ioctl) (struct file *, unsigned int, unsigned long);
        long (*compat_ioctl) (struct file *, unsigned int, unsigned long);
        int (*mmap) (struct file *, struct vm_area_struct *);
        int (*open) (struct inode *, struct file *);
        int (*flush) (struct file *, fl_owner_t id);
        int (*release) (struct inode *, struct file *);
        int (*fsync) (struct file *, loff_t, loff_t, int datasync);
        int (*aio_fsync) (struct kiocb *, int datasync);
        int (*fasync) (int, struct file *, int);
        int (*lock) (struct file *, int, struct file_lock *);
        ssize_t (*sendpage) (struct file *, struct page *, int, size_t, loff_t *, int);
        unsigned long (*get_unmapped_area)(struct file *, unsigned long, unsigned long, unsigned long, unsigned long);
        int (*check_flags)(int);
        int (*flock) (struct file *, int, struct file_lock *);
        ssize_t (*splice_write)(struct pipe_inode_info *, struct file *, loff_t *, size_t, unsigned int);
        ssize_t (*splice_read)(struct file *, loff_t *, struct pipe_inode_info *, size_t, unsigned int);
        int (*setlease)(struct file *, long, struct file_lock **);
        long (*fallocate)(struct file *file, int mode, loff_t offset,
                          loff_t len);
        int (*show_fdinfo)(struct seq_file *m, struct file *f);
};
Therefore in a character driver named foo we would have the following operations defined.
- int foo_open(struct inode *i, struct file *f)
-
The open operation is defined so that when user space opens the device file it gets access to the character driver. Here struct inode pointer is a structure that uniquely represents a file in the Linux system (be it a regular file, a directory, a symbolic link, a character or block device). And struct file is a structure created every time a file is opened. Going forward we see that the struct file object is used in the other operations. As the same file can be accessed by multiple applications there needs to be a way of differentiating each process’s access. Several file structures can point to the same inode structure. The object contains information like the current position, the opening mode, etc. which is relevant to a particular process. The struct file object also has a void *private_data pointer that one can freely use.
- int foo_release(struct inode *i, struct file *f)
-
The release operation is called when user space closes the file.
- ssize_t foo_read(struct file *f, char __user *buf, size_t sz, loff_t *off)
-
The read operation is defined to allow the user space application to read the device. So the driver has to read data from the device, write in the user space buffer pointed buf argument, and update the current position in off. The pointer to the same file structure that was used in the open call is used. The amount of data should be capped to that of sz. The number of bytes actually read is returned. On UNIX systems the read operation blocks if there is not enough data to read.
- ssize_t foo_write(struct file *f, const char __user *buf, size_t sz, loff_t *off)
-
Called when user space uses the write() system call on the device The opposite of read, must read at most sz bytes from buf, write it to the device, update off and return the number of bytes written.
- long foo_unlocked_ioctl(struct file *f, unsigned int cmd, unsigned long arg)
-
Associated to the ioctl() system call. Called unlocked because it didn’t hold the Big Kernel Lock (gone now). Allows to extend the driver capabilities beyond the limited read/write API. For example: changing the speed of a serial port, setting video output format, querying a device serial number. In this cmd is a number identifying the operation to perform arg is the optional argument passed as third argument of the ioctl() system call. Can be an integer, an address, etc. The semantic of cmd and arg is driver-specific
Exchanging Data With User Space
Since user space memory is different from kernel space memory we can’t use a simple memcpy to copy data from user space to kernel space. Additionally dereferencing a user space pointer in kernel space will not work on all platforms. Moreover if the pointer being dereferenced is invalid it will lead to a segfault in the application.
Linux defines a set of functions to keep the kernel code portable when it comes to copying data from user space to kernel space and vice versa. The first two functions copy single values and the last two copy buffers:
- get_user(v, p);
-
The kernel variable v gets the value pointed by the user space pointer p
- put_user(v, p);
-
The value of the variable refered by the pointer p is set to the value of the kernel variable v
- unsigned long copy_to_user(void __user *to, const void *from, unsigned long n);
-
Copy the contents of the kernel buffer from to the user space buffer to upto n bytes. Return 0 on success and -EFAULT on failure.
- unsigned long copy_from_user(void *to, const void __user *from, unsigned long n);
-
Copy the contents of the user space buffer from to the kernel buffer to upto n bytes. Return 0 on success and -EFAULT on failure.
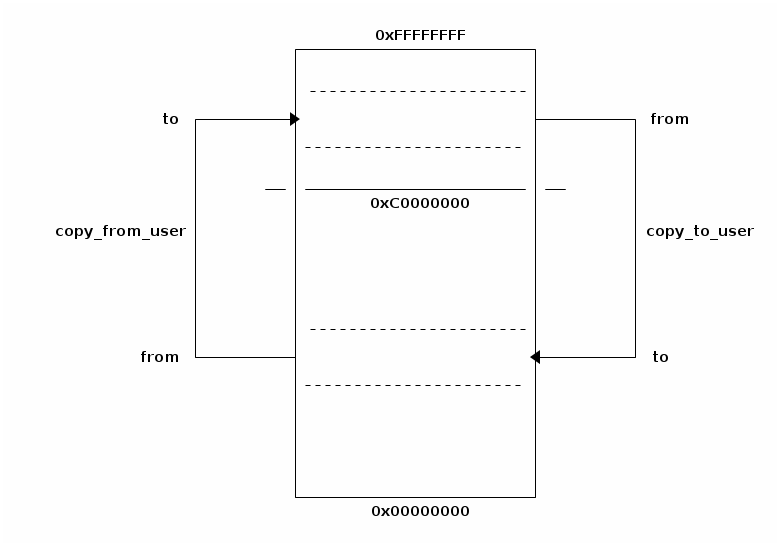
Zero Copy Access To User Space
We looked at the functions that allow us to copy data between user space and kernel space. If the amount of data we’re dealing with is huge we need a more efficient mechanism. We’d like to keep our system as efficient as possible and free up our processor to do other activities besides copying.
The Linux kernel offers zero copy options:
- mmap
-
This system call allows user space to directly access memory mapped I/O space.
- get_user_pages_fast
-
This allows a kernel module to get access to user pages without copying them. The API is more complex to use though.
Input Subsystem, A Framework Example
The input subsystem takes care of all the input events coming from the user. It was initially written to support the USB HID (Human Interface Device) devices, it expanded to handle all types of input devices irrespective of the interface. Some examples of input devices supported are: keyboards, mice, joysticks, touchscreens, etc..
The input subsystem is split into two parts:
- Device drivers
-
This part communicates with the hardware of the input device through the interface bus e.g. USB and provides events such as keystrokes, mouse movements, touchscreen coordinates, etc.. to the input core.
- Event handlers
-
This part gets the events from the drivers and passes them where needed mostly through interfaces such as evdev.
In user space we have different graphic stacks which will use the events such as X.Org, Wayland or Android’s InputManager.
Input Subsystem Overview
In order to configure the kernel with the input subsystem enabled we have to enable the configuration option CONFIG_INPUT. We see information in menuconfig INPUT
- tristate "Generic input layer (needed for keyboard, mouse, …)"
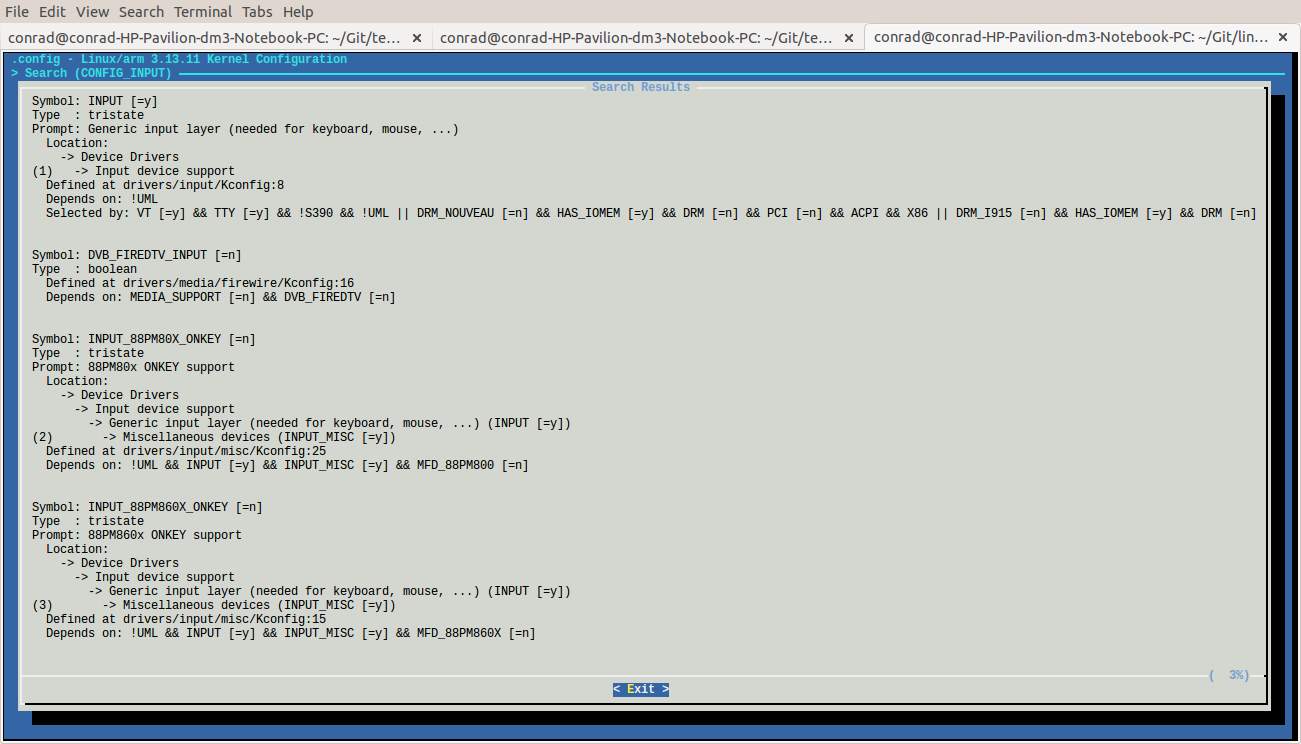
The framework is implemented in drivers/input/
-
input.c
-
input-polldev.c
-
evbug.c
The input subsystem implements a single character driver and defines the user/kernel API in include/uapi/linux/input.h. The set of operations that a input driver must implement and the helper functions for the driver are alse defined by the input subsystem. The important structures are defined in include/linux/input.h
-
struct input_dev for the device driver part
-
struct input_handler for the event handler part
Input Subsystem API For Allocation And Deallocation
The input device is described by a very long struct input_dev structure. Along with the definition we have the prototype of the functions used to allocate and free an object of the structure type i.e
-
struct input_dev *input_allocate_device(void);
-
void input_free_device(struct input_dev *dev);
struct input_dev {
        const char *name;
        const char *phys;
        const char *uniq;
        struct input_id id;

        unsigned long propbit[BITS_TO_LONGS(INPUT_PROP_CNT)];

        unsigned long evbit[BITS_TO_LONGS(EV_CNT)];
        unsigned long keybit[BITS_TO_LONGS(KEY_CNT)];
        unsigned long relbit[BITS_TO_LONGS(REL_CNT)];
        unsigned long absbit[BITS_TO_LONGS(ABS_CNT)];
        unsigned long mscbit[BITS_TO_LONGS(MSC_CNT)];
        unsigned long ledbit[BITS_TO_LONGS(LED_CNT)];
        unsigned long sndbit[BITS_TO_LONGS(SND_CNT)];
        unsigned long ffbit[BITS_TO_LONGS(FF_CNT)];
        unsigned long swbit[BITS_TO_LONGS(SW_CNT)];

        unsigned int hint_events_per_packet;

        unsigned int keycodemax;
        unsigned int keycodesize;
        void *keycode;

        int (*setkeycode)(struct input_dev *dev,
                          const struct input_keymap_entry *ke,
                          unsigned int *old_keycode);
        int (*getkeycode)(struct input_dev *dev,
                          struct input_keymap_entry *ke);

        struct ff_device *ff;

        unsigned int repeat_key;
        struct timer_list timer;

        int rep[REP_CNT];

        struct input_mt *mt;

        struct input_absinfo *absinfo;

        unsigned long key[BITS_TO_LONGS(KEY_CNT)];
        unsigned long led[BITS_TO_LONGS(LED_CNT)];
        unsigned long snd[BITS_TO_LONGS(SND_CNT)];
        unsigned long sw[BITS_TO_LONGS(SW_CNT)];

        int (*open)(struct input_dev *dev);
        void (*close)(struct input_dev *dev);
        int (*flush)(struct input_dev *dev, struct file *file);
        int (*event)(struct input_dev *dev, unsigned int type, unsigned int code, int value);

        struct input_handle __rcu *grab;

        spinlock_t event_lock;
        struct mutex mutex;

        unsigned int users;
        bool going_away;

        struct device dev;

        struct list_head        h_list;
        struct list_head        node;

        unsigned int num_vals;
        unsigned int max_vals;
        struct input_value *vals;

        bool devres_managed;
};
.
.
.
struct input_dev __must_check *input_allocate_device(void);
struct input_dev __must_check *devm_input_allocate_device(struct device *);
void input_free_device(struct input_dev *dev);
-
struct input_dev is defined
-
input_allocate_device is used to allocate the structure
-
input_free_device is used to free the structure
Input Subsystem API For Registration And Deregistration
Depending on the type of event that will be generated, the input bit fields evbit and keybit of the struct input_dev must be configured. Let’s take a look at the input driver for the Apple USB touchpad. This is located at drivers/input/mouse/appletouch.c.
.
.
.
static int atp_probe(struct usb_interface *iface,
                     const struct usb_device_id *id)
{
        struct atp *dev;
        struct input_dev *input_dev;

.
.
        set_bit(EV_KEY, input_dev->evbit);
        set_bit(BTN_TOUCH, input_dev->keybit);
        set_bit(BTN_TOOL_FINGER, input_dev->keybit);
        set_bit(BTN_TOOL_DOUBLETAP, input_dev->keybit);
        set_bit(BTN_TOOL_TRIPLETAP, input_dev->keybit);
        set_bit(BTN_LEFT, input_dev->keybit);
.
.
.
        return error;
}
.
.
.
-
EV_KEY type of events are generated by this input device
-
BTN_TOUCH events code are generated
In the example above set_bit() is an atomic operation allowing to set a particular bit to 1. Once the input device is allocated and filled, we have to register the allocated struct input_dev object with the input subsystem. This is done with the input_register_device function. In the same example we see the registration process just after initialising the allocated device structure.
.
.
.
static int atp_probe(struct usb_interface *iface,
                     const struct usb_device_id *id)
{
        struct atp *dev;
        struct input_dev *input_dev;

.
.
        set_bit(EV_KEY, input_dev->evbit);
        set_bit(BTN_TOUCH, input_dev->keybit);
        set_bit(BTN_TOOL_FINGER, input_dev->keybit);
        set_bit(BTN_TOOL_DOUBLETAP, input_dev->keybit);
        set_bit(BTN_TOOL_TRIPLETAP, input_dev->keybit);
        set_bit(BTN_LEFT, input_dev->keybit);

        error = input_register_device(dev->input);
        if (error)
                goto err_free_buffer;
.
.
.

        return error;
}
- input_register_device is used to register the input device object
When the driver is unloaded, the input device will be unregistered using input_unregister_device. We see this being called in the driver code.
.
.
static void atp_disconnect(struct usb_interface *iface)
{
        struct atp *dev = usb_get_intfdata(iface);

        usb_set_intfdata(iface, NULL);
        if (dev) {
                usb_kill_urb(dev->urb);
                input_unregister_device(dev->input);
                usb_free_coherent(dev->udev, dev->info->datalen,
                                  dev->data, dev->urb->transfer_dma);
                usb_free_urb(dev->urb);
                kfree(dev);
        }
        dev_info(&iface->dev, "input: appletouch disconnected\n");
}
.
.
- input_unregister_device is used to unregister the input device object
Input Subsystem API For Injecting Events
The input driver now has the task of sending events to the event handler based on the status of the input device. The events are sent by the driver to the event handler using input_event. This function is defined in drivers/input/input.c.
/**
 * input_event() - report new input event
 * @dev: device that generated the event
 * @type: type of the event
 * @code: event code
 * @value: value of the event
 *
 * This function should be used by drivers implementing various input
 * devices to report input events. See also input_inject_event().
 *
 * NOTE: input_event() may be safely used right after input device was
 * allocated with input_allocate_device(), even before it is registered
 * with input_register_device(), but the event will not reach any of the
 * input handlers. Such early invocation of input_event() may be used
 * to 'seed' initial state of a switch or initial position of absolute
 * axis, etc.
 */
void input_event(struct input_dev *dev,
                 unsigned int type, unsigned int code, int value)
{
        unsigned long flags;

        if (is_event_supported(type, dev->evbit, EV_MAX)) {

                spin_lock_irqsave(&dev->event_lock, flags);
                input_handle_event(dev, type, code, value);
                spin_unlock_irqrestore(&dev->event_lock, flags);
        }
}
EXPORT_SYMBOL(input_event);
The event types are documented in Documentation/input/event-codes.txt. An event is composed by one or several input data changes (packet of input data changes) such as the button state, the relative or absolute position along an axis, etc.. After submitting potentially multiple events, the input core must be notified by calling input_sync whic is defined in include/linux/input.h.
.
.
static inline void input_sync(struct input_dev *dev)
{
        input_event(dev, EV_SYN, SYN_REPORT, 0);
}
.
.
The input subsystem provides other wrappers such as input_report_key(), input_report_abs(), input_report_rel(), etc.. which are also defined in include/linux/input.h
.
.
static inline void input_report_key(struct input_dev *dev, unsigned int code, int value)
{
        input_event(dev, EV_KEY, code, !!value);
}

static inline void input_report_rel(struct input_dev *dev, unsigned int code, int value)
{
        input_event(dev, EV_REL, code, value);
}

static inline void input_report_abs(struct input_dev *dev, unsigned int code, int value)
{
        input_event(dev, EV_ABS, code, value);
}
.
.
Polled Input Subclass
Suppose the input device you’re dealing with does not support an interrupt mechanism. In such a case the input subsystem provides a subclass for devices which have to be periodically scanned to detect changes in the input. The device is defined by struct input_polled_dev structure defined in include/linux/input-polldev.h.
/**
 * struct input_polled_dev - simple polled input device
 * @private: private driver data.
 * @open: driver-supplied method that prepares device for polling
 *      (enabled the device and maybe flushes device state).
 * @close: driver-supplied method that is called when device is no
 *      longer being polled. Used to put device into low power mode.
 * @poll: driver-supplied method that polls the device and posts
 *      input events (mandatory).
 * @poll_interval: specifies how often the poll() method should be called.
 *      Defaults to 500 msec unless overridden when registering the device.
 * @poll_interval_max: specifies upper bound for the poll interval.
 *      Defaults to the initial value of @poll_interval.
 * @poll_interval_min: specifies lower bound for the poll interval.
 *      Defaults to 0.
 * @input: input device structure associated with the polled device.
 *      Must be properly initialized by the driver (id, name, phys, bits).
 *
 * Polled input device provides a skeleton for supporting simple input
 * devices that do not raise interrupts but have to be periodically
 * scanned or polled to detect changes in their state.
 */
struct input_polled_dev {
        void *private;

        void (*open)(struct input_polled_dev *dev);
        void (*close)(struct input_polled_dev *dev);
        void (*poll)(struct input_polled_dev *dev);
        unsigned int poll_interval; /* msec */
        unsigned int poll_interval_max; /* msec */
        unsigned int poll_interval_min; /* msec */

        struct input_dev *input;

/* private: */
        struct delayed_work work;
};

struct input_polled_dev *input_allocate_polled_device(void);
void input_free_polled_device(struct input_polled_dev *dev);
int input_register_polled_device(struct input_polled_dev *dev);
void input_unregister_polled_device(struct input_polled_dev *dev);
-
To allocate the polled device structure
-
To free the polled device structure
-
To register the polled device
-
To unregister the polled device
The poll() method is mandatory in the definition of the struct input_polled_dev. This function polls the device and posts input events.
The fields id, name, phys, bits of the input field must be initialized too. If none of the poll_interval fields are filled then the default poll interval is 500ms.
The registration/unregistration is done with input_register_polled_device/input_unregister_polled_device.
User space inteface evdev
The main user space interface to input devces is the event interface. From an application point of view the input device is represented as /dev/input/event<X> character device. The application can use either blocking or non-blocking reads after opening the device.
Each read will return struct input_event structures as defined in include/uapi/linux/input.h
/*
 * The event structure itself
 */

struct input_event {
        struct timeval time;
        __u16 type;
        __u16 code;
        __s32 value;
};