Running AOSP 16 Cuttlefish on Google Cloud
Installing host tools, launching the Cuttlefish virtual device on a Google Cloud VM, and accessing the Android interface via a web browser.
This post continues from the previous guide where we downloaded and built the AOSP 16 source code on a Google Cloud VM. Now, we will focus on configuring the environment to run the Cuttlefish virtual device and accessing it from our local browser.
Outline
Prerequisites
- Completed AOSP Build: You should have a successful build of AOSP 16 (target
aosp_cf_x86_64_only_phone-aosp_current-eng). - VM Instance: Your GCP instance (
aosp1) should be running.
Start your GCP VM and connect via SSH:
Start the VM: (Run this on your local machine)
➜ gcloud compute instances start aosp1 --zone asia-south1-aExpected output:
Starting instance(s) aosp1...done.
Updated [https://compute.googleapis.com/compute/v1/projects/aosp-build-480610/zones/asia-south1-a/instances/aosp1].
Instance internal IP is 10.160.0.2
Instance external IP is 34.93.152.34
Connect to the VM via SSH: (Replace
<VM-External-IP>with the IP from the previous step)➜ ssh -i aosp1-gcp 34.93.152.34You may see a warning about the authenticity of the host. Type
yesto continue.The authenticity of host '34.93.152.34 (34.93.152.34)' can't be established. ED25519 key fingerprint is SHA256:87rbbY7roPeh92nOnAKt+yan6bkYHOmUwVhCJYoC1pA. This host key is known by the following other names/addresses: ~/.ssh/known_hosts:4: 34.180.42.166 ~/.ssh/known_hosts:7: 35.200.250.134 ~/.ssh/known_hosts:8: 34.180.7.120 ~/.ssh/known_hosts:9: 34.100.182.186 Are you sure you want to continue connecting (yes/no/[fingerprint])? yes Warning: Permanently added '34.93.152.34' (ED25519) to the list of known hosts. Welcome to Ubuntu 22.04.5 LTS (GNU/Linux 6.8.0-1044-gcp x86_64) * Documentation: https://help.ubuntu.com * Management: https://landscape.canonical.com * Support: https://ubuntu.com/pro System information as of Mon Dec 15 07:27:15 UTC 2025 System load: 0.48 Processes: 234 Usage of /: 32.3% of 968.99GB Users logged in: 0 Memory usage: 0% IPv4 address for ens4: 10.160.0.2 Swap usage: 0% * Strictly confined Kubernetes makes edge and IoT secure. Learn how MicroK8s just raised the bar for easy, resilient and secure K8s cluster deployment. https://ubuntu.com/engage/secure-kubernetes-at-the-edge Expanded Security Maintenance for Applications is not enabled. 18 updates can be applied immediately. 6 of these updates are standard security updates. To see these additional updates run: apt list --upgradable Enable ESM Apps to receive additional future security updates. See https://ubuntu.com/esm or run: sudo pro status Last login: Thu Dec 11 12:18:07 2025 from 103.129.111.45 cAfter successfully connecting, you’ll be on your VM’s command line.
Step 1: Configure Network & Firewall
We need to allow traffic for WebRTC so we can view the device in our browser. We’ll create a firewall rule named allow-cf and tag our instance.
Create the firewall rule: (Run this on your local machine)
➜ gcloud compute firewall-rules create allow-cf \
--direction=INGRESS --priority=1000 --network=default --action=ALLOW \
--rules=tcp:8443,tcp:15550-15558,udp:15550-15558,tcp:5555,tcp:6444,tcp:5901 \
--source-ranges=0.0.0.0/0 \
--target-tags=http-server
Security Note: This configuration allows access from any IP address (
0.0.0.0/0). For a more secure setup, restrict--source-rangesto your specific public IP.Apply the tag to the instance: The firewall rule we created uses the target tag
http-server. We must apply this same tag to our VM so the rule takes effect.➜ gcloud compute instances add-tags aosp1 --tags=http-server --zone=asia-south1-aVerify the firewall rule: (Run this on your local machine)
➜ gcloud compute firewall-rules describe allow-cfYou should see an output similar to this, confirming the rule’s creation and configuration:
allowed:
- IPProtocol: tcp
  ports:
  - '8443'
- IPProtocol: tcp
  ports:
  - 15550-15558
- IPProtocol: udp
  ports:
  - 15550-15558
- IPProtocol: tcp
  ports:
  - '5555'
- IPProtocol: tcp
  ports:
  - '6444'
- IPProtocol: tcp
  ports:
  - '5901'
creationTimestamp: '2025-12-11T03:34:51.596-08:00'
description: ''
direction: INGRESS
disabled: false
id: '1629480362907734708'
kind: compute#firewall
logConfig:
  enable: false
name: allow-cf
network: https://www.googleapis.com/compute/v1/projects/aosp-build-480610/global/networks/default
priority: 1000
selfLink: https://www.googleapis.com/compute/v1/projects/aosp-build-480610/global/firewalls/allow-cf
sourceRanges:
- 0.0.0.0/0
targetTags:
- http-server
Confirm that the rule
allow-cfis created with the expected ports andtarget-tags.
Step 2: Install Cuttlefish Host Tools
Since we are building from source, we should also build and install the latest host packages to ensure compatibility and avoid using the deprecated cuttlefish-common package.
Install build dependencies:
conrad@aosp1:~$ sudo apt install -y git devscripts config-package-dev debhelper-compat golang curlClone and build the host packages:
conrad@aosp1:~$ git clone https://github.com/google/android-cuttlefish
conrad@aosp1:~$ cd android-cuttlefish
conrad@aosp1:~/android-cuttlefish$ tools/buildutils/build_packages.sh
Note on Daemons: During this step, you might encounter an
ncursesmenu asking which services to restart due to outdated libraries (e.g.,dbus.service,systemd-manager,user@1002.service). You can safely select all listed services (using the Spacebar to toggle, then Tab to<Ok>and Enter). Since you will be prompted to log out or reboot the system shortly after this step to apply group changes, the immediate impact of this selection is minimal.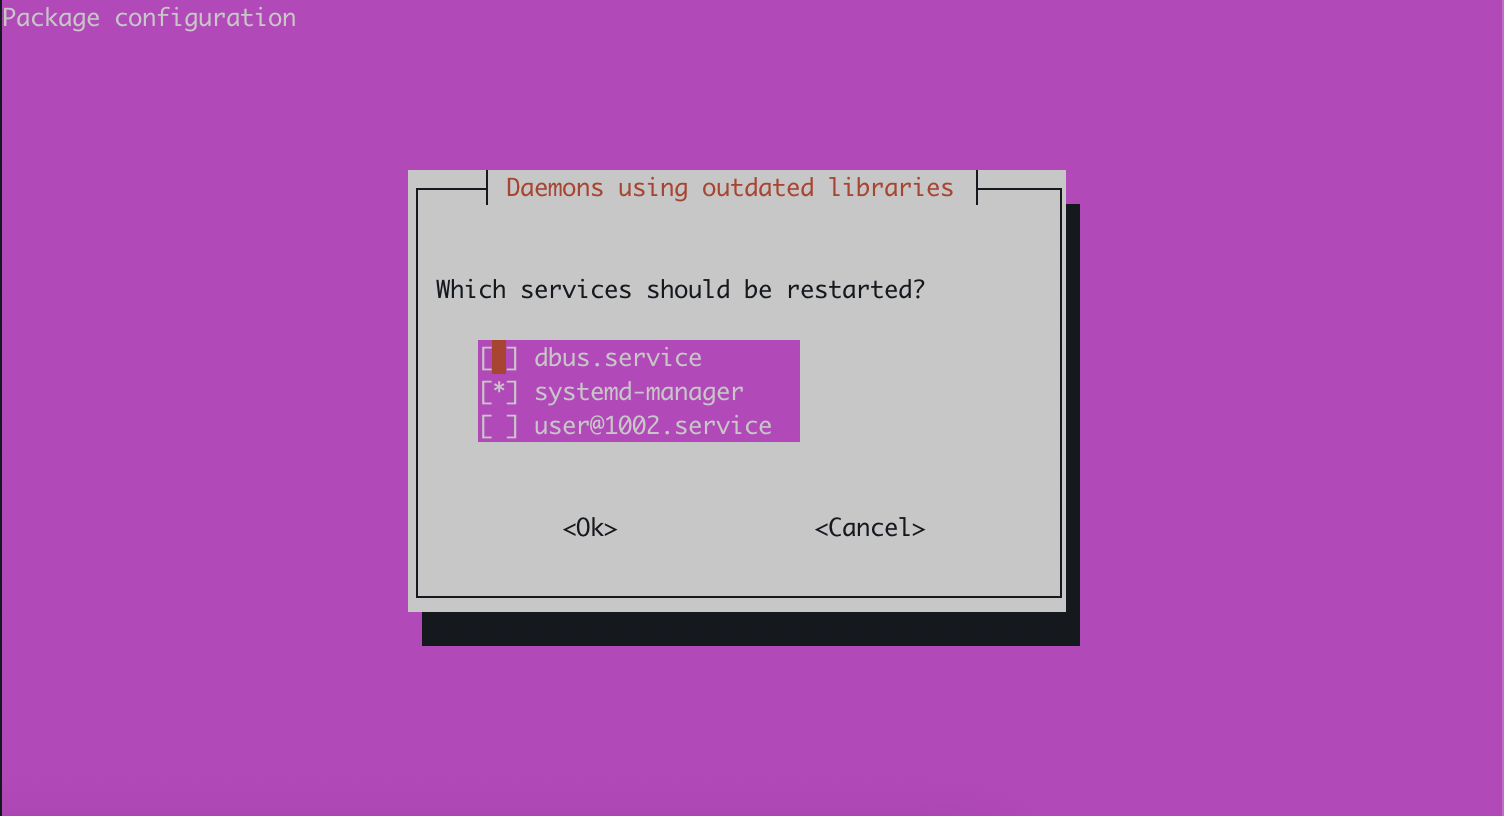
Note on Method: The official AOSP documentation lists the manual steps to build these packages (using
dpkg-buildpackage,mk-build-deps, etc.). We use thetools/buildutils/build_packages.shscript included in the repository to automate these steps, ensuring all dependencies and sub-packages are handled correctly without manual execution.Install the generated packages:
conrad@aosp1:~/android-cuttlefish$ sudo dpkg -i ./cuttlefish-base_*_*64.deb || sudo apt-get install -f
conrad@aosp1:~/android-cuttlefish$ sudo dpkg -i ./cuttlefish-user_*_*64.deb || sudo apt-get install -f
Add user to groups: Cuttlefish requires access to specific system resources. We add your user to these groups to grant the necessary permissions:
kvm: Provides access to Kernel-based Virtual Machine, essential for hardware-accelerated virtualization.render: Grants access to the GPU and graphics rendering devices for displaying the virtual device’s screen.cvdnetwork: Manages network interfaces and bridging for the Cuttlefish virtual device.
conrad@aosp1:~$ sudo usermod -aG kvm,render,cvdnetwork $USER
Important: You must log out and log back in (or reboot) for the group changes to take effect.
Before logging out, running groups will show that kvm, render, and cvdnetwork are not yet listed:
conrad@aosp1:~/android-cuttlefish$ groups
conrad adm dialout cdrom floppy audio dip video plugdev netdev lxd ubuntu google-sudoers
To verify groups in a new session:
conrad@aosp1:~$ groups
conrad adm dialout cdrom floppy audio dip video plugdev kvm render netdev lxd cvdnetwork ubuntu google-sudoers
Confirm that kvm, render, and cvdnetwork are now listed.
Step 3: Launch Cuttlefish
We will launch the device in daemon mode.
conrad@aosp1:~/aosp-16$ source build/envsetup.sh
conrad@aosp1:~/aosp-16$ lunch aosp_cf_x86_64_only_phone-aosp_current-eng
conrad@aosp1:~/aosp-16$ launch_cvd --daemon --noresume
--daemon: This flag runs Cuttlefish as a background process, allowing you to close your SSH terminal without stopping the virtual device.--noresume: Forces Cuttlefish to perform a fresh boot of the virtual device, ignoring any previously saved session state. This ensures a consistent, clean starting environment.
Step 4: Access the Device via Browser
Once Cuttlefish is running, you can access the device interface directly through your browser.
Direct Access (Insecure/Test):
Open https://<VM-External-IP>:8443 in your browser. You may need to accept a self-signed certificate warning.
You should see the Cuttlefish web interface, typically listing available virtual devices like cvd-1.
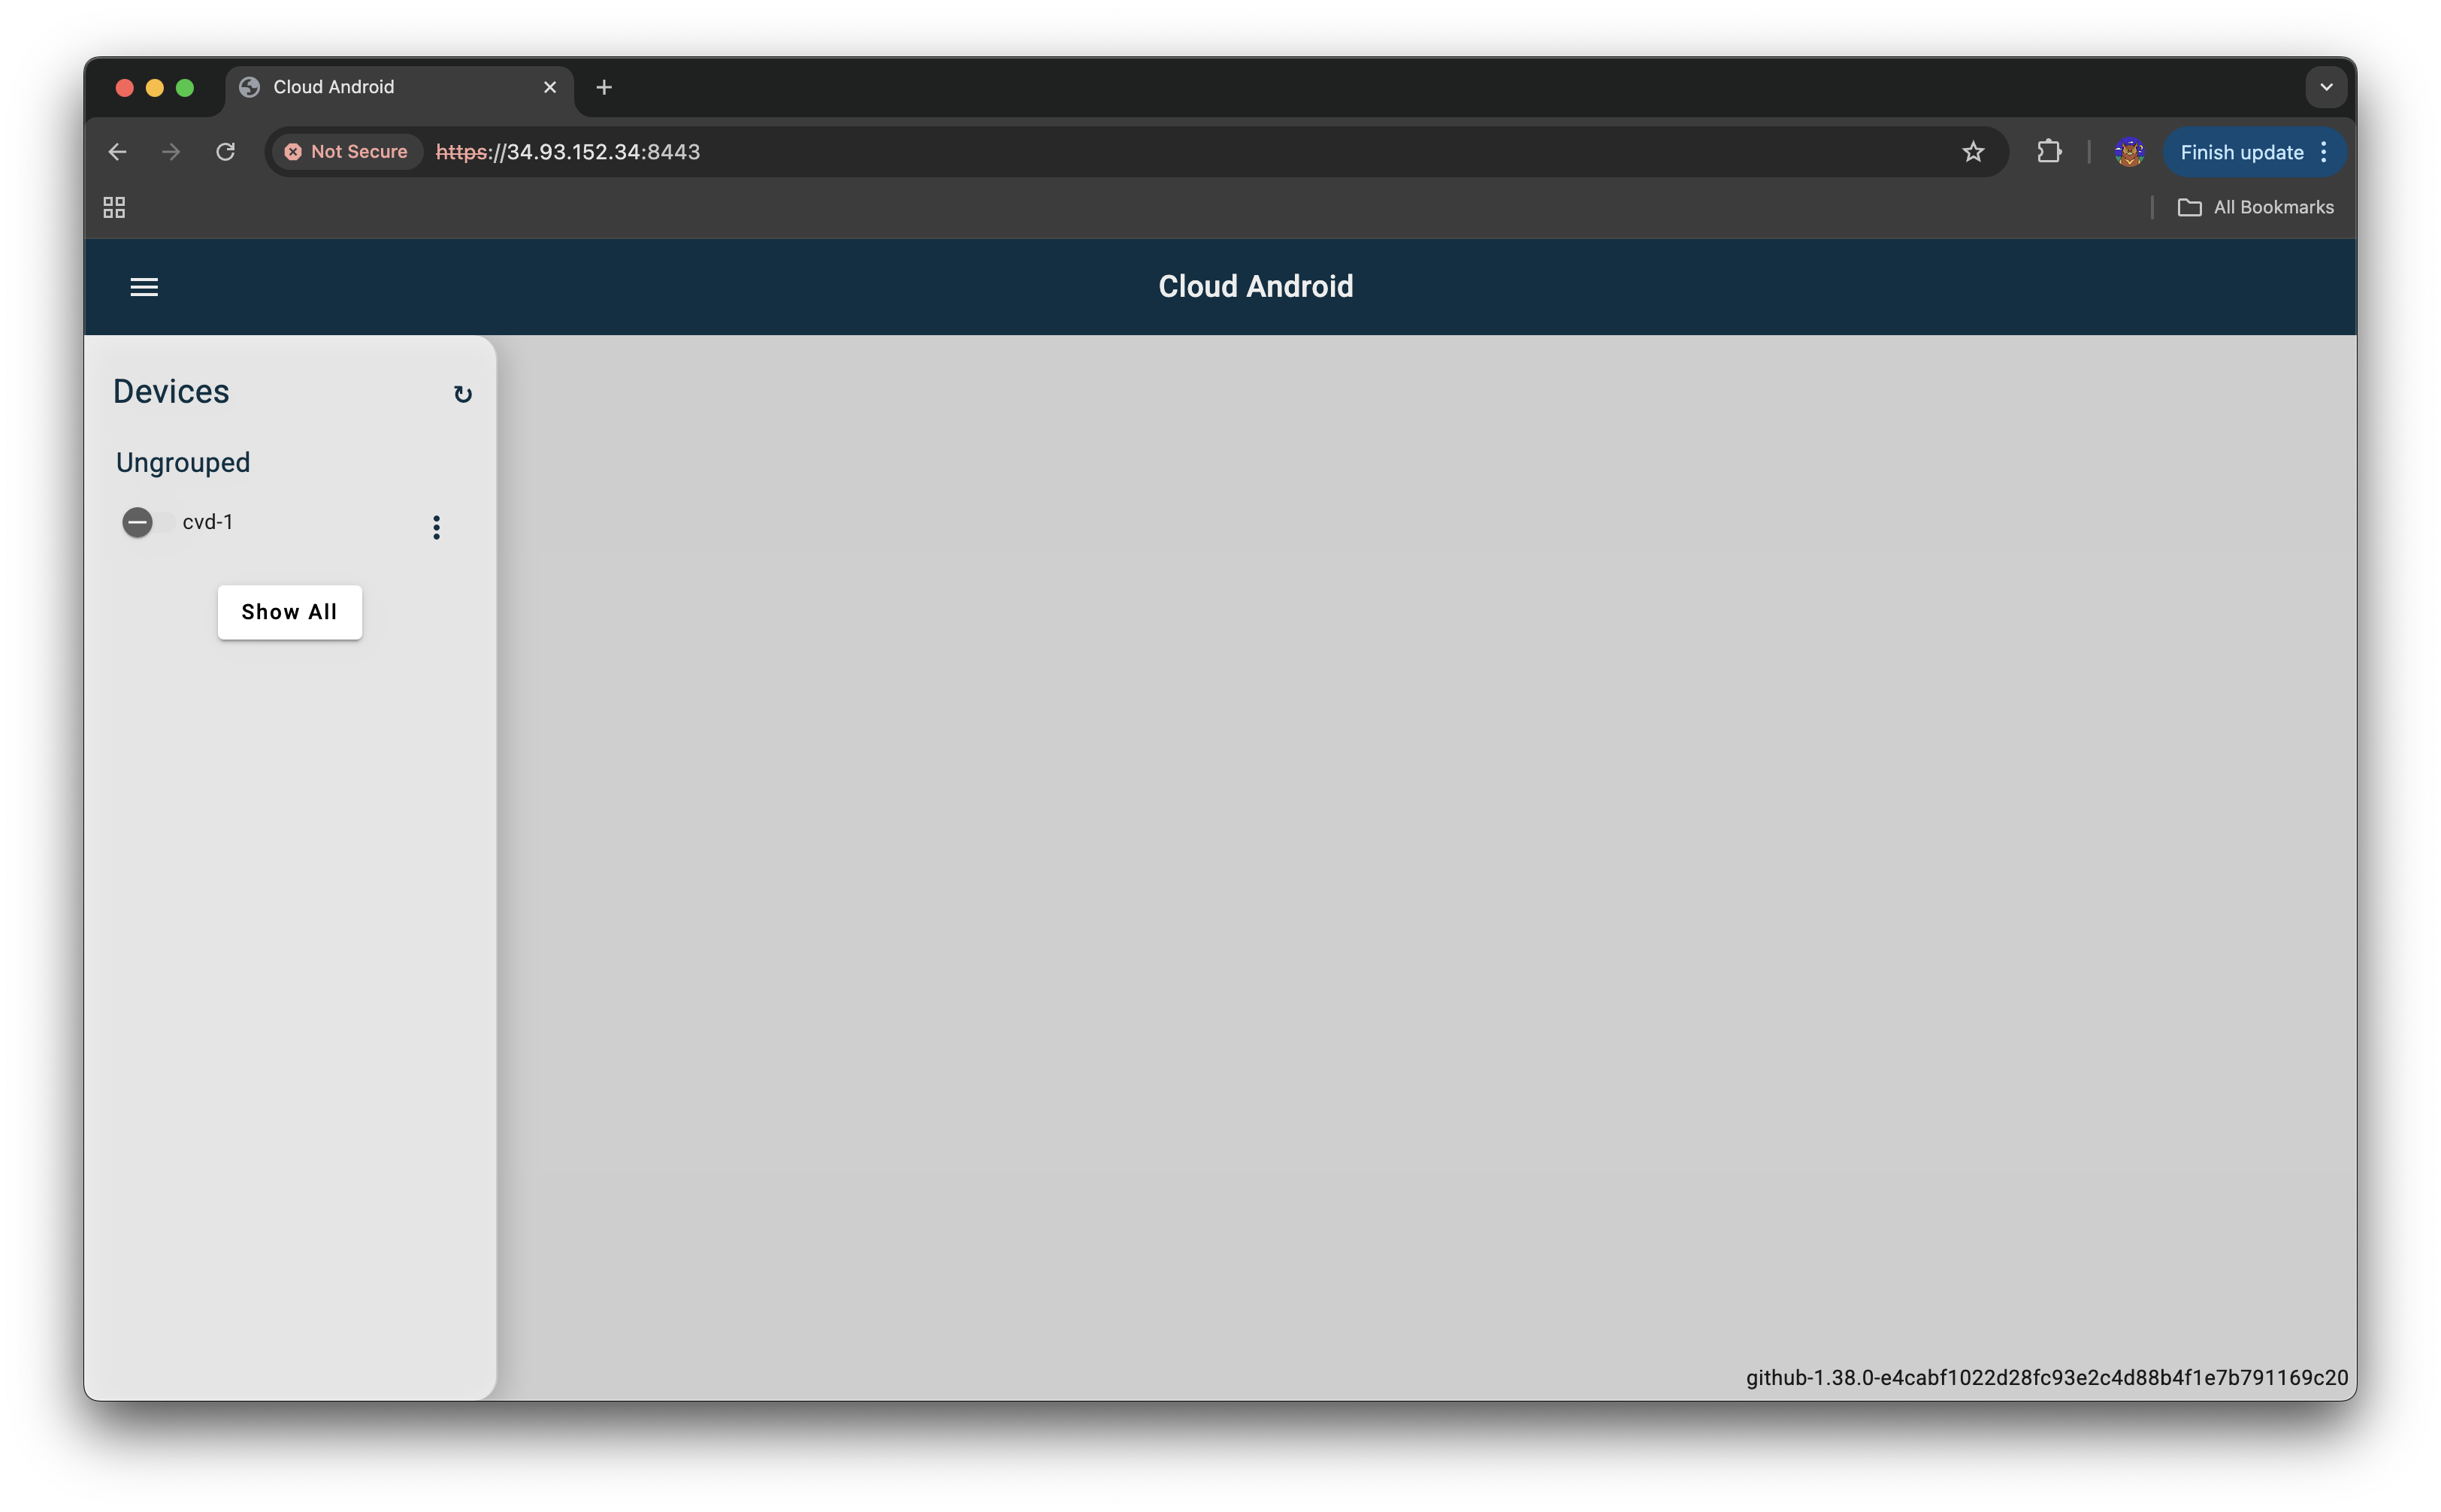
Click on cvd-1 to open the virtual device’s screen.
Once the device boots up, navigate to Settings > About phone to verify its details.
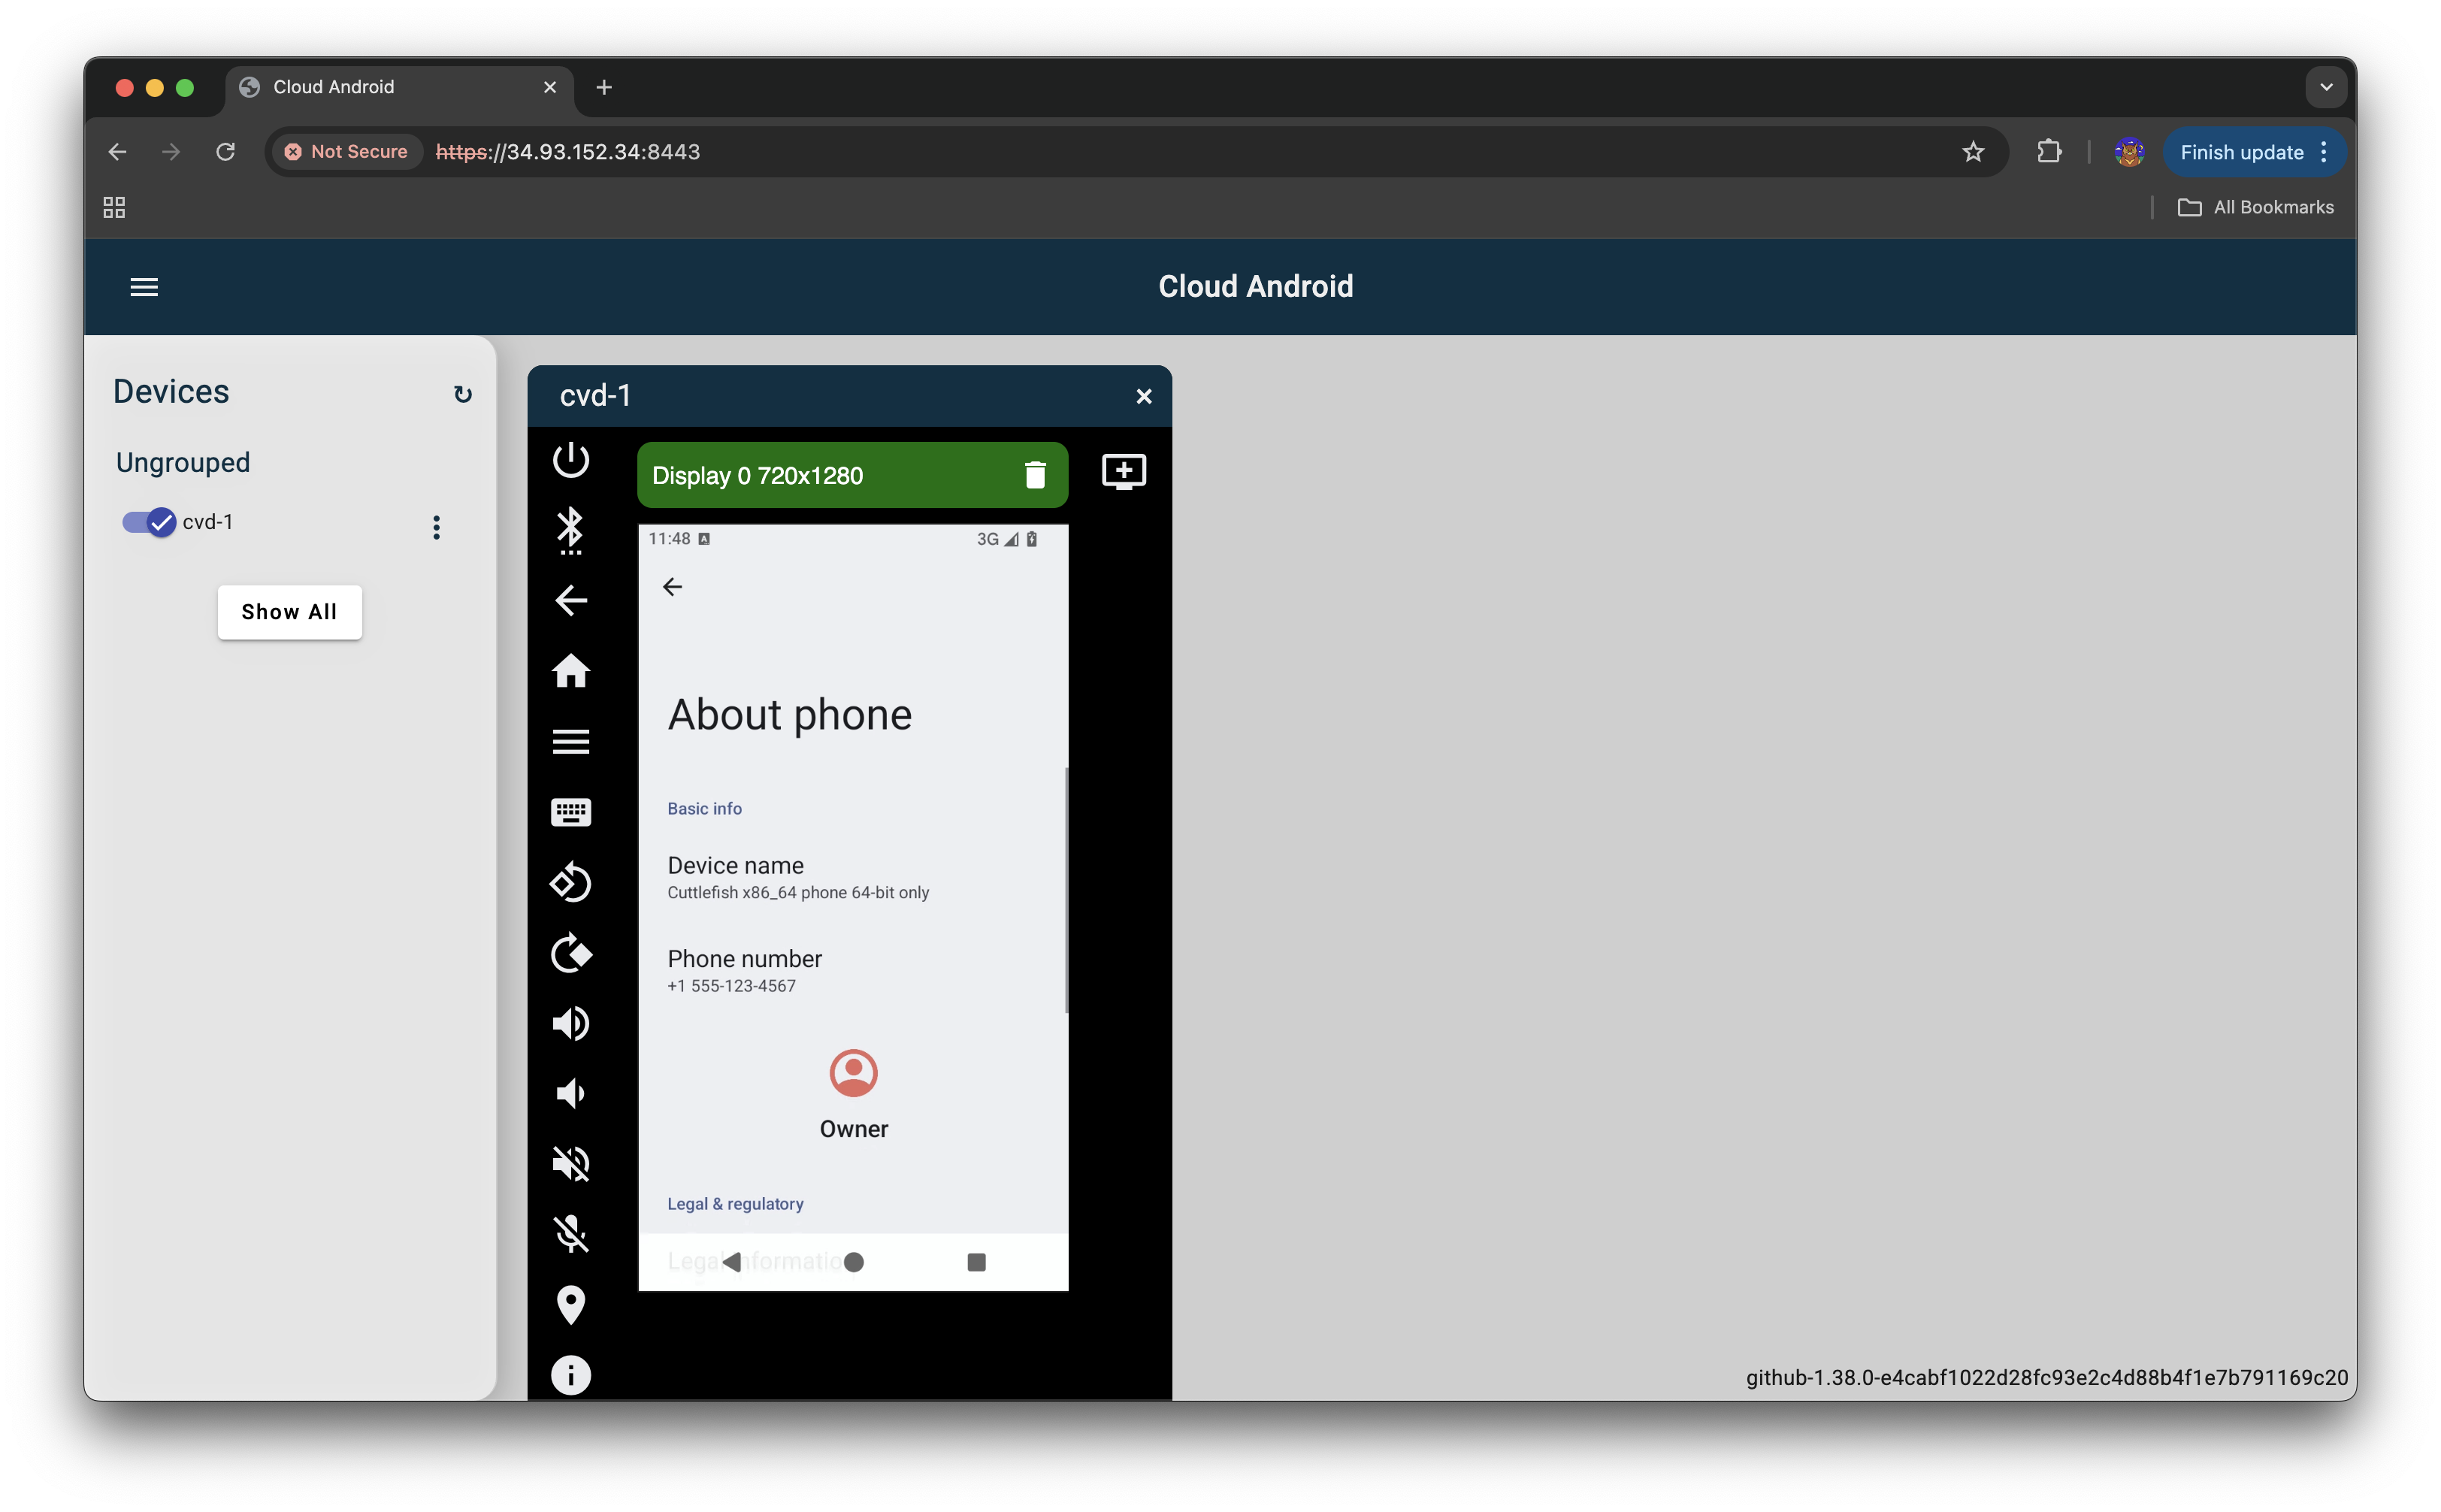
You should see “Device name” as “Cuttlefish x86_64 phone 64-bit only”.
Step 5: Stopping the Device
To gracefully shut down the Cuttlefish virtual device, use the stop_cvd command. This will terminate the Cuttlefish process and release its resources.
conrad@aosp1:~/aosp-16$ stop_cvd
Troubleshooting
- WebRTC Connection Failed: Check if your browser supports WebRTC and if the UDP ports (15550-15558) are truly open in the GCP firewall.
- Permission Denied: Ensure you re-logged in after adding your user to the
kvmandcvdnetworkgroups. - GPU Acceleration Warnings (gfxstream_graphics_detector / guest_swiftshader): If you see messages like “gfxstream_graphics_detector: … Assertion … failed” or “enabling –gpu_mode=guest_swiftshader,” it means hardware-accelerated GPU rendering is not available or detected. Cuttlefish will fall back to software rendering (SwiftShader), which might result in slower graphics performance but should not prevent the device from booting or functioning. This is common in cloud environments without specific GPU passthrough or drivers configured.